


Installing Miro on Ubuntu
Software name : Miro
Homepage : http://www.getmiro.com/
Software version used for this installation : 1.2.8
Operating System used for this installation : Ubuntu 8.04 (Hardy)
Recommended Hardware : 200 MHz processor (CPU) minimum
To install Miro on Ubuntu, you need to know a little about the Synaptic Package Manager. If you already know about the package manager, then skip to the section "Installing Miro".
Synaptic Package Manager
The Synaptic Package Manager (SPM) is used for more than just installing software. It can also upgrade your entire operating system, and manage all software installed on your computer. However most people use SPM for just installing new software. Before you embark on this process, there are a few concepts that you may wish to get familiar with. It's not crucial you understand them thoroughly, so just read the explanations and then let it soak in over time. The ideas behind SPM will become clearer with use.
What is a repository?
SPM can automate the installation of software on your computer because it has a direct connection to one or more online software repositories. These repositories are vast archives of programs that have been pre-configured for installation on your operating system. When your computer is online, SPM can connect to these archives, check what software is available for installation, and present you with a list of installable software. All you have to do is select the software from the list that you want. SPM then downloads the software from the repository and takes care of the installation process.
So SPM is actually a repository manager: it manages which repositories (there are many) you wish to access, and which programs to download and install from those repositories.
SPM allows you to choose which repositories it accesses through its settings. The default repositories used by Ubuntu can be extended through the SPM settings so you can access a wider range of programs. Ubuntu calls each repository by a simple name. They are: Main, Universe, Multiverse, Restricted. By default Ubuntu only uses the Main online repository. If you wish to access you the other repositories, you must do this by changing repository settings of SPM.
What is a package?
When SPM downloads a programs for installation, it is in the form known as a 'package'. This means that it is a compressed archive of the program, pre-configured so that it can install nicely on your computer. If the package has been configured nicely (and the Ubuntu project team spends a lot of time making sure this is the case), then many of the headaches that installing software can bring are taken away — it's the aspirin of software installation. One of the biggest issues with installing software on any form of Linux (Ubuntu is one of many types of Linux), is dependencies. Dependencies are all the other packages required by a particular package. If, for example, I want to install an audio editor, that audio editor software may use some functionality of other programs to do its job.
SPM takes the (often) dark art of dependencies away from you, and manages this itself. So if you wish to install a program and it has dependencies (and the list can be long), you don't have to work this out yourself. SPM knows already what is needed, finds it, and installs it along with the software you have chosen.
So, SPM, as well as managing which repositories you access, is also a package management software. Hence the name: Synaptic Package Manager.
apt
You don't really need to know about 'apt', so if you are on the verge of being confused then don't read this short section. If you are a geek wannabe, then read on.
Ubuntu is a form of Linux that has derived from another form of Linux called Debian. This family of Linux has in common (amongst other things) the package/repository management system. Both Ubuntu and Debian use the apt system for managing packages. APT is an acronym for Advanced Package Tool.
SPM is actually a 'front end' (graphical interface) for controlling 'apt'. So SPM is the nice user interface that you see, but the real work is done by 'apt'. There are other ways of managing 'apt', such as the command line interface known as apt-get. In the world of Linux, there are many varieties of Linux users and they have their own ways of doing things. In general it's safe to say most Debian users use apt-get, and most Ubuntu users are happier using SPM.
Configuring Synaptic Package Manager
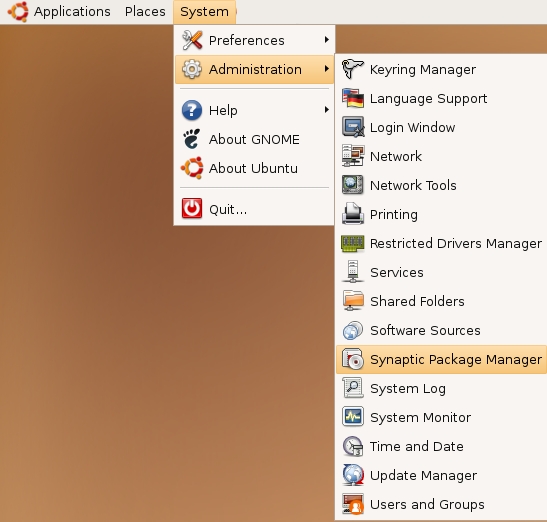
To install most software on Ubuntu, you need to change the default repository settings of SPM, because many programs are not contained in the default repository. To do this, you need to open the Synaptic Package Manager, which you can do via the System menu. If you haven't changed the default Desktop of Ubuntu, then the System menu can be accessed at the top left of your screen:
If all is good, you are prompted for a password.
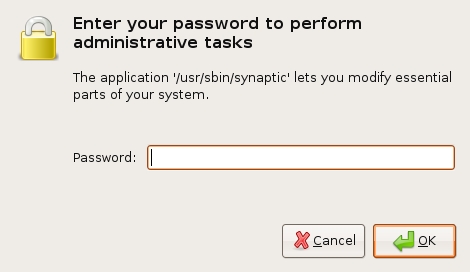
Here you must enter your password (the same one you use to log into the system). If you don't know the password, then you have a problem and it's probably caused by the fact that the computer you are using is not yours. In this case you have to find the computer's owners and ask them for the password (which is usually not polite unless you know them well) or ask them to input the password while you look casually in the other direction.
Assuming the password entered is correct, you now see the SPM open in front of you. It may be that you first see the following 'Quick Introduction' (which appears if you haven't used SPM before).
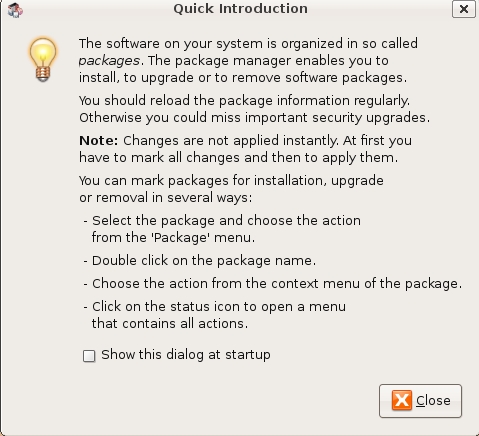
Just click Close and move on.
Let's look at the Synaptic Package Manager interface.
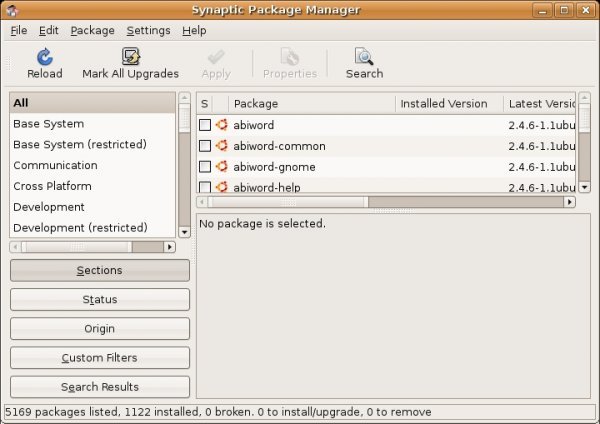
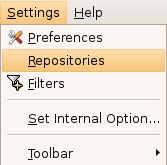
Let's not worry about the details of the interface for now. All we want to do is change the repository settings. To do this, on the Settings menu, click Repositories.
Now we get to where we can do some business. Make sure that all the options are selected:

Now close that window by clicking the big Close button at the bottom right.
![]()
Next, you see a warning telling you the repository has changed:

Click the Close button.
Back in the SPM interface, you need to refresh the repositories as the warning suggests. To do this, click Reload:
![]()
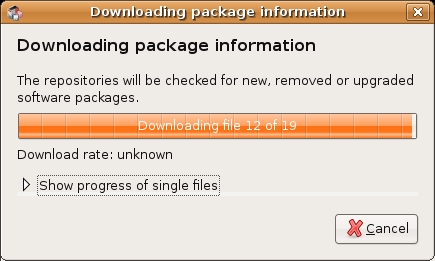
You then see a status window saying the repositories are being updated and showing the progress.
Installing Miro
Now we need to install Miro using the package manager.
- In the Synaptic Package Manager, click 'Search'.

- A search window appears:

- Type 'Miro' into the Search field :

- When you click 'Search', a number of results may eventually be displayed:

- Click 'miro' and choose 'Mark for Installation':

- A window asks you to confirm the extra packages (dependencies) that need to be installed:

- Click 'Mark'. The window disappears, and you see the icons in the Synaptic Package Manager change to show that Miro has been selected for installation :

- Click 'Apply' in the main window. A summary window appears:

- Click 'Apply' again and the installation process begins. The following three windows appear (one after the other) :


- Close this window to complete the installation process. You can also close the Synaptic Package Manager.
Starting Miro
Miro is added automagically to the Applications menu. Select its shortcut to start Miro.

If you don't see a shortcut for Miro in the Applications menu, then try restarting your computer.