After the Program
Submitting Code Samples
Students will be asked to upload a code sample to Melange after the final evaluation. As an Organization Administrator, you may be how to do this, or what code to submit. Please refer them to the Student section of this manual for more information.
Shipping and Payment Questions
As the program winds down, you may be contacted by Students with payment or shipping questions/issues. Please refer the Students to the Program Administrator for help.
After Student Acceptance
Once Students have been accepted and have an assigned Mentor, the Organization Administrator gets to relax a bit. During the Community Bonding Phase between Student proposal acceptance and the start of Student work, Organization Administrators may need to assist with Students withdrawing from the program and being replaced by other Students, or accepting new Mentors. During Student work the Organization Administrators may be asked to nag a Mentor or a Student to respond, but generally you are in a lull period until the Midterm Evaluation Period.
Below are some instructions for things you may need or want to do during this time.
How do I Accept a Student after the Deadline?
Contact a Program Administrator. This should occur only in very exceptional circumstances and only if a previously accepted Student drops out of the program through no fault of your organization's and a replacement student is desired before the coding period begins.
Can I send a Bulk email / "form letter" from Melange
No. Melange sends email to people requesting to be a Mentor or Organization Administrator for your organization, and Accepted and Rejected Students, but does not offer generic bulk email capabilities.
Attribution
Cat Allman
Mario Ferraro
Daniel Hans
Nathaniel Manista
Sverre Rabbelier
Mary Radomile
Ashleigh Rentz
Carol Smith
Stephanie Taylor
.. and.. the awesome Adam Hyde!
Welcome to Melange
Modifications:
carols - Carol Smith
2013,
2014
booki - adam or aco
2013
ashleighr - Ashleigh Rentz
2014
sttaylor - Stephanie Taylor
2014,
2013
catallman - Cat Allman
2013
fadinlight - Mario Ferraro
2013
srabbelier - Sverre Rabbelier
2013
maryr - Mary Radomile
2014,
2013
nathaniel - Nathaniel Manista
2013
Using the Google Summer of Code Website
Modifications:
carols - Carol Smith
2013,
2014
booki - adam or aco
2013
ashleighr - Ashleigh Rentz
2014
sttaylor - Stephanie Taylor
2013,
2014
dhans - Daniel Hans
2013
catallman - Cat Allman
2014,
2013
fadinlight - Mario Ferraro
2013
maryr - Mary Radomile
2013,
2014
nathaniel - Nathaniel Manista
2013
Data Privacy
Modifications:
carols - Carol Smith
2014,
2013
booki - adam or aco
2013
sttaylor - Stephanie Taylor
2013,
2014
dhans - Daniel Hans
2013
fadinlight - Mario Ferraro
2013
maryr - Mary Radomile
2014,
2013
nathaniel - Nathaniel Manista
2013
General Information and Questions
Modifications:
carols - Carol Smith
2013,
2014
booki - adam or aco
2013
sttaylor - Stephanie Taylor
2013,
2014
dhans - Daniel Hans
2013
fadinlight - Mario Ferraro
2013
maryr - Mary Radomile
2014,
2013
nathaniel - Nathaniel Manista
2013
Creating and Editing Profiles
Modifications:
carols - Carol Smith
2014,
2013
booki - adam or aco
2013
ashleighr - Ashleigh Rentz
2014
sttaylor - Stephanie Taylor
2013,
2014
dhans - Daniel Hans
2013
fadinlight - Mario Ferraro
2013
maryr - Mary Radomile
2013,
2014
nathaniel - Nathaniel Manista
2013
What is a Student?
Modifications:
maryr - Mary Radomile
2014
catallman - Cat Allman
2014
sttaylor - Stephanie Taylor
2014
Student Proposal Period
Modifications:
carols - Carol Smith
2013
booki - adam or aco
2013
ashleighr - Ashleigh Rentz
2014
sttaylor - Stephanie Taylor
2013,
2014
catallman - Cat Allman
2013,
2014
fadinlight - Mario Ferraro
2013
maryr - Mary Radomile
2013,
2014
nathaniel - Nathaniel Manista
2013
Evaluations
Modifications:
carols - Carol Smith
2013
booki - adam or aco
2013
sttaylor - Stephanie Taylor
2013,
2014
catallman - Cat Allman
2013,
2014
fadinlight - Mario Ferraro
2013
maryr - Mary Radomile
2014,
2013
nathaniel - Nathaniel Manista
2013
After the Program
Modifications:
carols - Carol Smith
2013
booki - adam or aco
2013
sttaylor - Stephanie Taylor
2013,
2014
catallman - Cat Allman
2013,
2014
fadinlight - Mario Ferraro
2013
maryr - Mary Radomile
2013,
2014
nathaniel - Nathaniel Manista
2013
What is a Mentor?
Modifications:
maryr - Mary Radomile
2014
sttaylor - Stephanie Taylor
2014
Before The Program
Modifications:
carols - Carol Smith
2013
booki - adam or aco
2013
ashleighr - Ashleigh Rentz
2014
sttaylor - Stephanie Taylor
2014,
2013
dhans - Daniel Hans
2013
catallman - Cat Allman
2013
fadinlight - Mario Ferraro
2013
maryr - Mary Radomile
2014,
2013
nathaniel - Nathaniel Manista
2013
Student Proposal Period
Modifications:
carols - Carol Smith
2013
sttaylor - Stephanie Taylor
2013,
2014
dhans - Daniel Hans
2013
catallman - Cat Allman
2013
fadinlight - Mario Ferraro
2013
maryr - Mary Radomile
2013,
2014
nathaniel - Nathaniel Manista
2013
Work Period & Evaluations
Modifications:
carols - Carol Smith
2013
booki - adam or aco
2013
ashleighr - Ashleigh Rentz
2014
sttaylor - Stephanie Taylor
2013,
2014
fadinlight - Mario Ferraro
2013
maryr - Mary Radomile
2013,
2014
nathaniel - Nathaniel Manista
2013
After The Program
Modifications:
carols - Carol Smith
2013
booki - adam or aco
2013
sttaylor - Stephanie Taylor
2014,
2013
dhans - Daniel Hans
2013
fadinlight - Mario Ferraro
2013
maryr - Mary Radomile
2014,
2013
nathaniel - Nathaniel Manista
2013
What is an Organization Administrator?
Modifications:
sttaylor - Stephanie Taylor
2014
maryr - Mary Radomile
2014
Before Your Organization Applies
Modifications:
carols - Carol Smith
2013
booki - adam or aco
2013
sttaylor - Stephanie Taylor
2014,
2013
catallman - Cat Allman
2013
fadinlight - Mario Ferraro
2013
srabbelier - Sverre Rabbelier
2013
maryr - Mary Radomile
2014,
2013
nathaniel - Nathaniel Manista
2013
Organization Application Period
Modifications:
carols - Carol Smith
2013,
2014
booki - adam or aco
2013
ashleighr - Ashleigh Rentz
2014
sttaylor - Stephanie Taylor
2013,
2014
dhans - Daniel Hans
2013
catallman - Cat Allman
2013
fadinlight - Mario Ferraro
2013
srabbelier - Sverre Rabbelier
2013
maryr - Mary Radomile
2014,
2013
nathaniel - Nathaniel Manista
2013
Student Proposal Period
Modifications:
carols - Carol Smith
2013,
2014
booki - adam or aco
2013
ashleighr - Ashleigh Rentz
2014
sttaylor - Stephanie Taylor
2014,
2013
catallman - Cat Allman
2013
fadinlight - Mario Ferraro
2013
srabbelier - Sverre Rabbelier
2013
maryr - Mary Radomile
2014,
2013
nathaniel - Nathaniel Manista
2013
After Student Acceptance
Modifications:
carols - Carol Smith
2013,
2014
booki - adam or aco
2013
ashleighr - Ashleigh Rentz
2014
sttaylor - Stephanie Taylor
2014
catallman - Cat Allman
2013
fadinlight - Mario Ferraro
2013
srabbelier - Sverre Rabbelier
2013
maryr - Mary Radomile
2013,
2014
nathaniel - Nathaniel Manista
2013
Evaluations
Modifications:
carols - Carol Smith
2013,
2014
booki - adam or aco
2013
ashleighr - Ashleigh Rentz
2014
sttaylor - Stephanie Taylor
2014,
2013
catallman - Cat Allman
2013
fadinlight - Mario Ferraro
2013
srabbelier - Sverre Rabbelier
2013
maryr - Mary Radomile
2013,
2014
What is a Program Administrator?
Modifications:
carols - Carol Smith
2014,
2013
booki - adam or aco
2013
sttaylor - Stephanie Taylor
2013,
2014
dhans - Daniel Hans
2013
catallman - Cat Allman
2013
fadinlight - Mario Ferraro
2013
maryr - Mary Radomile
2014,
2013
nathaniel - Nathaniel Manista
2013
Setting Up a New Program
Modifications:
carols - Carol Smith
2013,
2014
booki - adam or aco
2013
sttaylor - Stephanie Taylor
2014,
2013
dhans - Daniel Hans
2013
madhusudancs - Madhusudan C.S.
2013
catallman - Cat Allman
2014,
2013
fadinlight - Mario Ferraro
2013
maryr - Mary Radomile
2013,
2014
nathaniel - Nathaniel Manista
2013
Organization Application and Acceptance Period
Modifications:
carols - Carol Smith
2013,
2014
booki - adam or aco
2013
sttaylor - Stephanie Taylor
2014,
2013
dhans - Daniel Hans
2013
catallman - Cat Allman
2013
fadinlight - Mario Ferraro
2013
maryr - Mary Radomile
2013,
2014
nathaniel - Nathaniel Manista
2013
Student Proposals and Acceptance Period
Modifications:
carols - Carol Smith
2014,
2013
booki - adam or aco
2013
sttaylor - Stephanie Taylor
2013,
2014
catallman - Cat Allman
2013
fadinlight - Mario Ferraro
2013
maryr - Mary Radomile
2014,
2013
nathaniel - Nathaniel Manista
2013
Student Work Period and Evaluations
Modifications:
carols - Carol Smith
2014,
2013
booki - adam or aco
2013
sttaylor - Stephanie Taylor
2013,
2014
madhusudancs - Madhusudan C.S.
2013
catallman - Cat Allman
2014,
2013
fadinlight - Mario Ferraro
2013
maryr - Mary Radomile
2013,
2014
nathaniel - Nathaniel Manista
2013
Program Wrap-up Questions and Issues
Modifications:
carols - Carol Smith
2013,
2014
booki - adam or aco
2013
sttaylor - Stephanie Taylor
2013,
2014
dhans - Daniel Hans
2013
fadinlight - Mario Ferraro
2013
maryr - Mary Radomile
2014,
2013
Lists How To
Modifications:
booki - adam or aco
2013
sttaylor - Stephanie Taylor
2014,
2013
catallman - Cat Allman
2014
fadinlight - Mario Ferraro
2013
maryr - Mary Radomile
2014
nathaniel - Nathaniel Manista
2013
Troubleshooting
Modifications:
carols - Carol Smith
2013
booki - adam or aco
2013
sttaylor - Stephanie Taylor
2013,
2014
catallman - Cat Allman
2014,
2013
fadinlight - Mario Ferraro
2013
maryr - Mary Radomile
2014,
2013
nathaniel - Nathaniel Manista
2013
Glossary
Modifications:
carols - Carol Smith
2013,
2014
booki - adam or aco
2013
sttaylor - Stephanie Taylor
2013,
2014
catallman - Cat Allman
2013,
2014
fadinlight - Mario Ferraro
2013
maryr - Mary Radomile
2013,
2014
nathaniel - Nathaniel Manista
2013
Attribution
Modifications:
booki - adam or aco
2013
catallman - Cat Allman
2014
maryr - Mary Radomile
2014
fadinlight - Mario Ferraro
2013
Before The Program
If you have been contributing to an organization that has been accepted into Google Summer of Code, you might discover that you want to mentor a Student in the program. Here's some information about participating as a Mentor.
Mentor registration
The first (and required) step in becoming a Mentor is to have a discussion with the Organization Administrator of the organizations for which you are interested in mentoring. Once you have both agreed that you are qualified, you then must create create a profile in Melange and apply. Please remember that you need to have a Google account in order to register and create a profile with the program. If you don't have a Google account, you will need to sign up for one at http://accounts.google.com/signup.
To create a profile, press on the "organizations apply now!" button on the homepage. Once you have logged in with your Google account, you will be taken to a page to create your profile.
You will need to fill in your name, email address, home address, and other optional information. You will be asked if your shipping address is different from your home address. If so, please check the box and additional fields will appear to add an additional address.
Note that it is possible to sign up as a Mentor from the time the Organizations are accepted into a particular program until the end of the coding period for students.
Important points:
Make sure that your Public Name is professional and consistent with the name or handle you use within your project. For example, if your name is Bill Chow and you go by "bchow" on your project mailing list, you might choose "Bill_Chow" or "bchow" as your "Public Name". Please do not choose a Public Name that is potentially offensive, such as "jacktheripper".
For "Public Email", please enter an email address to be used by Organization Administrators or students seeking additional information. Please use the email address associated with the Google Account information you provided during the application process but it is not required. This email will be used as the primary mode of contact by Google throughout the program, e.g. the email address which we will use to subscribe you to the Google Summer of Code Mentors/Organization Administrators-only mailing list or the email to contact you if there is a shipping issue.
For IM Handle and Home Page and Blog URL, please note that these are not required text fields. Leave these fields blank if you do not use these systems or if you prefer not to share that information.
You'll need to press Submit at the bottom of the page. You will remain able to edit your profile after submission. After you hit submit, you will not see a confirmation of completion. Instead, you'll be taken directly to the Edit Profile tab.

Once you have created a profile in Melange you can apply to be a Mentor for the particular organization (or organizations) with which you would like to work. To apply to be a Mentor for each organization, click on the orange "Start connection" button on the homepage.
You will then be taken to the list of organizations available to mentor for. Choose the organization you wish and you will be taken to a form in which you can include a message to your Organization Administrator about why you would like to participate in the program. Then press the Submit button.
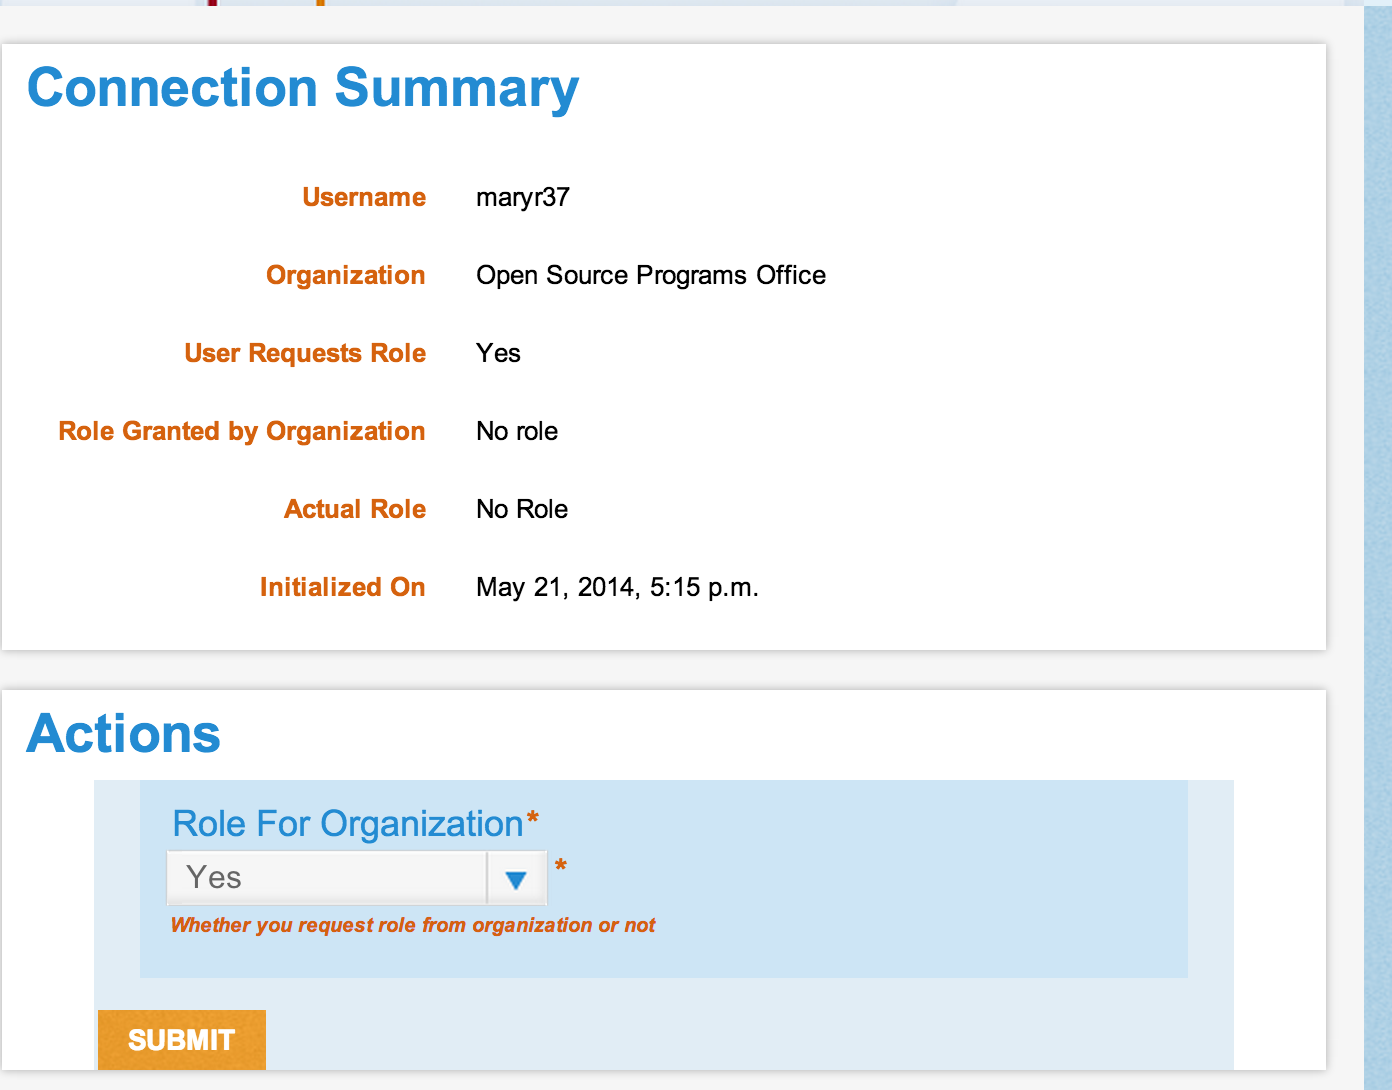
You will then see a Connections Summary page. This page lists all of the connection history between you and the organization. Under the "Action" box, click on the Yes button and hit Submit.
How do I know if I have been accepted as a Mentor?
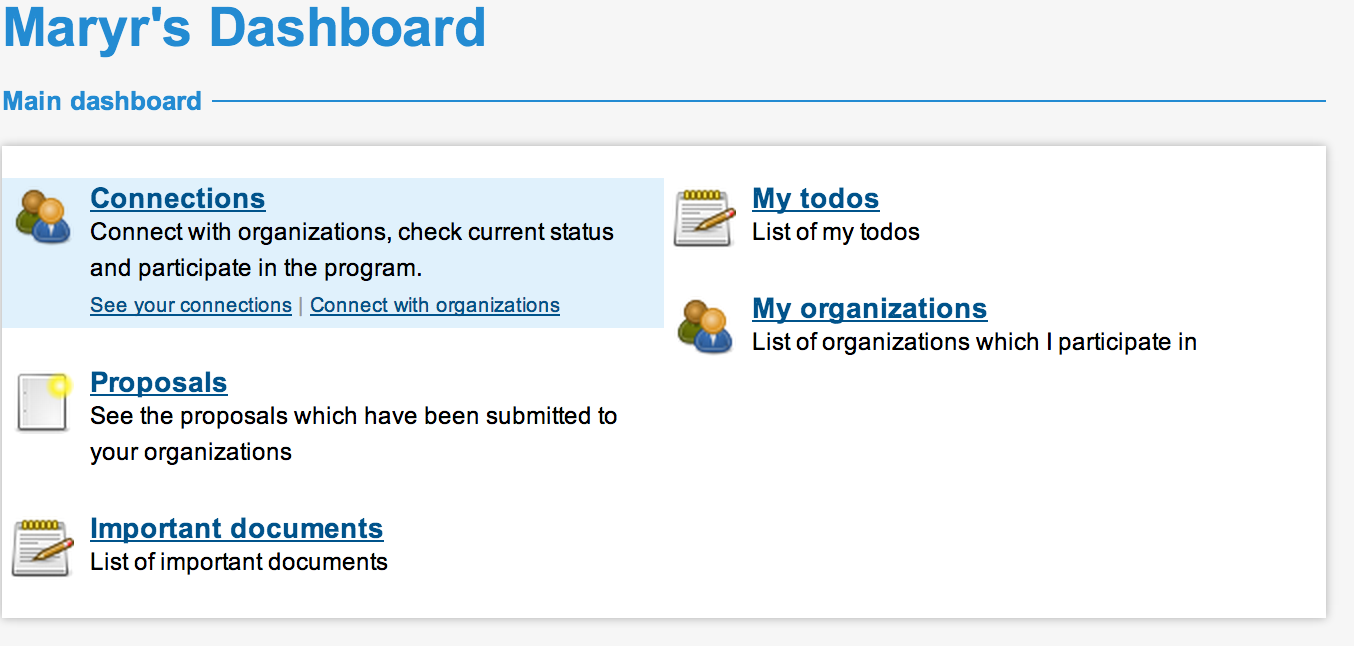
Click on My Dashboard --> Connections --> See your connections. Your "Connections Summary" page will change to reflect your status as a mentor (see "Role Granted by Organization").
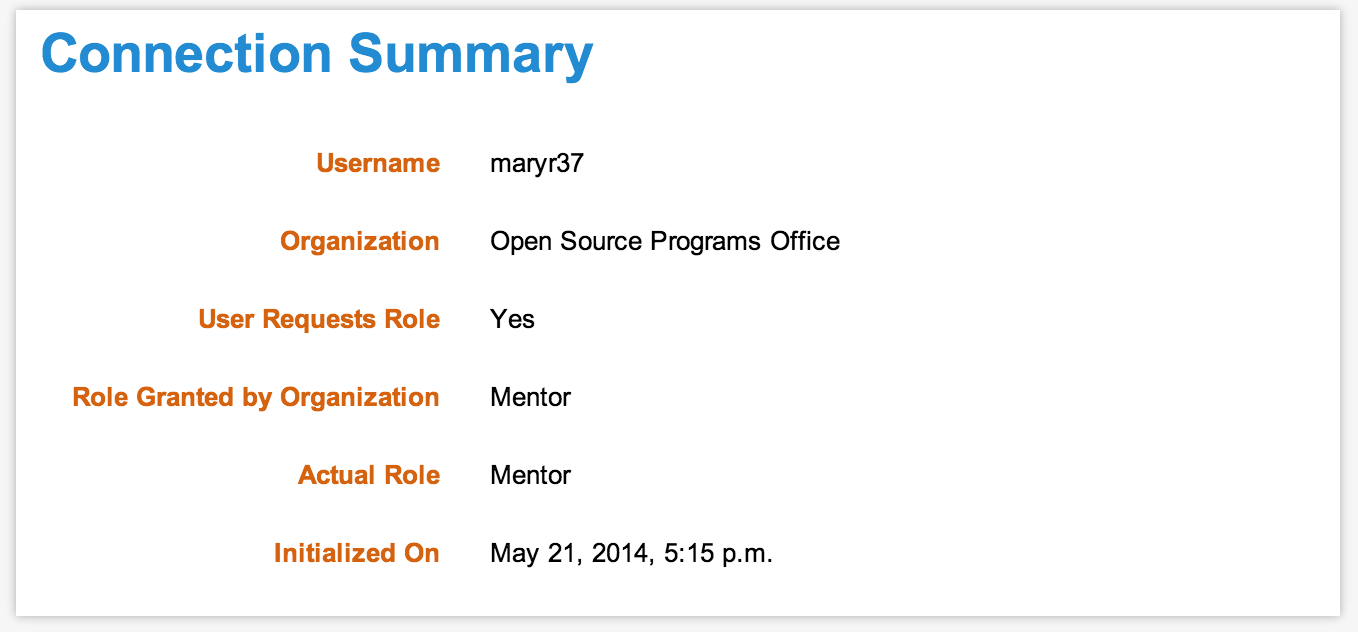
You may also notice that more options show up in your dashboard including "Proposals", "Important Documents", "My ToDo's" and "My Organizations".
 Registering as a Mentor throughout the Program
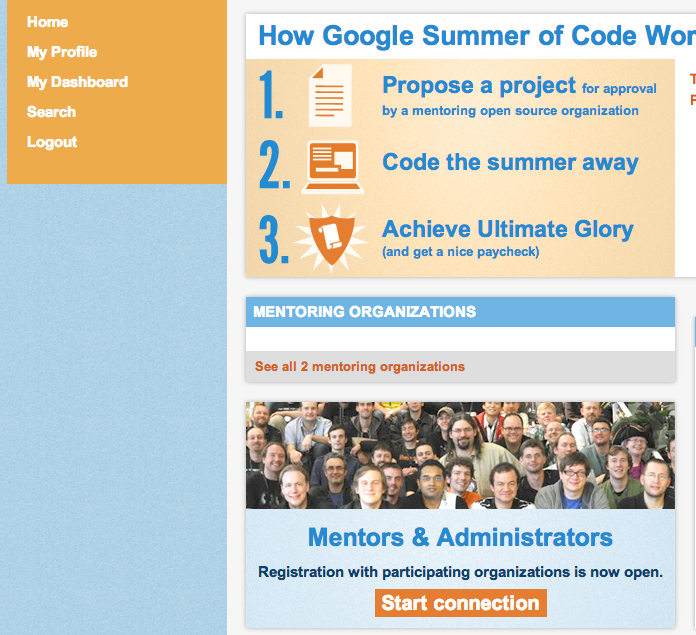
It is possible to register as a Mentor and follow the steps above at any point once the Organization has been accepted all the way until the final evaluations are submitted. The screen will look a bit different if you try to register as a Mentor after the Students have been accepted. See the screenshot below for what to expect. You can then follow all of the same instructions outlined above to register as a Mentor.
Before Your Organization Applies
As an Organization Administrator, you are the overlord of your organization's projects. You are the first and final point of contact for your organization throughout the program. The Program Administrators depend on you to herd the cats (Mentors) in your organization to ensure that they meet their obligations to their Students, your Mentoring Organization and Google Summer of Code.
How do I create a profile in Melange?
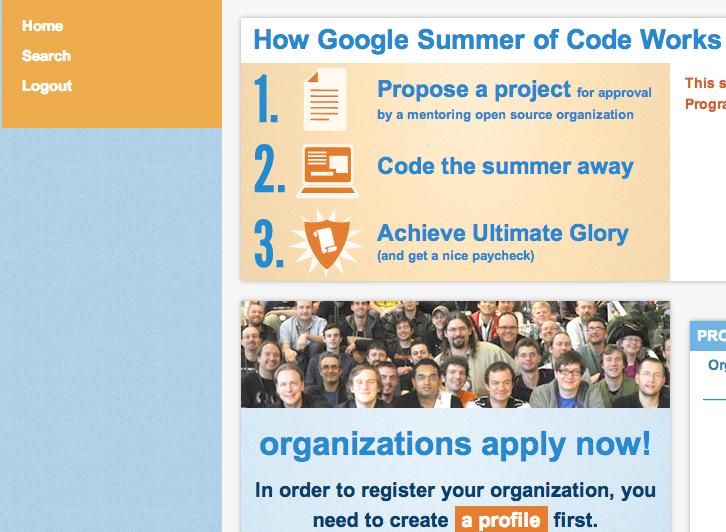
The first step to participating as an Organization Administrator is to create a profile in Melange. Please remember that you need to have a Google account to create a profile with the program. If you don't have a Google account, you will need to sign up for one via accounts.google.com/signup. Once you have a Google account, the first step to creating a profile is to press Login on the left hand navigation bar from the homepage. Once you have logged in with the Google account you wish to use, create your organization profile by clicking on the a profile link in the middle of the homepage.
Notes:
- If you have a profile in Melange from one of the previous programs, the top part of the page indicates what user you are logged in as. If this is not correct and you want to use a different account, click on the logout link at the very top of the page to sign out and sign in with a different account. Please note, your username is set in stone site-wide and you cannot change it.
- Please review the Mentoring Organization/Mentor Participant Agreement and, if you agree to the terms therein, click the "I Agree to the Admin Agreement" check box. You will notice that this agreement incorporates our Program FAQs and Terms of Service by reference. Make sure you have reviewed these documents prior to agreeing.
- Information entered in the Contact Information, Residential Address and Other Information parts are visible only to Program Administrators.
- Submit the form to create an Organization Administrator profile.
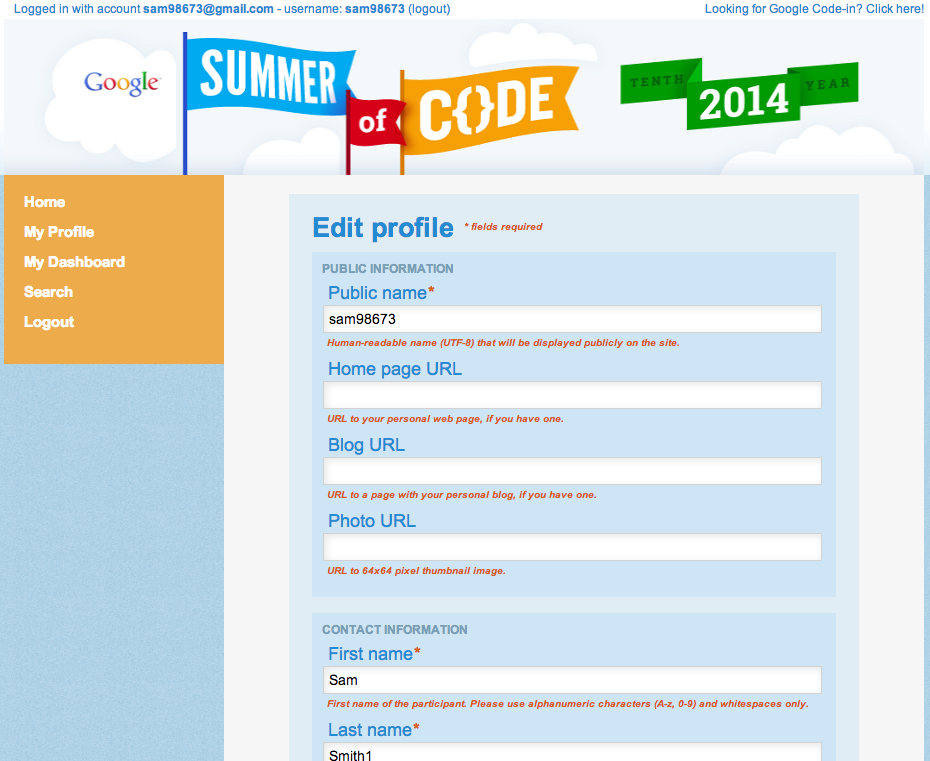
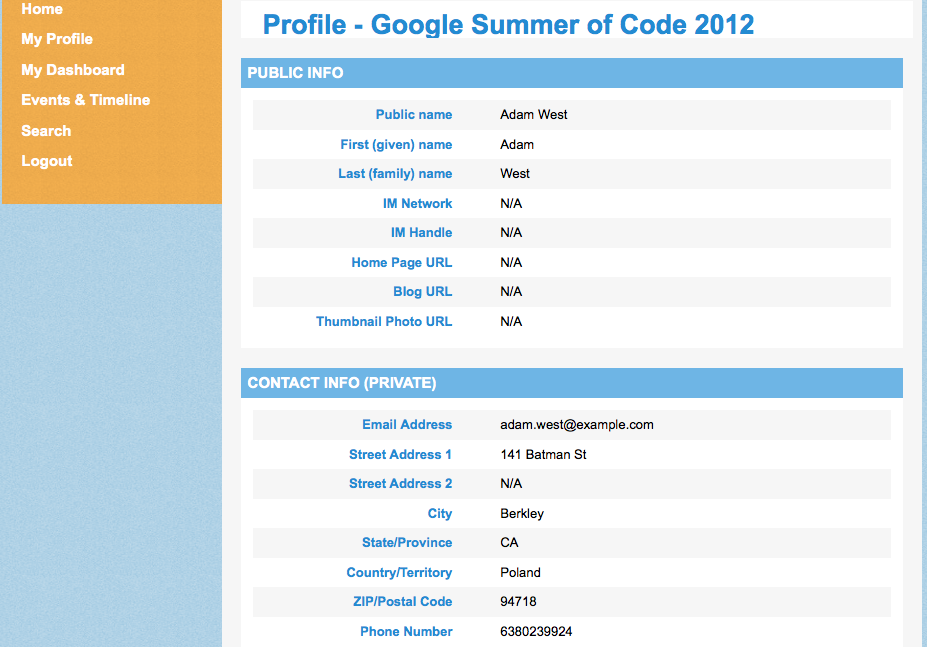
Click on the My Profile tab on your dashboard to view your information and you can edit any information (shipping address, phone number, etc.) throughout the program period by then clicking on the Edit Profile tab.
Where do I change what notifications I get?
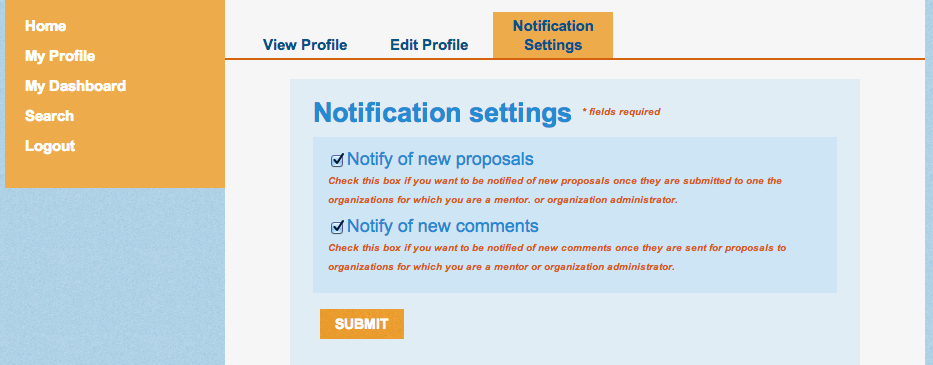
You can change your notification settings by checking or unchecking the appropriate boxes on the Notification Settings tab. You will see help text below each of the notifications describing more about how they function.
Once you have logged in and created a profile, click on your Home tab in the dashboard and Melange shows you a new section of the homepage (see bottom middle of the page) under "organizations apply" and click on Begin registration.
Creating and Editing
Profiles are created on the Register as Student, Register as a Mentor, or Register as an Org Admin pages (depending on your role). If you have not registered on the website for any previous programs, you also have to create a username which will be a part of various URLs throughout the website. This username will be publicly exposed to other users, so it should not contain any sensitive personal information.
In order to create a Student profile, a user should click the Register as a Student link on the homepage during the application period. Mentors register by going to an Organization page and clicking the Register as a mentor link. Organization Administrator profiles are created as part of the organization application process (and existing Organization Administrators can name new Organization Administrators at any point after an organization's acceptance into the program).
The actual form to create the profile contains the following sections:
- Public Info
This section contains public information which may be shown to other users. - Contact Info (private)
This section contains various contact information by which Program Administrators may get in touch with the participant. Apart from address information, it also has fields like email and telephone number. The email address is particularly important. This is the email address to which all system generated notifications will be sent. You may choose for this email address to be the same as the email address associated with your Google Account or you may choose a completely different email address. The Contact Info section is private and visible to Program Administrators only.
- Address (private)
This section contains address information to which all potential physical items will be sent. The Shipping Info section is also private and visible to Program Administrators only. - Notifications (private)
Preferences on what type of notifications should be sent to the user via email.
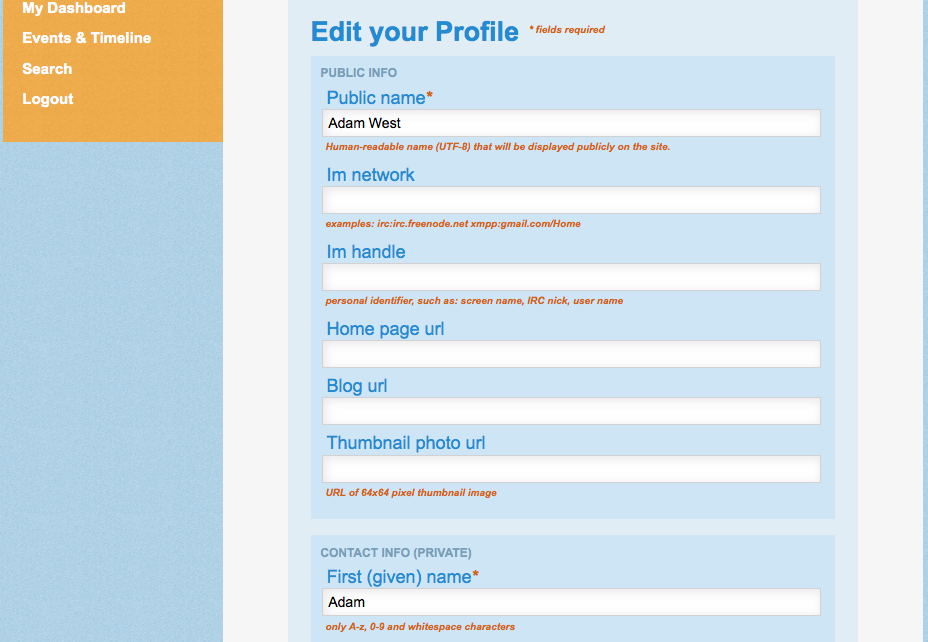
You'll notice a box to click if you'd like a different shipping address than a home address. When clicked, another area for you to enter your address will appear.
There is also a section dedicated to Student-specific information (such as university affiliation) which only has to be filled in by Students. Press the Submit button at the bottom when you have completed the fields.
Profiles may be edited during the program. It is particularly important to update your shipping address should it change during the course of the program, as t-shirts, certificates and all other items will be sent to that address.
After the program is completed, profiles become frozen and cannot be modified anymore. If a user participates in the program, she should make sure that the shipping address is accurate before the program ends, as all potential packages associated with the program will be sent to this location.
Users can still access their data in read-only form after the program and until the legal requirements necessitate the information be deleted or the user specifies the data be deleted.
Data Privacy
Melange's datastore goes back to the website's first use in 2009. Earlier information about the Google Summer of Code program is not available in Melange. Older records may be available at http://google-opensource.blogspot.com if they were posted in a blog post. If not, you can try contacting the Program Administrators at ospoteam@gmail.com, but please be aware that you will most likely not be able to access this information.
Who can see what information about me?
The Program Administrators (Google Open Source Programs employees) can always see your profile, your proposal (if applicable), and your forms (if applicable) regardless of your role.
Student proposals may always be viewed by the Mentors and Organization Administrators of the organization to which the proposal was submitted. Organization Administrators and Mentors cannot see proposals from students for other organizations by default. If the Student chooses to mark the proposal "public", they can give the URL to another person to view and that person will also be able to view the proposal.
Mentor names and email addresses may always be viewed by the Organization Administrators of the Mentor's organization.
Organization contact information may be visible to other Organization Administrators during the deduplication phase of Google Summer of Code if a duplicate situation exists between the two (or more) organizations.
How long do you save information and what information does Melange save?
Melange saves personally identifiable information (such as email and postal addresses) only as long as necessary to complete programs and meet applicable legal requirements. Melange may save participant work products (such as code written by students or comments written by mentors) indefinitely.
How do I delete my account?
Send an email to the Program Administrator at ospoteam@gmail.com. Please indicate which year(s) profile you'd like to delete. For example, if you participated in 2010, 2011 and 2012, please request that all three years be deleted.
How do I confirm that Melange has deleted what I told it about me?
Visit Melange and, after logging in with your Google account, you should check whether you have a My Profile link in the sidebar or not. If you don't see that link, that means you don't have a profile for the current year. To check if your profile has been correctly deleted for other years of Google Summer of Code, you can visit the Accepted Projects page and change the current program using the dropdown found on the top right of the page, just above the list. Every time you select a different year, the whole website switches to that year's version, so you can check if you have a link to My Profile there. If you don't see a link to My Profile, your profile for that year has been deleted as well.
Can I undelete an account?
No, we cannot undelete your profile. You must create a new one.
Student Work Period & Evaluations
While mentoring your student during the program be aware that there are also two evaluation windows that will require action from a Mentor. The first is the midterm evaluation and the second is the final evaluation.
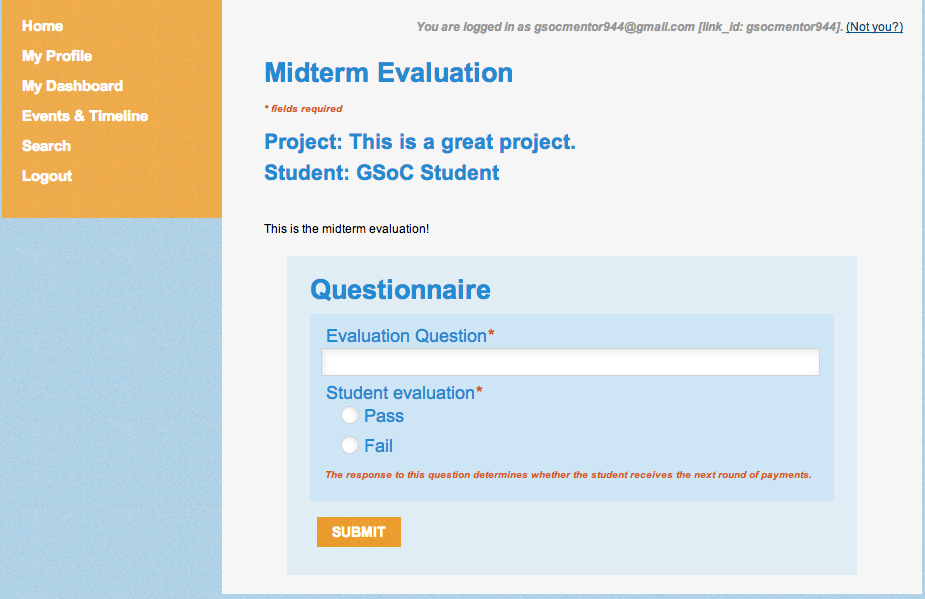
For both evaluations, you will need to wait until the evaluation window opens in order to submit an evaluation of your Student(s). During the evaluation window, visit My Dashboard -> Mentor Evaluations or Student Evaluations to access the evaluations that you are required to complete. You will see evaluations in the list for students for whom you are a Mentor.
You will be asked a series of questions about your Student and you will need to decide if the Student should pass or fail the evaluation. Press the Submit button when you are done evaluating the Student. You can re-access the evaluation and make edits as many times as you would like to up until the evaluation deadline. The evaluation can be accessed via My Dashboard -> Mentor Evaluations or Student Evaluations.
Who should write the evaluation?
A Student's evaluation can be completed by any of her Mentors or by the Mentor's Organization Administrator. Only one evaluation will be completed (and later changes will overwrite earlier ones). Mentors and Organization Administrators should agree on who is responsible for completing the evaluation.
If more than one evaluation is submitted, it overwrites the previous evaluation. The one in the system at the evaluation deadline is the one that will be recorded for the student.
Failing a Student at Midterm versus Final
Failing a student is a serious action which removes the student from the program. Please consider the situation carefully before doing so. This action cannot be undone.
If a student is marked as "fail" in the midterm evaluation they are then removed from the Accepted Projects list on the Google Summer of Code homepage and they will not appear in your Evaluations when the final evaluation window opens. If you fail a Student at the midterm they are completely removed from the Google Summer of Code and will no longer be able to participate in that year's program.
For the final evaluation if a Student is marked as "fail", they are then removed from the Accepted Projects list on the Google Summer of Code homepage.
Once you have marked a Student as "fail" and the evaluation deadline (midterm or final) has passed there is no way to change the student's status to "pass." The fail action can not be undone once the evaluation deadline has passed.
Post Evaluation Student Deadline States
- Pass: The Student submitted an evaluation of their Mentor before the deadline, the Mentor submitted an evaluation of the Student before the deadline, and the Mentor marked the student as "Pass" on the evaluation.
- Fail: The Student fails if she submits an evaluation of her Mentor and the Mentor marks the Student as "Fail" on the Student's evaluation. The Student also automatically fails if she does not submit an evaluation of her Mentor before the deadline, regardless of the grade the Mentor gives the Student.
- Undecided: The Student submitted an evaluation of her Mentor, but the Mentor did not submit an evaluation of the Student by the deadline. The Student is in this state until the Program Administrator manually changes the Student's grade to either "Pass" or a "Fail".
Using the Google Summer of Code website
The Google Summer of Code website has resources available to visitors that are not participating in Google Summer of Code. However, some pages are only available during specific program phases and/or to viewers with specific roles in the program.
The pages that are always accessible to everyone are:
- Lists of Accepted Projects and Mentoring Organizations from current and past years (beginning with 2009.)
- Frequently Asked Questions
- Mentoring Organization pages from current or past years
- Events and Timeline from current or past years
- Connect with Us documents.
View Student Projects
Anyone can view the accepted Students' projects list after the Students' proposals have been accepted into the program. You can find the list on the Accepted Projects page linked from the left hand navigation bar. After the conclusion of the program, you may also find code samples for specific projects.
To view the list of projects, click on Accepted Projects in the left hand navigation bar. Here you can sort the list by student, title of the project, or organization by clicking on the column heading. Code samples, once available, can be downloaded by selecting a specific project. |
|
View Mentoring Organizations
We publish the accepted Mentoring Organizations list for anyone to access, but only after the Mentoring Organizations' applications have been accepted or rejected for the current program.
From the Melange homepage, click on the "See all <number> Mentoring Organizations" under the Mentoring Organizations box to see a list of the Mentoring Organizations from the most recent year of Google Summer of Code.
When you click on an organization, you can see a list of that organization's Accepted Projects, a description of the organization, Tags, and Contact information.
The "Tag" label helps organizations classify the type of work they do and what type of skills a student may need to work with the organization's software.
To contact an organization before or after a program instance, look on the right hand side of the organization page and use the various communication channels listed (IRC, email, Blogger, etc.).
Past Years
On the GSoC homepage, you may use the "Select Program" drop-down box to choose a past instance of the program. This will allow you to see historical versions of all the same data described above. Be sure to return to the current year's program when you're done.
Historical data begins with the 2009 program when we began using Melange.
User Accounts
Some portions and features of the website are available only to those actively participating in the program in some capacity. If you would like to participate in Google Summer of Code you must have a Google Account. Google Accounts may be created at accounts.google.com/signup. Google has its own requirements for creating a new account, so you will need to be sure you meet those requirements as well.
Once you have a Google Account you can log in to the website during the program's registration periods and create a profile as a Student, Mentor, or Organization Administrator. You can read more about this process in the Profile section of this book.
Roles
Your profile type on the website will be determined by the role with which you participate in the program. The roles are Program Administrator, Organization Administrator, Mentor, and Student. Information and website features will be accessible or inaccessible in part depending on your role.
What you see on the site changes depending on the active phase of Google Summer of Code and on your role in the program. If you don't see what you expect to see, take a moment to:
- ensure that you are logged in
- confirm the current phase of the program
Timekeeping
All dates and times on the website are expressed in Coordinated Universal Time (UTC).
General Information and Questions
Profiles are used in Melange to represent users participating in the particular program. All profiles are created on a per-role basis. Because some user data may change between programs and users can take on different roles in different Google Summer of Code years, we ask users to create a new profile (without choosing a new username) every year.
There are four main roles in Melange:
- Students
- Mentors
- Organization Administrators
- Program Administrators
A participant who is a Student may not also take on any other role, e.g. Students may not also be Mentors (even in different organizations) during the same Google Summer of Code year. Students one year may be Mentors the next year of the program, and we are very proud of those who have taken this step.
Mentors and Organization Administrators participate in Google Summer of Code on behalf of a Mentoring Organization. Mentors instruct, guide, and oversee Students. Organization Administrators approve, assign, and manage Mentors within their Mentoring Organization as well as creating the initial application for the organization to apply for the Google Summer of Code. These roles are not exclusive, and many Organization Administrators also choose to mentor one or several Students during Google Summer of Code. Also, Mentors as well as Organization Administrators can participate and supervise Student work on behalf of multiple Mentoring Organizations.
Program Administrators are responsible for administering Google Summer of Code. Program Administrators can be Mentors and even Organization Administrators as well, though this has been rare in practice.
Glossary
These are some of the terms most commonly used throughout the Melange website as well as this documentation.
Accepted Projects
Student proposals that have been accepted by a Mentoring Organization.
App Engine
Google's web application hosting platform. Melange is one of many web applications hosted on App Engine.
Community Bonding Period
The time between the date Students are accepted and the Program officially begins. During this time Organization Administrators may need to assist with Students withdrawing from the program and being replaced by other students. Students are encouraged to use this time to get familiar with the Organization's community, learn any unfamiliar tools and languages, and generally get ready to start coding. Mentors should be available to answer questions during this time.
Connections
The system Melange uses to make Mentors officially recognized by Mentoring Organizations and to add other Organization Administrators to their Mentoring Organizations is called "Connections." Connections are described in detail in their respective sections of this manual.
Dashboard
Participants who have filled out a profile have a My Dashboard in Melange where they see program information specifically relevant to them.
Deduplication
Students are allowed to submit a maximum number of proposals for Google Summer of Code as decided by the Program Administrator in the Program Settings at the start of the year. Often a proposal is set to be accepted by more than one organization. This is considered "duplication." The process of resolving which organization will accept which student (and proposal) is deduplication.
Evaluation
At the Midterm and Final Evaluation points of the program each Student is asked to complete a form to evaluate their Mentor and the program, and each Mentor is asked to complete a form to evaluate their Student's work. These forms, completed on Melange, are "evaluations".
Evaluation Template
The blank (and customizable) evaluation form, placed into Melange by the Program Administrator.
Final Evaluation Records
The evaluations completed by Students and Mentors at the end of the program.
Ideas List
The page or series of pages where an Organization describes possible projects for Students to apply for. More detail is better.
Internet Relay Chat (IRC)
A somewhat archaic but still common means of real-time multi-participant conversation, IRC is Internet text messaging (chat) or synchronous conferencing. It is mainly designed for group communication in discussion forums, called channels, but also allows one-to-one communication via private message as well as chat and data transfer. Many mentoring organizations use IRC as a place for Students to ask questions. IRC requires client software, much of which is freely available for a variety of platforms. See http://en.wikipedia.org/wiki/Internet_Relay_Chat for more information.
Melange
Melange is the software application used to run the Google Summer of Code program. Melange is used via a web browser such as Chrome, Firefox, or Safari (all modern standards-compliant browsers are supported).
Mentor
A member of an accepted Mentoring Organization who has filled out a profile on Melange and has been accepted to participate as a Mentor by the organization's Organization Administrator.
Mentoring Organization
An open source organization that was accepted into the Google Summer of Code program and supervises and benefits from work done by Students during a program. A Mentoring Organization is managed by one or more Organization Administrators.
Midterm
The mid-point of the Program when Students' progress on their projects are evaluated by their Mentors.
Midterm Evaluation Records
The evaluations completed by the Students and Mentors halfway through the program.
My Todos
This dashboard in Melange is where you can find various time-sensitive tasks that need your attention.
Organization Administrator
The primary manager of an accepted Mentoring Organization's responsibilities. Please see the Google Summer of Code FAQ (located on the Melange homepage) for information on the full complement of their responsibilities.
Organization Application Template
The set of questions to be answered as part of an organization's applying to participate in a program. Program Administrators create this template and Organization Administrators complete it in their application.
Profile
The personally identifying information you fill out that includes your name, address, t-shirt size, sex, etc. Completed on the Google Summer of Code website.
Program Administrator
One or more of the Google Open Source Programs Office's employees who manage the Google Summer of Code program.
Program Entity
A single program such as Google Summer of Code 2014 as represented in the Melange datastore. The program's timeline, allowed numbers of Students and Organizations, and other program-wide data are stored as part of this entity.
Program Timeline
The time frame and important dates of a given program.
Project
An accepted Student proposal. A project describes the scope and goals of the work that the student wishes to complete during the program.
Proposal
An application from a student to participate in Google Summer of Code. The proposal describes the scope and goals of the work that the student wishes to complete.
Role
A user's function on Melange. Any user can be one of 4 roles: Program Administrator, Organization Administrator, Mentor, or Student. (Organization Administrators can also serve as a Mentor.)
Slots
The number of Students an organization can accept, or the total number of students that may be accepted into the current Google Summer of Code program. A "slot allocation" is given to each mentoring organization to indicate how many total Student proposals they can accept during the current year's program.
Stipend
Money potentially awarded to a Student at three points during the program: acceptance, midterm evaluation, final evaluation.
Student
A user who meets the Student participation criteria for the Google Summer of Code program and has completed a Melange profile.
Student Application Period
The period of a program's timeline during which Students are proposing work that they wish to perform during the later work period of the program.
Sub-Organization
These are small features or participants in a Mentoring Organization that are not the whole organization. See Umbrella Organization.
Umbrella Organization
Some Mentoring Organizations in Google Summer of Code have small features or participants who do not fit into the larger schema of their work. The organization can become an "Umbrella Organization" and allow multiple projects to function independently during the program while still remaining cohesive.
Work Period
The period of a program's timeline during which Students actively implement software for the Mentoring Organization they are working with.
Lists How To
Lists in Melange are ubiquitous and they have more features (and also annoyances!) than meets the eye. Here are some tips on how to use them.
First of all, it takes a while to load the lists, and you will see them populating dynamically as soon as data is available from the server. The cause of this behavior is out of the scope of this book but is a consequence of how the backend Google AppEngine infrastructure works and its limitations.
Furthermore, what you tweak in each list is saved in a cookie in your local browser. This is done both per page and per list (this means that options for each different list are saved independently from one another). Since the options are saved in a cookie, that also means that you won't see your settings preserved if you use a different browser or different computer than the one used to set your settings. That also means that all the settings will be lost if you clear your browser cookies.
The lists are generally structured in five main sections:
- Ordering
- Searching
- Actions and Options
- Content
- Filtering and Pagination

Ordering
Clicking a column header will order the list by the selected column. Subsequent clicks will toggle between ascending and descending order (indicated by an arrow that appears on the right of the column's header).
Searching
By writing something under a specific column header in the searching section (or selecting one option from a drop-down menu if the possible states for the column are limited to certain possible entries), the list will automatically and dynamically be filtered according to the substring requested. This can be done on more than one column at once, and that would result in searching the list for entries that match both requests (logical AND).
Actions and Options
On the upper side of each list there is some space reserved for optional buttons to appear in order to do some action over the listed entries. You can usually find at least two options: RegExp Search and CSV Export.
RegExp Search
By clicking this checkbox you will be able to search on the columns by using regular expressions rather than plain substring search. If you don't know what regular expressions are you can just ignore it. If you have a grasp of what they are but don't know how to use them, it's out of the scope of this book to explain them, but you can find plenty of information on the Internet about them.
CSV Export
Most of the lists have a button available which allows exporting the content of the list in CSV (Comma-Separated Values) format. By clicking on that button, a popup window will appear showing the content properly formatted as CSV. You will have to copy and paste the content to a new file in your own computer in order to work with it.
Since the data is loaded from the server incrementally, you will want to wait until the whole list has been loaded before pressing the CSV Export button. Hitting the CSV Export button before the list completely loads will display only the data that has already been loaded, which may be incomplete.
The CSV Export has another convenient feature: it will export the data shown on the list in the current state. That means that it will reflect the order, the filtered subset, and the visible columns that are available in the moment the button is clicked.
Please note that the CSV export button will only appear after all the data in your set has finished loading.

Advanced Actions on multiple entries
Sometimes (only for some roles), you will be able to apply some actions to one or more entries displayed on the list.

When available, the actions you can take on the selected entries are available on the left side of the Actions and Options section of the list. You can select the desired entries by clicking on the checkbox shown in the first column of the corresponding row. You can also select/deselect all the currently visible rows by clicking on the checkbox shown on the left of the column headers.
Content
This is where the list data is displayed. Sometimes the rows can be clickable, and you'll be able to reach a page with details about the clicked row. In those cases, since the list data needs to be downloaded again from the server each time a page loads, if you have to look at more than one detail, we suggest you open a new tab (this is usually done with Ctrl+click on PCs or Command+click on Macs) instead of clicking the row, since doing the latter will send you to a different page and you will have to click the back button of your browser to reload the previous page all over again.
Furthermore, you can resize any column by dragging and dropping the vertical lines between them.
Filtering and Pagination
The footer of each list displays, from right to left:
- The number of entries currently displayed against the number of entries that are available within the current (eventually filtered) dataset.
- The current page against the total number of pages of the current (eventually filtered) dataset. There are also clickable arrows that allow you to go to the previous, next, first or last page. Furthermore, the current page is editable, so it's easy to change to a specific page by writing the number of the desired page and pressing Return. You might also see a dropdown that allows you to change the number of rows displayed at once for each page.
- A toolbar with different buttons that can be used to tweak the list appearance and/or filter the dataset with something more complicated than the simple string searching that we already explored above.
Show/Hide/Order Columns
Most lists have more data than necessary or useful for your current task. We don't display all of them by default because it might be overwhelming for the interface; we show by default only a subset of data most relevant for the selected page. Also, the columns are displayed in an order that made sense to us. Both these choices might not make sense to you, hence the option to tweak the columns in the list.
By clicking on the Columns button, you will see a simple but powerful interface with the following features:
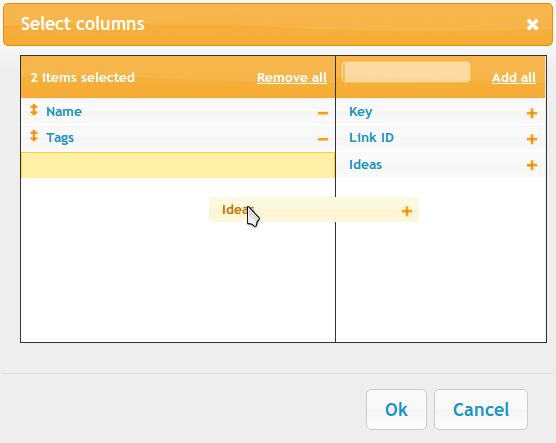
On the left hand side of the interface you can see the columns that are currently visible in the list. The other available columns, currently hidden, are shown on the right.
You can make a column visible either by dragging and dropping it from right to the left, or by clicking on the + button. You can even look for a column name by writing part of its name on the text field displayed above the list of hidden columns.
You can hide a currently visible column by clicking on the - button.
You can reorder the currently visible columns by dragging and dropping columns names on the left hand side.
Finally, you can hide all columns at once or display all columns at once by clicking on the Remove All or Add All links.
Advanced filtering
By clicking on the Filter button, you will be shown a popup window that gives you various options to create an advanced filter on the current list data.
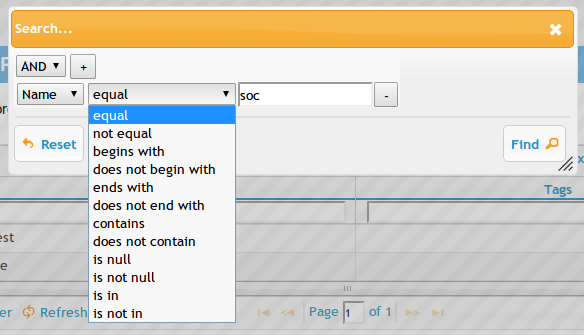
You can create more than one filter that will be applied over the list dataset at once, either by logical AND or logical OR. Each filter consists of a column name, a type of filter to apply, and a substring that the type of filter should match (if applicable).
You can reset the filter(s) applied by visiting the interface again, clicking Reset and either clicking Find or closing the popup window.
Refreshing the lists
Another button might be available on the lists, the Refresh button, which will allow you to reload the data in the list without reloading the whole page and/or other lists that might appear in the same page. This is especially useful when the underlying data changes frequently or you're expecting it to change soon and you want to monitor it.
Editable lists
Some lists have live editing enabled. For those lists you just need to click on the row that you want to change and the cells which are editable will turn into text fields/dropdowns/checkboxes/etc. In order to modify one row you can just change whatever you want and then press Return to automatically save the modified row to the server.

There are currently some gotchas to remember:
- Even though these editable lists have a "Save" button, that button is disabled and doesn't do anything. The only way to save is to change something and then press Return, so don't rely on that button. This is a temporary issue that will hopefully change soon.
- Pressing Return to save the row is required even when you're just modifying a dropdown. So when you change a dropdown, make sure that you press Return afterwards to save the data.
- When you press Return after editing a row, you're not able to change the same row immediately by clicking on the row again. You have to select another row first and then select the original row you want to change again. If your list has just one row, then you can press the Refresh button on the list: refreshing the list will deselect that row automatically.
- When you're editing a row, if you select another row without pressing Return the row will revert back to the previous state, without saving anything to the server.
Credits
Melange's lists are built on top of the jQuery Grid Plugin, A.K.A. jqGrid. More information on that plugin can be found at http://www.trirand.com/blog/.
Evaluations
Once Students have been accepted into the program, you will not need to use Melange as much. However, there are two evaluation periods you need to participate in during the program. The midterm evaluation and the final evaluation. The evaluations function in the same way with the only difference being the point in the program timeline when they happen.
During the evaluation periods, you will be able to see the Mentor Evaluations and Student Evaluations pages linked from My Dashboard in Melange. Here you can see lists of all Mentors and Students for your organization. During the evaluation window, visit My Dashboard and then click on Mentor Evaluations or Student Evaluations as appropriate to view the status of all evaluations for your Organization.
For both types of evaluations, Organization Administrators will need to make sure that all the assigned Mentors for your organization have submitted an evaluation of each student(s) by the deadline. You will also need to ensure all Students for your organization have submitted an evaluation of their Mentor(s).
Organization Administrators can submit an evaluation of a Student on any Mentor's behalf. Students cannot fill out and submit the evaluation earlier or later than the assigned evaluation window.
Who should write the evaluation?
A Student's evaluation can be completed by any of her Mentors or by the Mentor's Organization Administrator. Only one evaluation will be completed (and later changes will overwrite earlier ones). Mentors and Organization Administrators should agree on who is responsible for completing the evaluation.
If more than one evaluation is submitted, it overwrites the previous evaluation. The one in the system at the evaluation deadline is the one that will be recorded for the student.
How do I pass/fail a Student?
After completing the Student evaluation, you can pass or fail a Student by pressing the radio button for pass or fail on the appropriate question. A Student is passed only if they have filled out their evaluation, and the Mentor has set the grade in their evaluation of the student to pass.
Possible evaluation states for students to be in after the evaluation deadline:
- Pass: The Student submitted an evaluation of their Mentor before the deadline, the Mentor submitted an evaluation of the Student before the deadline, and the Mentor marked the Student as "pass" on the evaluation.
- Fail: The Student fails if she submits an evaluation of her Mentor and the Mentor marks the student as "fail" on the Student's evaluation. Also, the Student automatically fails if she does not submit an evaluation of her Mentor before the deadline, regardless of the grade the Mentor gives the student.
- Undecided: The Student submitted an evaluation of her Mentor, but the Mentor did not submit an evaluation of the Student by the deadline. The Student is in this state until the Program Administrator manually changes the Student's grade to either a pass or a fail.
How do I pass/fail a Student after the evaluation deadline?
Contact a Program Administrator. This creates a lot of extra work for the Program Administrators. Please avoid this at all costs.
How do I know if a Mentor has not filled out their survey?
Go to your My Dashboard and go to either the Student or Mentor evaluations. You will see a "status" column that indicates either "Submitted" or "Not Submitted."
Organization Application Period
The Organization application period is the most important part of your responsibilities as an Organization Administrator. The primary Organization Administrator submits the organization application to the program and if accepted, ensures that the organization page on the Google Summer of Code website accurately and effectively represents the organization.
Submitting an Organization Application
The organization application is filled out on the Google Summer of Code website. To create a new organization application, go to the homepage and click on Begin registration in the middle of the page.
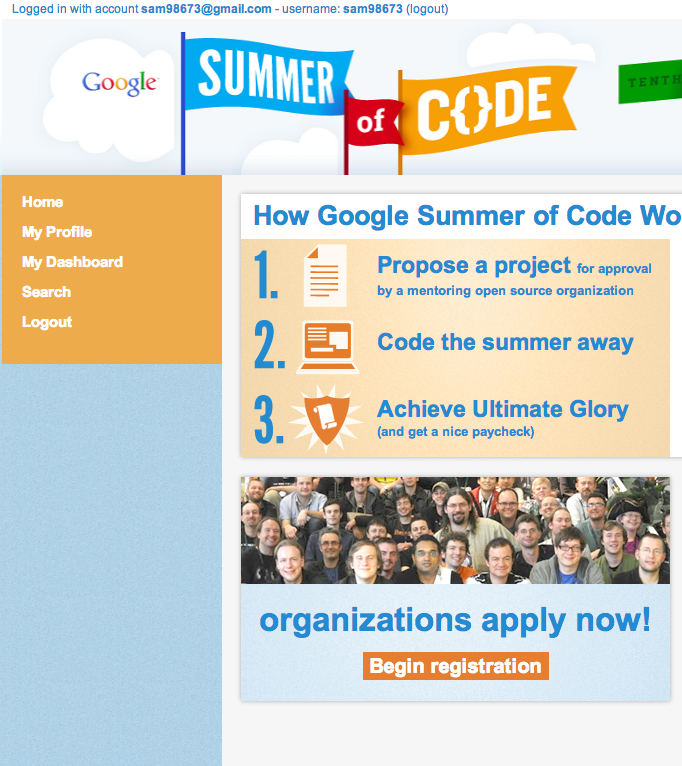
You will then be prompted to create your organization profile by filling out the form below.

- Organization ID: Make sure that your Organization ID is descriptive of the name of your project. For example, "The Apache Software Foundation" could be "apache" or "asf". Please do not choose a Mentors' name, or something only a project "insider" would understand.
- Organization name: should be the full, formal name of your group, e.g. The Google Open Source Programs Office or The Linux Foundation.
- Description: please provide an overview of your organization that will be publicly displayed on its profile page should the organization be accepted.
- Tags: Be sure to include tags on your application. By entering tags such as programming languages and the version control system your project uses such as "Python" or "git" as well as descriptors of what your project does students can easily find the languages/skills
- Main license: use the dropdown menu to pick the appropriate license for your organization.
- Logo URL: please provide a logo that is 64 X 64 pixels so that the image will scale properly on the site should your organization be accepted.
- Ideas list: Your ideas list should contain all of the project ideas that a student may want to apply for.
- Organization website: This is the website that you'd like the public to see when visiting the Google Summer of Code.
- Feed URL: This is for an ATOM or RSS feed that may deliver content related to the program.
- Backup administrator: As part of Google Summer of Code, you must specify a backup administrator. Make sure that your backup administrator has created a profile prior to submitting your organization's application so you are able to add her username details on your application.
- Please review the Mentoring Organization/Mentor Participant Agreement and, if you agree to the terms therein, click the "I Agree to the Administrator Agreement" check box. You will notice that this agreement incorporates the Program FAQs and Terms of Service for reference. Make sure you have reviewed these documents prior to agreeing.
- You must check the box verifying that your organization is not located in an embargoed country. You cannot register without checking this box.
Once your information is correct, click the Submit button. If your are not taken to the questionnaire tab, there is an error somewhere on the form, e.g. a required field missing. Such an error will be shown in red - but you may need to scroll down to find it.
Upon successful completion of your organization application you will then be taken to the Questionnaire tab, where you will need to answer the required questions. Your application will not be completed until you hit Submit on the questionnaire tab.

If you successfully submit your application, you will see an orange bar at the top of the page that reads "Your questionnaire has already been submitted and registration process is now complete. You can still modify and update the answers below before (XXX deadline)."

Do not wait until the deadline to submit your application.
Note: If you want to edit an existing organization application before the submission deadline, go to My Dashboard, click on My organizations, and choose your organization from the list. You can also click on the Or edit your organization application from your dashboard link on the homepage.
How do I know if our Organization has been accepted?
You will receive an email - sent to the email address indicated in your profile - from the Program Administrator notifying you whether or not your organization was accepted. Emails will be sent at the time specified in the program timeline for the announcement of accepted organizations.
Our organization was accepted! How do I create my organization page?
You will receive a direct link to the Organization profile page for your organization in the email you receive confirming your acceptance into the program. Please note that your organization will not appear in the Mentoring Organizations list linked from the homepage until you have completed all the required fields in the Organization Profile form. Alternatively, you can edit your organization page by going to My Dashboard -> My organizations -> click on the name of the organization whose profile you want to edit from the list -> Edit.
Much of the information you entered when submitting your organization's application to the program will pre-populate to the organization profile page. The information requested is also largely self-explanatory, but here are some tips for filling out this page:
- Short name: Please choose a short name for your organization that will be used at places where there is not enough space. E.g. "Google" for Google's Open Source Programs Office or "PSF" for the Python Software Foundation.
- For the Address Information for your organization, please fill in the address where your organization has a physical office. If your organization does not have an office, please fill in a contact address for the organization, e.g. the address for your Organization Administrator.
- If there are fields that you are unsure of how to answer (and they are not required), feel free to leave them blank. The Program Administrator(s) will send more information about these fields as the program progresses.
Accepted organizations will be listed on the Google Summer of Code homepage only after the Organization Profile has been submitted.
Who can see which sections in Melange after my organization has been accepted?
Your organization description, tags, is publicly available. Only Organization Administrators can see:
- the sliders used to "ignore", "accept", and "assign" Mentors for their Organization in the "Mentors" field of their Dashboard
- Mentor evaluations from their students
- Mentor emails
How do I designate individuals in my organization as Mentors and Organization Administrators?
The default Organization Administrator is the user who submitted the organization's application. You can invite more users to be Organization Administrators or Mentors if they have created a profile in Melange for the current year's program by using the Connections system.
There are two ways for members of your organization to become an Organization Administrator or Mentor:
1. Send an invitation directly to the individual
2. The individual can request to be an organization administrator and you can approve their request.
Inviting an individual in your organization to be a Mentor or Organization Administrator:
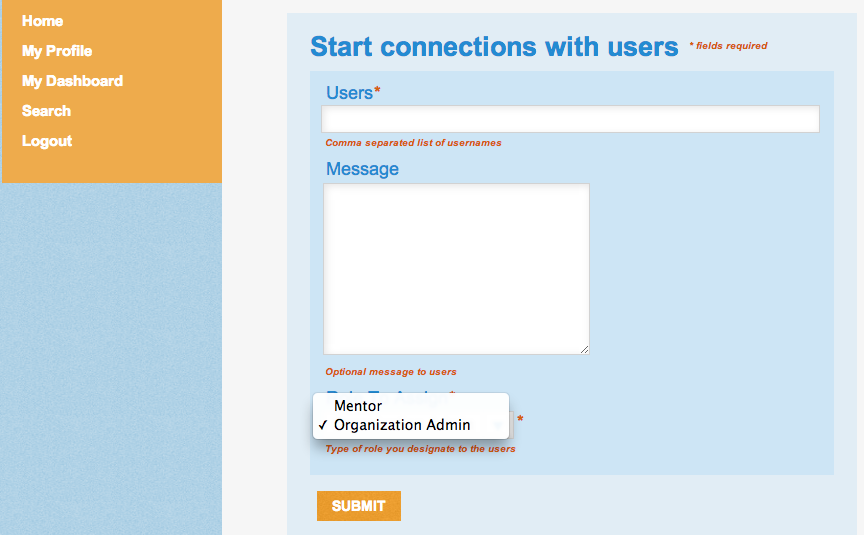
Go to My Dashboard -> Connect users with XX org (name of your org will populate). Then the screen below will appear and you will need to enter the email address for the person/people you would like to invite to be a Mentor(s) or Organization Administrator(s) using a comma to separate multiple emails.
Next, write a short email in the Message section telling them you would like to invite them to be an Mentor or Organization Administrator for XX org for GSoC 20XX.
Finally, select the role you would like to assign to the person/people (Mentor or Organization Administrator) from the dropdown menu and click Submit.
Individual requests to be an Organization Administrator or Mentor with your org
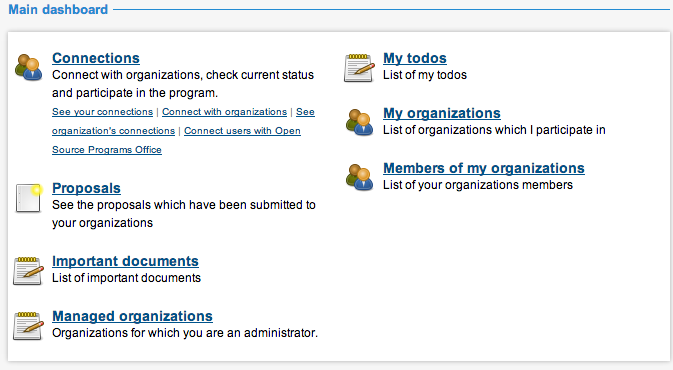
To check on the list of people who may have requested to have a role (Mentor or Organization Administrator) with your org for this year's program you can view all incoming requests by going to My Dashboard -> Connections -> See organization's connections.
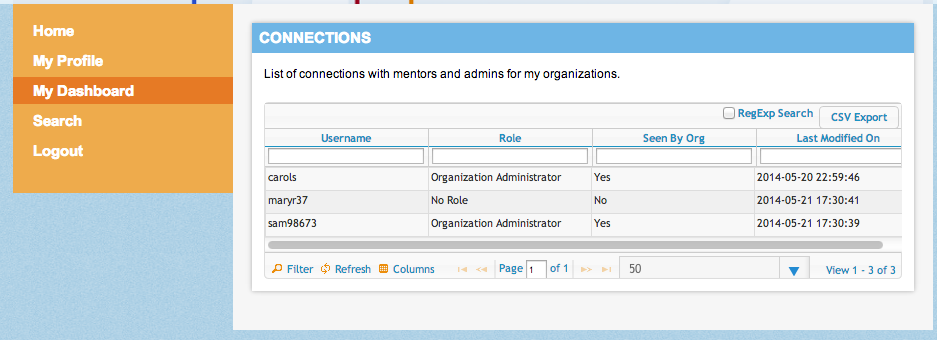
You will then see a list of all of the users that have requested to be connected with your org as a Mentor or Organization Administrator including those that are already Mentors or Organization Administrators.
To review the new user requests sort the Seen By Org column for any "No's" by entering "No" in the blank search field directly underneath the Seen By Org text. Then you can click on each cell where you have not reviewed the request and see the username and at the bottom the note from the user requesting a role with your organization. There is also an auto generated email that can be sent if the user did not type text in their role request.
The dropdown menu will allow you to assign the desired role (Mentor or Organization Administrator) to the person or you can chose to leave the "No Role" default option checked and they will not be granted a Mentor or Organization Administrator role unless you later decide to change your decision.

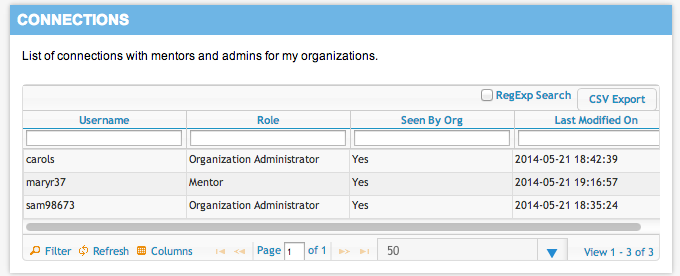
Once you click on the Role you wish to assign to the user and hit Submit the system will update. At that point the person that you offered the role to can go to My Dashboard -> Connections -> See your connections and they will see their Role as "Mentor", "Organization Administrator" or "No Role."
And you can see all of the users and their updated roles from your Connections accessible from your dashboard.
What is the role of a backup Organization Administrator?
A backup administrator is simply the Organization Administrator who is listed on the organization's initial application in the "backup admin" text field. When you specify an Organization Administrator after the acceptance deadline that user has the same privileges as all other Organization Administrators.
How does a Mentor resign? How may I remove one of my organization's Mentors?
A resigning Mentor informs their Organization Administrator that they no longer wish to be involved with the program. The Organization Administrator can remove the Mentor from the program by going to My Dashboard -> See organization's connections -> Username of Mentor (or Organization Administrator) they wish to remove -> Change Role to Assign dropdown to "No Role" -> Submit
How do I resign as Organization Administrator?
Contact the Program Administrators to notify them you will be leaving and ensure that your Backup Administrator is aware of the change. Then change your role to "No Role" from My Dashboard -> Connections -> See your connections -> click on the organization you wish to remove yourself from ->and change the Role for Organization dropdown menu to "No" -> Submit
How do I load my organization logo into Melange?
Visit My Dashboard -> My organizations. Click on the corresponding organization in the list. On your Organization page, click on Edit. Under "Logo URL", enter the URL where your logo is available for download as a JPEG, sized 64 X 64 pixels.
Organization Application and Acceptance Period
Before the organization application period, Program Administrators will create an "Organization Application Template" for the organizations to fill out to apply for the program. After all organization applications are submitted, Program Administrators will review the applications and accept or reject organizations.
Creating applications and evaluations
This section discusses how to create the organization application. You can also use these instructions for creating the midterm and final evaluations for Students and Mentors.
The blank template can be found via the Admin Dashboard -> Manage Organizations -> Edit Organization Application. You can then add and edit questions to be filled out by Organization Administrators.
One of the input fields on the application template is a start and end date and time in UTC. The Organization Application will be "live" on the date/time indicated in the template. Organizations interested in applying will then see an Apply button on the homepage.
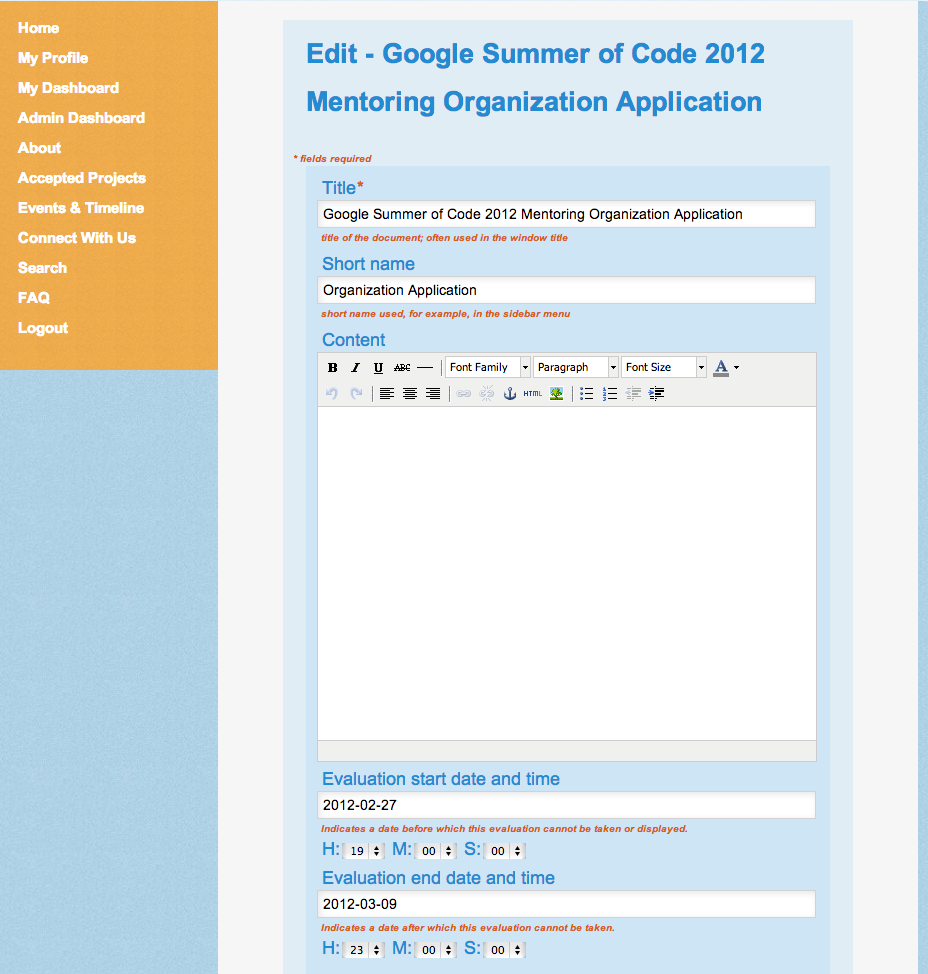
The list of the questions that will be shown to the organizations can be built using the tool found at the bottom of the page. The same tool will be available for the Student/Mentor midterm/final evaluations later in the program.

You can add different types of fields using the tool:
- Text Field
- Paragraph Field
- Checkbox Group
- Radio Group
You can add a new question by selecting a new field in the dropdown menu.
Text Fields
Creating a text field requires you to specify the label (generally the question you are posing) and select whether the field is required or not.

A text field created as seen above will be displayed to the final user like this:

The red star after the name of the text field indicates that the field is required (because the "Required" box is checked on the template). If a user does not fill out a required field they will receive an error message after they attempt to submit the form.
Paragraph Fields
A paragraph field requires you to complete the same steps:

This will be displayed to the final user as:

Checkbox group
Once you add a checkbox group you will see an interface like the following:
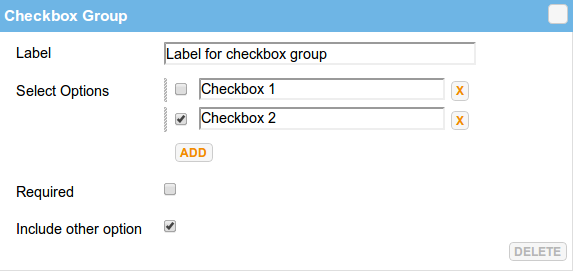
As before, you can specify a "Label", and then you can add different checkboxes that will be displayed in a group to the user. You can add a checkbox by clicking on the Add button. If you make a mistake you can delete the checkbox by clicking on the X button on the right of each checkbox. You can also move the checkboxes around inside the group:

The "Required" checkbox will work as specified above. The "Include other option" means that the final user will see an additional "Other" checkbox that, once clicked, will display an additional text field that will let the user specify something different.
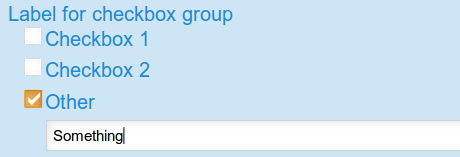
The checkbox group specified in the first picture of this paragraph will be displayed to the user like this:

Since we checked the "Include other option" box, if the user clicks on the "Other" checkbox, an additional editable text field will be displayed.
Radio group
The radio group works exactly like the checkbox group:
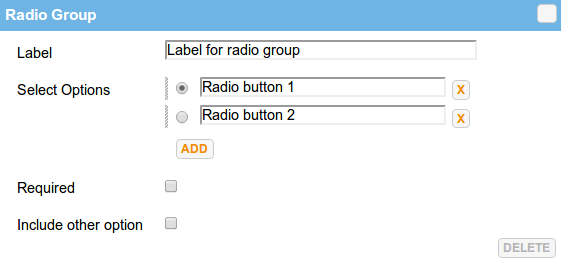
It will just display a radio selection instead of a group of checkboxes to the user. In this case we didn't check the "Include other option" feature, so the radio group will be displayed to the user like this:

Other features
Using the Organization Application Template, you can also:
- delete a field using its Delete button.
- temporarily hide a field using the upper right button, if the fields you're defining are too numerous and the interface gets cluttered.
- move around the fields if you change your mind about their order, by clicking on the blue bar and dragging and dropping them.
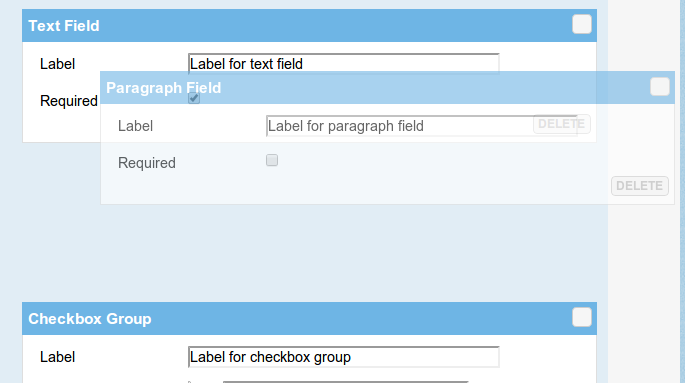
You may preview the organization application template by visiting Admin Dashboard -> Manage organizations -> Preview organization application to verify that the template is to your liking.
Review Organization Applications
The Program Administrator(s) will review submitted applications from applying organizations after the application deadline (as per the deadline listed on the Application Template) has passed.
Evaluate Applications
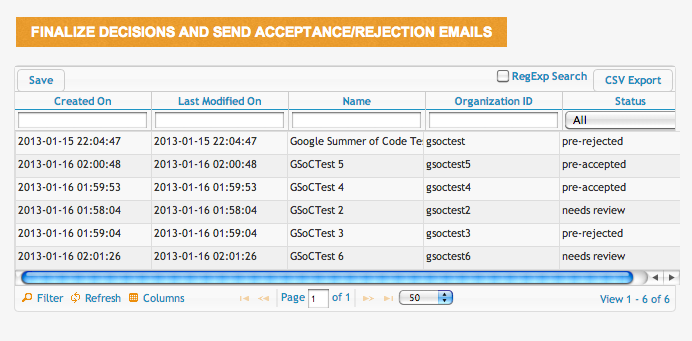
To evaluate organization applications, the Program Administrator should visit the Organization application list (Admin Dashboard -> Manage organizations -> Organization application records) and mark applications as "pre-approved", "pre-rejected", "ignored", or "needs review" by selecting the appropriate status in the drop-down and hitting Return. Please note you must click directly on the text in the Status column to make a change. The list will refresh each time you press Return and your work will be saved.
Finalize Decisions
Clicking the "Finalize Decisions And Send Acceptance/Rejection Emails" button on the top of the Organization application list page at any point will immediately send notification to all pre-accepted and pre-rejected organizations and mark them in the system as accepted and rejected, respectively. Only click this button when you are absolutely sure you are ready to approve/reject. The email text that is sent to the organizations can be specified in the Edit Messages (see the Setting up a new Program chapter in this manual) section on the Admin Dashboard. After notification, accepted and rejected organization applications will be filtered out (Status defaults to "needs review") of the organization application list. Organizations will not be further notified if the "Finalize Decisions and Send Acceptance/Rejection Emails" button is pressed again. The save button currently does not work.
Any organizations listed in the "ignored" or "needs review" state when the "Finalize decisions and send acceptance/rejection emails" button is pressed will remain in the list in that state. No email will be sent to those organizations.
Program Wrap-up Questions and Issues
Once the Google Summer of Code program concludes, Program Administrators can gather considerable statistics about the program including: Student/Mentor data, tax forms, keeping PII (Personally Identifiable Information) records for the allotted amount of time, and more.
Exporting Reports
There are a number of useful reports you can export, please be aware that large numbers of records might take a little while to render.
Student information
Admin Dashboard -> Students -> All Students
It will take about 6-7 minutes to download all of the Students (this includes all Students who submitted a profile for Google Summer of Code for a given year).
At the bottom of the page, you'll see a Columns button that you can click to view all of the available columns of information for Students. To add that column to your view, click on the "+" button next to the field you'd like to move into your view. If you would like to hide a column click on the "-" next to the field. To move the order of the viewable columns click on the name of the column you'd like to reorder and drag it to the top or your desired location. Click Ok.

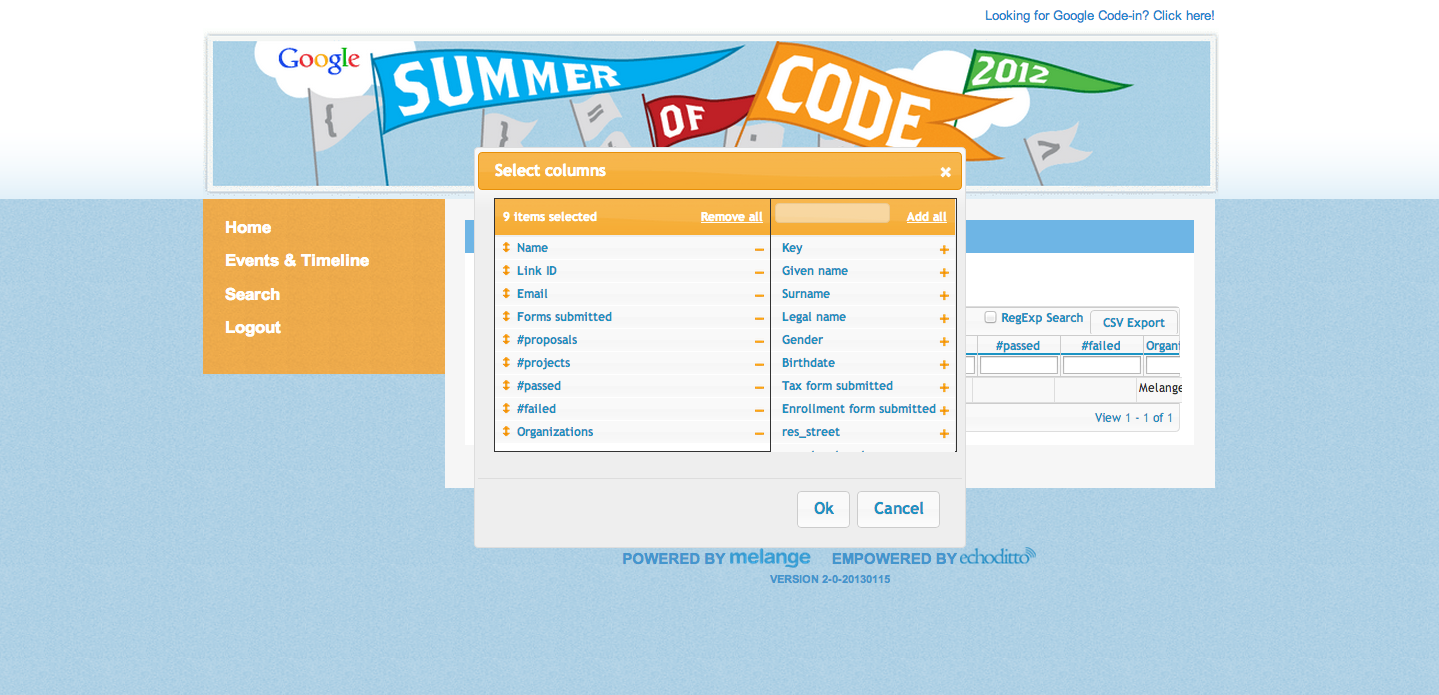
To sort alphabetically or by highest to lowest click directly on the title of the column.
To export all of the information to a spreadsheet:
CSV Export -> Select All -> Copy -> Open LibreOffice (or other text editor of your choice) -> Spreadsheet -> Paste -> (Make sure Tab and Comma are both checked) -> OK
Information about Mentors/Organization Administrators
Admin Dashboard -> Participants -> List mentors and admins
At the bottom of the page, you'll see a Columns button that you click and view all of the columns of information we have available on the Mentors. To add that column to your view, click on the "+" button next to the field you'd like to move into your view. If you would like to hide a column click on the "-" next to the field. To move the order of the viewable columns click on the name of the column you'd like to reorder and drag it to the top or your desired location. Click Ok.
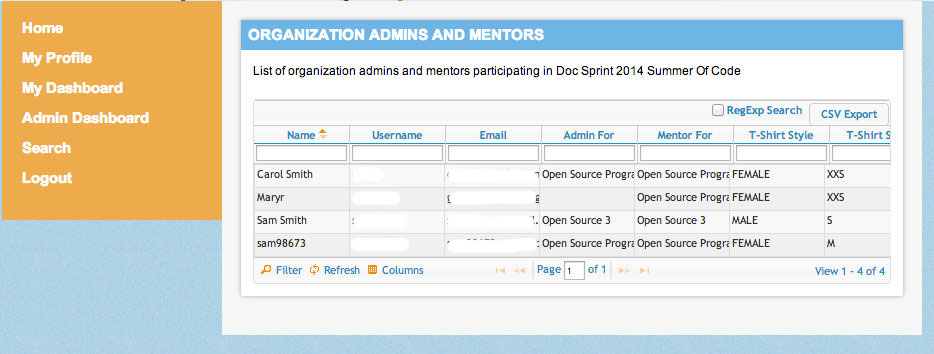
To sort alphabetically or by highest to lowest click on the Title of the column.
To export all of the information to a spreadsheet:
CSV Export -> Select All -> Copy -> Open LibreOffice (or text editor of your choice) -> Spreadsheet -> Paste -> Make sure Tab and Comma are both checked -> OK
Student Work
To view past Google Summer of Code projects, click on Accepted Projects on the left hand navigation bar. Here you can sort the list by Student, project title, or organization. You may also filter by year by going to the drop down menu on the upper right hand corner of the page marked "Select Program". The earliest instance of the program in Melange is 2009.
How do I delete a student account?
Ask a Melange developer to manually delete the account.
How do I dismiss an Organization Administrator from the program?
Ask a Melange developer to remove the person as an Organization Administrator from the program. Make sure that the backup Organization Administrator is aware of the change and will assume all the responsibilities of running the program for his/her Mentoring Organization.
Setting Up A New Program
A new program, as defined in this section, is a new year of Google Summer of Code. Here are the steps outlined in this section in the order they need to be completed:
- Become a Program Administrator
- Create a new program
- Edit the program's timeline
- Edit the program's settings
- Create and then add the appropriate documents for the program
- Edit the messages for the program
- Ask for modification of the logos and graphics for the program
- Modify the active program information on the /site/edit page
How to Become A Program Administrator
Ask a Melange developer to create a new user and then to designate the given individual as a Program Administrator. At this time, only a member of the Google Open Source Programs team can become a Program Administrator.
How to Create a New Program
To create a program the Program Administrator should go to:
Admin Dashboard -> Program settings -> Create a Program in a new or existing instance of Melange. This will bring you to the Create a new program page. Fill in the appropriate fields and press the Submit button.
Please note that you should enter the "Age as of" field on the Create a new program page in the format MM/DD/YYYY.
You will be redirected to the Edit program settings page of the new program instance.
How to Edit the Program
Once the Melange developer has created the new program, the Program Administrator has many options available. Most of a program’s data can be edited via the links in the Program settings section of the Admin Dashboard. The majority of the text that will need to be updated is stored in the Edit program settings and List of Documents links. These can be edited on the Edit program messages page and the List of Documents.
There are two types of data on the Edit program settings page, documents and non-document data. Documents, as explained in this section, are a list of webpages that exist on Melange for a specific program and are created initially outside of Melange in a text editor. A program’s non-document data (for example, numbers of allowed students and organizations, latest allowed student birthdate, etc.) can be updated directly on the Edit program settings page. Please note that there is a checkbox for "Messaging enabled" on this page which does not currently have any function; you can safely ignore it.
How to edit/view documents for the program
You should create new documents when creating a new program. Create the following documents in a text editor (outside of Melange) before going into Edit program settings:
- Organization Admin Agreement
- Mentor Agreement
- Student Agreement
- About Page
- Events Page
- Connect with Us Page
- Help Page
Once all of your documents have been created in a text editor go to:
Admin Dashboard -> Program settings -> Edit program settings
Scroll down to the documents that need to be updated (starting with Organization Admin Agreement). All the documents that are needed to run the program are listed on this page. Click on Click here to edit this document under each corresponding text field on the Edit program settings page. You will be brought to a WYSIWYG (What You See Is What You Get) editor in Melange to edit the document. Cut and paste your appropriate document text into the Title and Content Fields. Press Submit and you'll be taken back to the Edit program settings page. Then in the field corresponding to the document start typing any part of the document title and an auto-complete drop down appears. Choose the correct document from the drop down. Be sure to save the program settings form every time you change the document field.
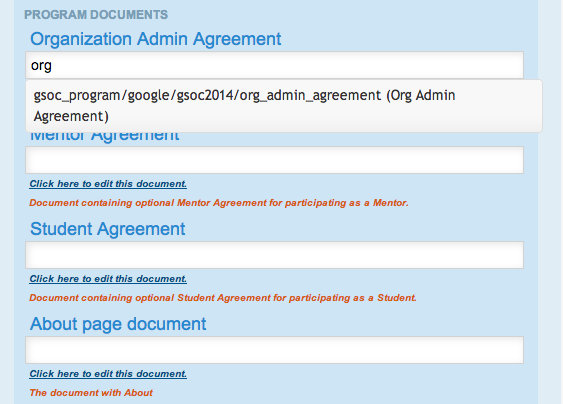
If you'd like to preview your documents before they go live, you can do so by changing the word "edit" on your web browser's URL to "show". For example http://www.google-melange.com/gsoc/document/show/gsoc_program/google/gsoc2012/events_page. This page can be shared publicly if necessary.
The documents are always viewable to anyone with the document's URL. On the document edit page you are also able to change the locations where the document will appear:
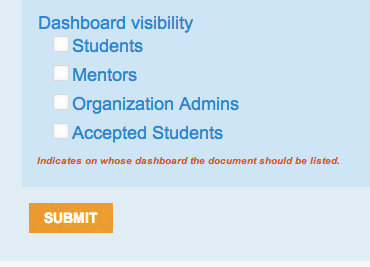
If you tick any of the boxes the document will be on also be specifically available on that user's dashboard in the Important documents section as well as still viewable to anyone with the document's URL.
Before hitting Submit, you must make sure all the text fields have been populated.
When the program is underway you can easily review the documents in a list view:
- Go to Admin Dashboard
- Click on List of Documents under Program settings
- Click on the name of the document you wish to view under 'Title'
Once you have successfully added the URL's for the new documents continue to fill out the rest of the Edit program settings (Max slots per organization/for the program).
How to add new documents for the program
In the event that a Program Administrator wants to create a document that is not linked from the Edit program settings page, she would visit the following URL:
http://www.google-melange.com/gsoc/document/edit/gsoc_program/google/(current year id)/<name of new document to create>
This will automatically create the document with the name listed above. Pressing Submit will save the document. It will thereafter appear in the List of documents from the Admin Dashboard.
How to Change the Program Timeline
The Program Timeline defines when a specific program begins/ends, student work periods, etc.
- Go to Admin Dashboard
- Program Settings -> Edit program settings -> Edit Timeline
- Update the fields and Submit. Times are all in Coordinated Universal Time (UTC).
How to edit messages for the program
After you have set up the documents and settings for the program you should edit the messages for the program. Go to the Admin Dashboard -> Program settings -> Edit messages section. You will find text editing fields for the emails that will be sent to:
- Accepted organizations
- Rejected organizations
- Accepted Mentors
- Accepted Students
- Rejected Students
We recommend that you use the following text for your template form in order to send a custom email message to each accepted organization:
Accepted organizations message
Your Organization Application for "{{ org }}" in {{ program_name }} has been accepted.
Please click {{ url }} to fill in the necessary information and create your Organization.
Best regards,
{{ sender_name }}
"org" is the name that was filled in by the Organization Administrator in the "Organization Name" field of the organization application.
"program name" is the Name listed on the Edit program settings page.
"url" is the direct URL for the organization to fill in its organization profile. The link is specific to each organization.
"sender_name" is the Site name listed on the Edit site settings page at http://www.google-melange.com/site/edit.
The fields within the curly brackets are customizable and will be filled in as appropriate by Melange depending on the recipient. You can add more welcome text to this message if you choose.
Rejected organizations message
Thank you for submitting "{{ org }}" organization application to {{ program_name }}.
Unfortunately, we were unable to accept your organization's application at this time.We received many more applications for the program than we are able to accommodate,
and we would encourage you to reapply for future instances of the program.
Best regards,
{{ sender_name }}
The fields within the curly brackets are customizable and will be filled in as appropriate by Melange depending on the recipient. Please see the notes above for definitions of each of the types of fields. You can add more rejection text to this message if you choose.
Mentor welcome message
This message will be sent to Mentors when they are accepted by their respective Organization Administrators into the program. You can include information about participating as a Mentor generally to help Mentors get started with the program.
Dear {{ to_name }},
Congratulations! You have been accepted as a Mentor for {{ org_entity.name }}.
With best regards,
The Google Summer of Code Program Administration Team
The fields within the curly brackets are customizable and will be filled in as appropriate by Melange depending on the recipient. Please see the notes above for definitions of each of the types of fields. You can add more rejection text to this message if you choose.
Accepted students message
Congratulations! Your proposal "{{ proposal_title }}" as submitted to "{{ org_entity.name }}" has been accepted for {{ program_name }}. Over the next few days, we will add you to the private {{ program_name }} Student Discussion List. Over the next few weeks, we will send instructions to this list regarding turn in proof of enrollment, tax forms, etc.
Now that you've been accepted, please take the opportunity to speak with your mentors about plans for the Community Bonding Period: what documentation should you be reading, what version control system will you need to set up, etc., before start of coding begins on xxxx Date.
{% if org_entity.accepted_student_msg %}
The organization has added the following message:
{{ org_entity.accepted_student_msg|safe }}
{% endif %}
Welcome to {{ program_name }}! We look forward to having you with us.
With best regards,
The Google Summer of Code Program Administration Team
Please note in the example above that you will need to fill in the section that says "xxxx Date." There is not currently a way to refer to variables in the program timeline in the messages system. The fields within the curly brackets are customizable and will be filled in as appropriate by Melange depending on the recipient. You can add more welcome text to this message if you choose.
Rejected students message
Thank you for applying to {{ program_name }}. Your proposal "{{ proposal_title }}"
submitted to "{{ org_entity.name }}" was not selected for the program this year.
We annually receive many more proposals than we are able to accept, and we
would like to encourage you to apply again next year.
{% if org_entity.rejected_student_msg %}
The organization has added the following message:
{{ org_entity.rejected_student_msg|safe }}
{% endif %}
With best regards,
The Google Summer of Code Program Administration Team
The fields within the curly brackets are customizable and will be filled in as appropriate by Melange depending on the recipient. You can add more rejection text to this message if you choose. A student will receive one rejection email per each rejected proposal.
Custom content
It is possible to put your own messages rather than the example contents which are shown above. Program Administrators can put dynamically generated variables in the double curly brackets. Here is a short description of the fields which are available
Default context which can be used in any program message:
- {{ sender_name }}: the official name of the site, as defined in Site settings
- {{ program_name }}: the full name of the program
Context specific to "Accepted organizations message":
- {{ org }}: Organization ID which was entered in the organization application
- {{ url }}: URL to create Organization's profile
Context specific to "Rejected organizations message":
- {{ org }}: Organization ID which was entered in the organization application
Context specific to "Accepted students message":
- {{ to_name }}: given name of the student
- {{ proposal_title }}: name of the proposal
- {{ org_entity.name }}: name of the organization for the accepted proposal
- {{ org_entity.accepted_student_message }}: Mentoring Organization's message that is sent out to accepted Students
Context specific to "Rejected students message":
- {{ to_name }}: given name of the student
- {{ proposal_title }}: name of the proposal
- {{ org_entity.name }}: name of the organization for the rejected proposal
- {{ org_entity. rejected_student_message }}: Mentoring Organization's message that is sent out to Students with rejected proposals
Not all of these variables must be actually defined. For instance, an Organization may decide not to set a custom message to rejected students. If a variable only has a value for some users, wrap uses of it within a conditional guard as follows:
{% if variable_name %}
Additional information provided by your organization about your proposal is: {{ org_entity.rejected_student_message }}
{% endif %}
Changing Logos and Program Graphics
Ask a Melange developer - program graphics and layout within Melange are not customizable and generally require code and behavioral changes to update. Program banners are the easiest to update.
How do I modify the landing page for visitors to Melange?
By default, there is no active program when you visit the main URL for Melange. In order to make your program appear on the landing page for Melange, will need to set your new program as the "active program" in the Edit site settings page. Go to the site edit page: http://www.google-melange.com/site/edit. Find the field titled Latest gsoc, enter the field in the format google/<Program id>. The Program id is what you specified when you created the new program. Please also make sure the program is marked "visible" on the Program Profile (Admin Dashboard -> Program Settings -> Edit program settings) on the drop-down for Program Status. The user will receive an "Access Denied" error if the program is invisible and tries to visit the homepage of the program. Finally, please note that the timeline for your program will determine when the program begins and the landing page images display the "Currently Active!" banner.
Student Proposal Period
Student proposals will begin to appear in the Proposals section of My Dashboard as they apply.
Student proposal and acceptance workflow
In brief...
- Each Student fills out and submits one or more proposals to an organization.
- Mentors review and score proposals, making private comments for themselves and/or public comments for the student.
- Mentors and Organization Administrators decide how many students they want to accept.
- Organization Administrators indicate the minimum and maximum number of "slots" they desire for their Mentoring Organization.
- The number of slots allocated to the organization is announced by Program Administrators.
- Mentors and Organization Administrators decide which students to accept.
- Organization Administrators accept Students using the slider on each application.
- Organization Administrators assign a mentor to each Student, if one has not already been assigned.
- Students are accepted/rejected and receive an email.
In more detail...
How do I review student proposals?
To review student proposals for your organization, click on Proposals on My Dashboard. This lists all the proposals submitted to all the organizations for which you are a Mentor or Organization Administrator. You can then visit each proposal individually by clicking on the corresponding item in the list.
The proposal page also provides a way to score the proposal and to view or create comments.
Melange is customized since we know that Organization Administrators all administer their proposal process differently. You can view the Students' proposals based on the statuses listed below:
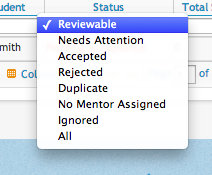
Do not use the "Needs attention" states.
- Reviewable: this is the default setting
- Needs Attention: proposal is in this state if no mentor is assigned or if it is a Duplicate
- Accepted: this status will appear only after the acceptance/rejection deadline (will not appear in this state during the proposal review period)
- Rejected: this status will appear only after the acceptance/rejection deadline (will not appear in this state during the proposal review period)
- Duplicate: if the proposal is a duplicate use this status
- No Mentor Assigned: use this if you have not indicated at least one mentor this status will appear
- Ignored: used for spam proposals
- All: this will show you all of the proposals in the list, regardless of their current status.
Can we customize the Google Summer of Code workflow for our organization?
There are several ways to customize the Melange workflow for your organization, all of which can be found on your organization profile, accessible from the Edit link on your Organization page. Customizations include:
- Disabling scoring
- Altering the scoring system to more or fewer stars
- Listing all Mentors while assigning Mentors to proposals
- The message to display when someone requests to be a Mentor or Organization Administrator of your organization
- The message that is included in the email sent to accepted and rejected students
- Adding a 'sub-organization' column to each proposal by clicking on Edit on your Organization page. After adding the column you can edit its value in the Proposals page, accessible from My Dashboard.
- Adding additional columns to student proposals received by the organization where you can make extra comments, etc. To do this, go to: My Dashboard -> Managed organizations -> select your organization -> click on Preferences tab -> scroll to bottom of the page to Proposal extra fields and follow help text instructions
Comments on Proposals
Mentors and Organization Administrators may post comments to any proposal. Proposal review comments are of two different types: public comments that are visible to the Student, the Mentors and the Organization Administrator, and private comments that are not visible to the Student.
Private comments are the default. If you'd like to make a public comment, uncheck the "Private" checkbox. Not only will the comment be visible to the Student, she will also receive email notification that you have commented on the application (provided she has remained subscribed to notifications on her proposal). Public comments on publicly-visible proposal are still only viewable to the Student, Mentors, and Organization Administrators for the Mentoring Organization.
All comments are color coded to make it easy to distinguish between private (gray background) and public (light blue) comments on an application. Students may add comments to their application at any time, and these will be listed in the public comments section of the proposal review page.
Scoring Proposals
If you wish, your organization can assign a score to a proposal by using a star-based review system. You may customize the number of stars available (the score range) from the organization profile.
Each organization should decide on their own process for scoring proposals. Organizations do not need to use the scoring options in place in Melange if they choose not to. It does not affect student acceptance or rejection in any way. Only Students explicitly marked as "Accept" and assigned a Mentor will be accepted.
This feature is meant to make it easier for organizations to make the final choice about which proposals they should accept if, for example, they end up in a duplicate situation with another organization and can't take their first choice Student.
Subscribing to proposal updates
If you wish to receive notifications about either new proposals submitted to your Mentoring Organization or comments on the proposals, check the respective boxes on the Notification Settings tab of the My Profile page.
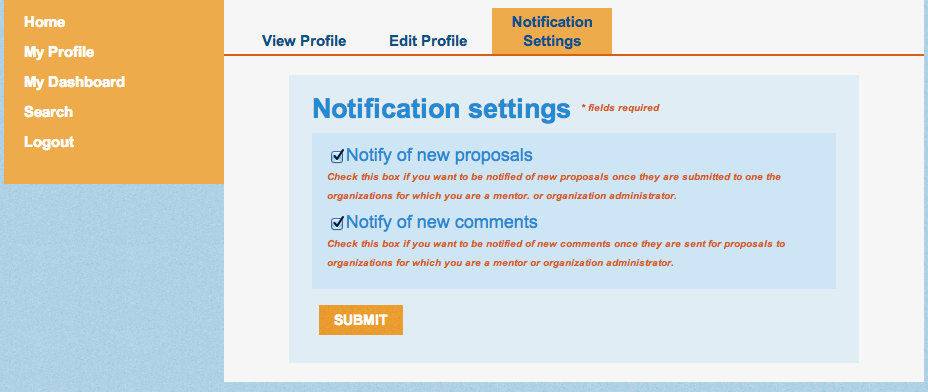
Dealing with spam
Proposals that are clearly spam, meaning proposals having no viable content, can be marked as ineligible by using the "Ignore Proposal" slide switch. Only Organization Administrators can perform this action. While deciding whether a proposal is spam is somewhat subjective, you will likely know a spam proposal when you see it. If you discover you have accidentally marked a proposal ineligible and you need to revert it, you can do so using the same sliding switch. Once you ignore the proposal you cannot assign a Mentor or accept that proposal and Mentors cannot use the "Wish to mentor" sliding switch. The Student cannot withdraw or edit this proposal. The Student's proposal will no longer appear in the Proposals submitted to my orgs list by default. You will need to change the Status column to display either "All" or "Invalid" proposals in order to see it again.
How do I assign a Mentor to a Student proposal?
Only Organization Administrators have the capacity to assign a particular Mentor to a proposal. They can do so by selecting a Mentor from the "Assign Mentor" drop-down on the left hand "Proposal Actions" menu and clicking on the "Assign" button. (The drop-down list will contain all the Mentors in your organization that you may choose from.) The Organization Administrator can change the assigned Mentor at any time by updating the "Assign Mentor" select list. She can also add multiple Mentors to the proposal by clicking on the "Add New" link below the Mentors select list on the proposal actions menu.
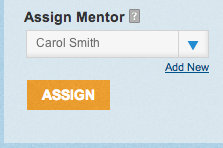
Your Mentors will be able to see if they are assigned to mentor the student by viewing the "Assigned mentors" section of the proposal.
You can let a Student edit her proposal after the proposal deadline by visiting My Dashboard -> Proposals -> Clicking on the name of the proposal you want to change in the list -> toggling the "Editable post deadline" switch to "Yes."
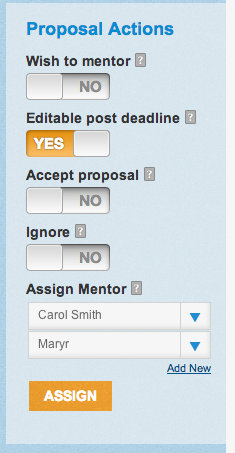
What is a Slot Allocation request?
After the Student proposal phase concludes, Organization Administrators and Mentors review the proposals to decide which they would like to accept. The Organization Administrator then submits the minimum and maximum number of Students that they would like to accept into Google Summer of Code as a "slot allocation request" on their Edit organization preferences page. This can be found from: My Dashboard -> Managed organizations -> <name of Organization> -> Preferences tab.
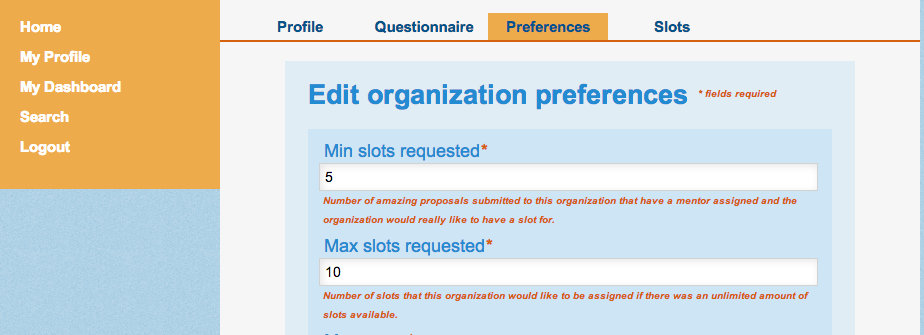
The Program Administrators decide how many slots will be allocated to each organization soon after.
In some cases an organization does not have enough Mentors to accommodate all the slots it is given. In these cases slots can be given back to the general pool for other organizations to make use of using the Slots tab from the same Managed organizations page. The Program Administrators make the final decision on how slots are allocated once they are returned to the pool.
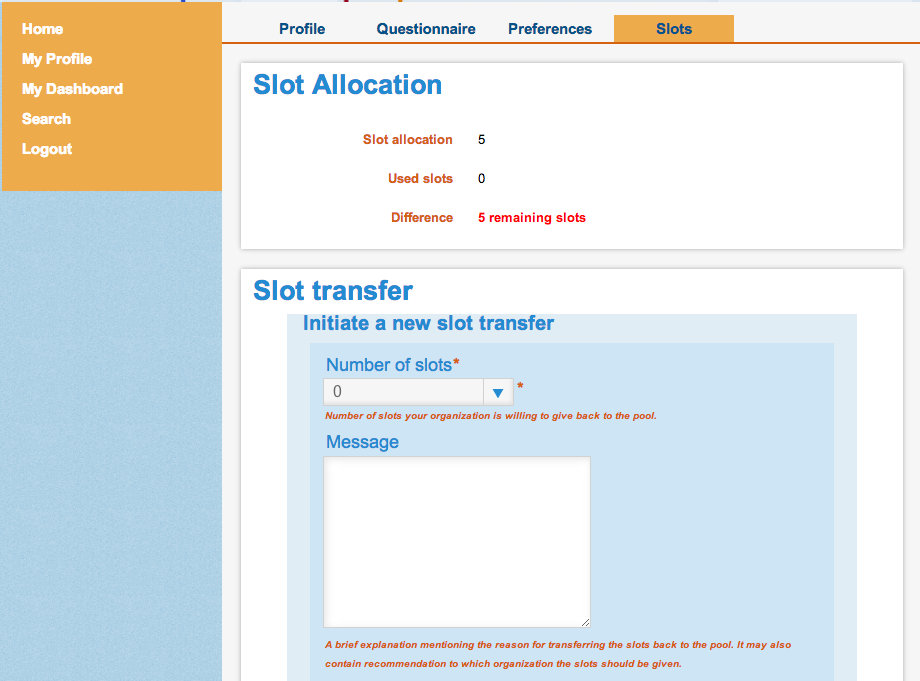
Accepting or Rejecting Proposals
An Organization Administrator also has the ability to directly accept or reject the proposals for his organization, regardless of any scores given to the proposal. He can accept the proposal either by using the sliding switch on the proposal actions left hand menu or from the drop-down list of all the proposals. In other words, an organization may receive 2 slots and decide it wants to accept proposal "Space Elevator" and proposal "Thermal Detonator". The Organization Administrator may visit the applications for "Space Elevator" and "Thermal Detonator" and accept them, meaning these 2 proposals will then be the accepted projects for their organization no matter what the proposal review scores are. The top N ranked proposals that are marked "Accepted", where N is the number of student slots Google allocates to each organization, will be those that are accepted into the program.
Organization Administrator should enter organization-specific acceptance and rejection messages into the Organization's Profile before the Student proposal phase concludes (see the timeline on the program homepage for exact date and time).
To do this:
- go to My DashBoard -> My organizations
- Select the Organization from the list
- Select "Edit"
- Scroll down to find the Edit Fields.
Upon acceptance or rejection, a student will receive an email consisting of a standard message from the Program Administrator, followed by the organization-specific message, which is in turn followed by a signature.
For clarity, the list of requirements an organization must meet to be able to accept a Student proposal:
- You must have a number (at least "1") in the text field for "# desired slots" on your Organization profile.
- Your organization must have been allocated slots by the Program Administrators. You will not be allowed to accept more students than you have slots allocated to you.
- You must have toggled the "Accept Proposal" switch on each student proposal you want to accept to "Yes" or marked the proposal as "accept" from the proposals list.
- You must have a Mentor assigned to each proposal you want to accept.
The Deduplication Process
Students can submit more than one application to more than one Mentoring Organization during the application period. Once Organization Administrators have marked their student proposals as either Accept or Reject, some Students may be about to be accepted by multiple Mentoring Organizations. However, Students may only work on one project and within one Mentoring Organization each year. Information about students who have had proposals accepted by multiple organizations is later made visible to all Organization Administrators on their Proposals list.

You will be able to see if you are in a duplicate situation with another organization after the Program Administrators have made that information visible. You are encouraged to contact the organizations with whom you are in a duplicate situation and resolve it directly with them using the other organizations' contact information as listed on the proposal.

However, because some duplicates cannot be resolved between the organizations, the Program Administrators will set up a live IRC meeting where Organization Administrators can resolve these conflicts in real time.
Please note that when the Program Administrator accepts Students for the program all proposals are converted to projects.
Do I have to work in Melange?
Yes. Everyone participating is required to work within Melange as part of participating in Google Summer of Code.
Can I sort student projects by tags?
No.
Student Proposal Period
When students begin submitting proposals to an organization, a list will appear in the Proposals section of My Dashboard.
Viewing a Proposal
If you click on any of the proposals in the Proposals list you will be able to see the student's full proposal.
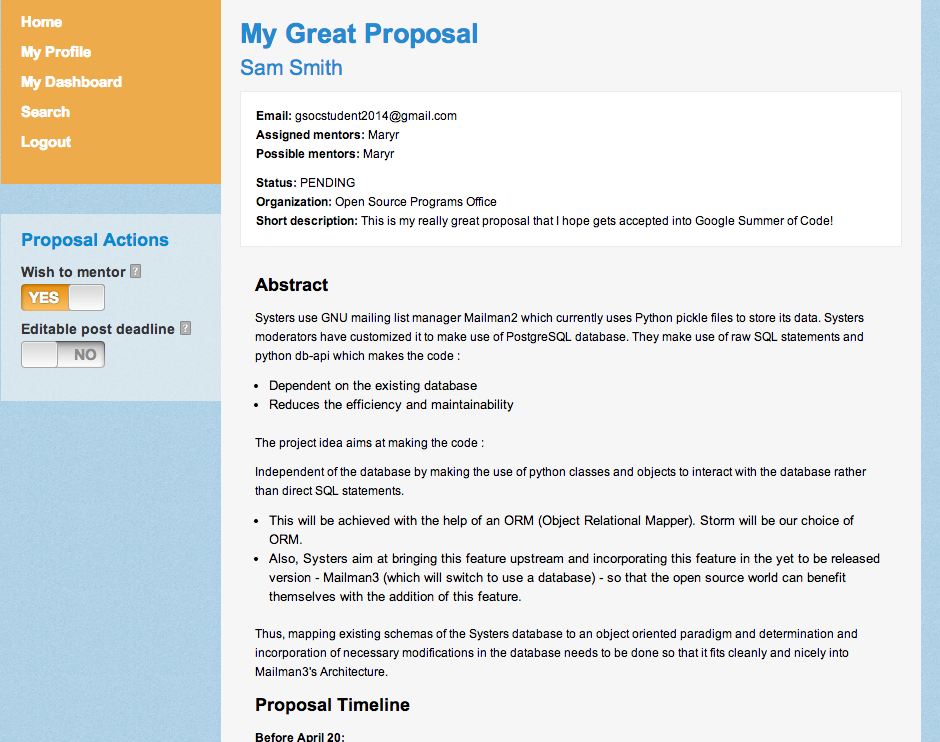
In addition to viewing the full text of the proposal you can also:
- Add "My Score": You can add a score (marked in a number of stars) that you think fits the proposal's quality. You can also view the "Average score" which is the average of all scores given to that student's proposal from all Mentors and Organization Administrators within the organization. Please note that each organization may use their own criteria for scoring a proposal, and some organizations don't use this feature at all. Speak to your Organization Administrator about how they administer acceptance of proposals to be sure you use this feature as intended by your organization.
- Leave a Comment: You have the option to leave a comment on any Student's proposal for your organization. You can choose to leave this comment "Private" so that only Mentors and Organization Administrators within your organization can see the comment, or you can choose to uncheck the "Private" box and make this comment viewable to the Student as well as the Mentors and Organization Administrators.
- Wish to Mentor: This indicates whether you would like to volunteer to be a Mentor for this Student's proposal. It will also list your name in your Organization Administrator's options when assigning Mentors to proposals. Please note that marking that you "wish to mentor" does not mean you are automatically assigned as the Mentor of that proposal if it is accepted. Your Organization Administrator is the final decision maker for who mentors a Student if she is accepted. Organization Administrators can also add Mentors after the Student project announcement.
Student Proposals and Acceptance
As a Program Administrator, your role in the Student proposal phase is (somewhat) limited. Once the student application phase has ended it is now up to you to complete four tasks:
- Slot Allocation
- De-duplication
- Accept proposals
- Reject proposals
Slot Allocation
As part of the Google Summer of Code program process, each organization is given a number of slots into which they decide how many student proposals they want to accept. The slot allocation page (Admin Dashboard -> Allocate Slots) is available to Program Administrators in Melange as soon as a new program has been created. This page will list all the accepted Mentoring Organizations for the current program. It displays the total number of slots you have allocated at the bottom of the page and text fields to add notes if desired for each organization.
Click directly on the individual field you want to change, enter the number of slots to allocate, and press Return to save the number you've entered. The save button does not do anything on this page.
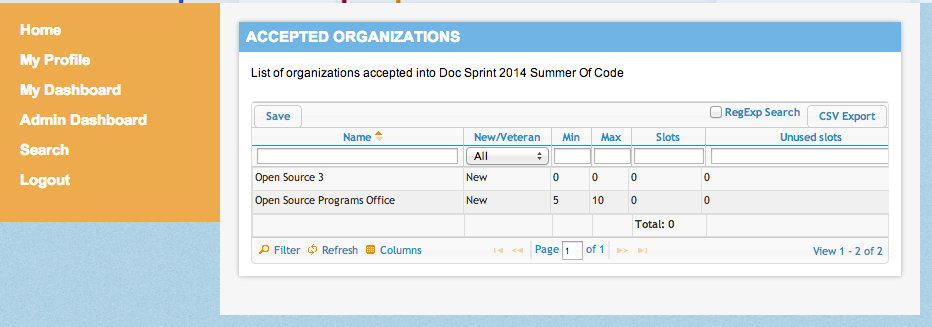
You can then make the individual slot allocations visible to each mentoring organization by going to the Program Profile (Admin Dashboard -> Program Settings -> Edit program settings) and checking the box for "Slots allocations visible".

Once the organizations have been chosen, the Organization Adminstrators submit their minimum and maximum number of students that they would like to accept via their organization profile.
Program Administrators then decide the number of slots each organization will receive. Those numbers are manually entered by the Program Administrator into the Allocate Slots (Admin Dashboard -> Allocate Slots) page under 'Slots'.
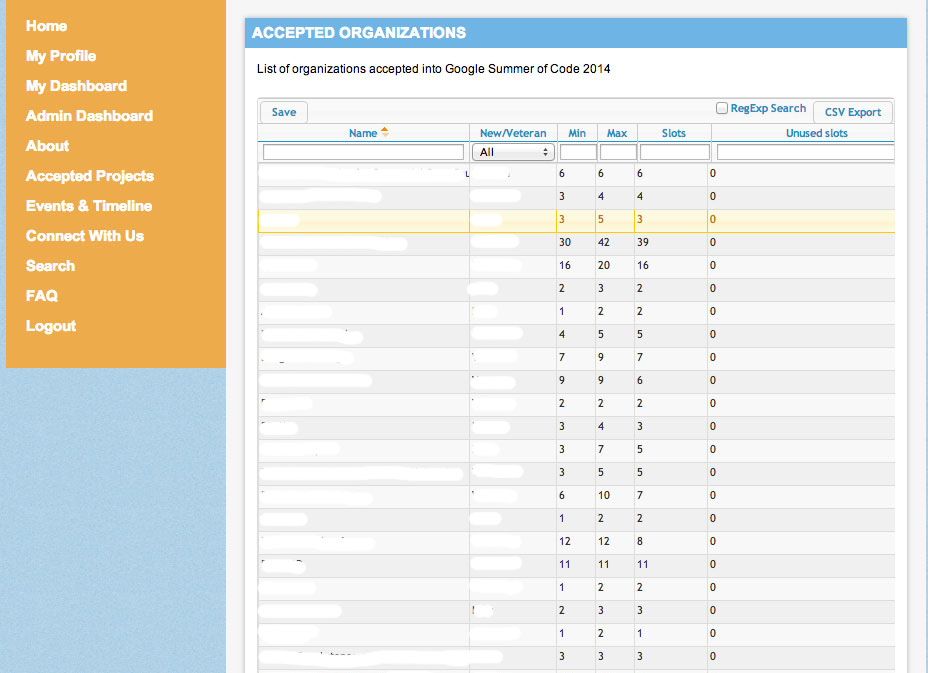
If there are Mentoring Organizations that do not need some of their assigned slots, the Transfer slots to pool page is used by the Organization Administrators.
The Program Administrator then manually reassigns the extra slots via the Transfer slots to pool page.

Ticking the box next to the Mentoring Organization's name and clicking the Accept button will take the slots away from the Mentoring Organization and make them available to reallocate on the Slots page. The Program Administrator can then change the slot allocations for another Mentoring Organization in the list if she so chooses. The slots will otherwise just remain in the "pool" for allocation.
Deduplication
Once Organization Administrators have marked their student proposals as either Accept or Reject, this will put some Students into a situation where multiple Mentoring Organizations want to accept them. Students can only be accepted by one Mentoring Organization. To resolve these potential conflicts, the Duplicates page (Admin Dashboard -> Duplicates) is accessible by Program Administrators. On your first visit to the page, you will need to press the "Initialize Calculation" button on the Duplicates page.

The script takes 2-3 minutes to run for the first time - refresh the page to see the full list of Mentoring Organizations who are in a duplicate situation. After the first calculation (and as duplicates resolve themselves and you want to see a new list) you will need to click the "Recalculate" button on that page. The script will give an indicator of its current status as either "calculating" or "idle."
.png)
Only when the list is empty and the script indicates it is idle after a calculation are all duplicates resolved in Melange. Make sure the organizations work with each other during this time to resolve their duplicates and decide who will accept the student and who will release the student from the accepted state.
Rejection/Acceptance emails
When all duplications are resolved, you can then send notifications of the decisions to the Students. You should edit the emails through the Admin Dashboard -> Edit program settings -> Edit messages links. Melange will retrieve the information regarding the program name, organization, etc. automatically for you. For more information on editing messages, see the 'Setting up a new Program' chapter in this manual.
Accepting/Rejecting Proposals
When you are finally ready to accept and reject proposals, you will find the Bulk accept proposals and send acceptance/rejection emails link from the Admin Dashboard.

You will need to click on the link, visit the next page, and then click on the "Start" button in order to start the proposal to project conversion. Only click "Start" when you are really ready to begin. The process to convert the proposals and send emails to Students takes 10-15 minutes.

Once you press the "Start" button the page will refresh and you will receive a new screen.

You will need to press the "Send acceptance/rejection emails" button after the process has completed to notify Students of their acceptance or rejection.
In rare circumstances every year there are Students who need to be accepted after the acceptance deadline and Students who drop out. To withdraw a Student after the accepted students deadline, visit Admin Dashboard -> Accept/withdraw projects. Once the full list loads (this may take a minute), filter to find the student you want. Then check the box to the left of their name, and then click on the "Withdraw" button on the top of the list. The list will refresh and the status of the Student will be changed.
If you want to accept a student after the acceptance deadline, visit Admin Dashboard -> Proposals submitted. Once the full list loads (this will take about 20 minutes), filter to find the student you want. Then check the box to the left of their name, and then click the "Accept" button on the top of the list. The list will refresh and the status of the Student will be changed. No email will be sent to the Student to notify him of this change.
Student Work Period & Evaluations
Once Student projects have been accepted and Students are working on their projects, Program Administrators must set up Student and Mentor evaluation templates, send evaluation reminders, and keep an eye on the general flow of the program.
Setting up Student & Mentor Evaluation Templates
Mentors evaluate Students, and Students evaluate Mentors, twice during the program. Once at the halfway point of the program ("midterm") and once at the end of the program ("final"). The Program Administrator must create evaluation templates before Students and Mentors are able to complete them by following the steps outlined below.
- Admin Dashboard -> Evaluations -> Student Evaluations -> Create or Edit Midterm
- Admin Dashboard -> Evaluations -> Mentor Evaluations -> Create or Edit Midterm
- Admin Dashboard -> Evaluations -> Student Evaluations -> Create or Edit Final Evaluation
- Admin Dashboard -> Evaluations -> Mentor Evaluations -> Create or Edit Final Evaluation
Information about using the tool to create the evaluations provided can be found on the previous "Organization Application and Acceptance Period" section.
Program Administrators may also want to preview the evaluations after creation to ensure all information is accurate.
- Admin Dashboard -> Evaluations -> Student Evaluations -> Preview Midterm Evaluation
- Admin Dashboard -> Evaluations -> Mentor Evaluations -> Preview Midterm Evaluation
- Admin Dashboard -> Evaluations -> Student Evaluations -> Preview Final Evaluation
- Admin Dashboard -> Evaluations -> Mentor Evaluations -> Preview Final Evaluation
Sending Evaluation Reminders
When the deadline for evaluations is approaching, the Program Administrator sends a reminder email via Melange.
See Dashboard -> Evaluations -> Sending Evaluation Reminders -> Evaluations for Mentors (Midterm or Final button as desired) or Evaluations for Students (Midterm or Final button as desired). Email reminders will not be sent to Students or Mentors who have already submitted an evaluation.
Midterms
Once the deadline for Mentor and Student evaluations has passed, the Program Administrator can View Midterm Records (Admin Dashboard -> Evalutions -> Student Evaluations -> View Midterm Records) to see the Students' projects that successfully passed the midterm.
To view Midterm records for Mentors see Evaluations -> Mentor evaluations -> View midterm records.
Possible Student evaluation states
- Pass: The Student submitted an evaluation of their Mentor before the deadline, the Mentor submitted an evaluation of the Student before the deadline, and the Mentor marked the Student as "pass" on the evaluation.
- Fail: The Student automatically fails if she does not submit an evaluation of her Mentor before the deadline, regardless of the grade the Mentor gives the Student. The Student also fails if she submits an evaluation of her Mentor and the Mentor marks the student as "fail" on the Student's evaluation.
- Undecided: The Student submitted an evaluation of her Mentor, but the Mentor did not submit an evaluation of the Student by the deadline. The Student is in this state until the Program Administrator manually changes the Student's grade to either a pass or a fail.
Changing Student Evaluation Records Manually
Every year a few Mentors and Students miss the evaluation deadline for forgivable reasons, placing a Student in a fail or undecided state that is not appropriate for their situation. Each Student record must be manually changed to fix this issue.
You can create the page that lists all the Student evaluation records, called the Evaluation Group Overview, by navigating to Dashboard -> Evaluations -> Evaluation Group -> Create. Once this page is created, it will be empty. To update the list of student evaluation records on this page you can click on the Update records button. This button can be clicked any time after creating the Evaluation Group. However, the Update projects button should only be used after the evaluation ends.
Once the list is created by clicking the Update records button, a Program Administrator can then find the student record, click on the name, and change the grade to pass or fail. Pressing the Save and Update Project button will save the changed record and bring you back to the Grading Records Overview page.
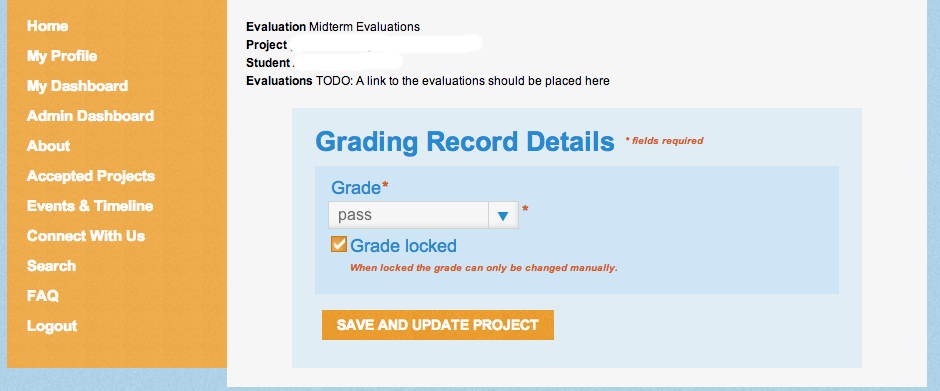
Finals
After the program ends, the Program Administrator can View Final Evaluation Records (Admin Dashboard -> Evaluations -> Mentor (or Student) Evaluation Records -> View Final Evaluations) to see the results of either the Mentor or Student final evaluations.
After the Program
Submitting Code Samples in Melange
As a requirement of Google Summer of Code, all Students who receive passing final evaluations will need to provide either a sample or a copy of the code they produced as part of participating in the program. Ask your Mentor if you are not sure which you should do. All Students will need to add files, which can include source files, a single .diff file, multiple .diff files, git bundles, etc. to their project in Melange.
If your status is in a "fail" or "undecided" state you will not be able to upload your code sample.
Code Sample File Naming Convention
Name your tarball file according to the following convention: givennames_surnames.tar.* (e.g. Carol_Smith.tar.gz)
How to Provide Your Code Samples
Login to your your account in Melange.
- Go to My Dashboard
- Go to My Projects section and choose the project you worked on
- Click on Update
- At the bottom of Update Project page, use the form to upload code samples
Keep in mind there is a firm deadline for submitting code samples via Melange. Check with your Organization Administrator if you need more information.
Before the Program
Here are some things a Student can do to learn more about Google Summer of Code before the Student Applications phase of the program begins.
View List of Mentoring Organizations
All past and current Mentoring Organizations from 2009 to the present can be found in Melange. From the Melange homepage, click on the "See all <number of organizations> Mentoring Organizations" under the Mentoring Organizations box to see a list of the Mentoring Organizations from the most recent year of Google Summer of Code. From there, you can see all organizations by year of the program by going to the drop down menu on the upper right hand corner of the page marked Select Program.
When you click on an organization, you can see a list of that organization's Accepted Projects, a description of the organization, Tags, and Contact information.
The "Tag" label helps organizations classify the type of work they do and what type of skills a student may need to work with the organization's software.
To contact an organization before the program starts, look on the right hand side of the organization page and use the various communication channels listed (IRC, email, Blogger, etc.).
View Past Projects and Code Samples
To view a list of past Google Summer of Code projects, click on Accepted Projects on the left hand navigation bar. Here you can sort the list by student, title of the project, or organization by clicking on the column heading. Code samples of projects from the most recent year of the program can be downloaded by selecting a specific project. You may also view projects from previous years of Google Summer of Code by going to the drop down menu on the upper right hand corner of the page marked "Select Program". The earliest year of Google Summer of Code data stored in Melange is 2009, code samples from all years before 2012 are available on code.google.com/hosting under the label:google-summer-of-code.
Evaluations
Student evaluations can be found on My Dashboard -> Evaluations from the Melange homepage during the designated evaluation window. You will be notified by e-mail when the evaluation window is open.
Midterm
To complete the midterm evaluation, click on Midterm Evaluation in the Evaluations list. Fill out the required information and press Submit.
Final
To complete the final evaluation, click on Final Evaluation in the Evaluations list. Fill out the required information and press Submit.
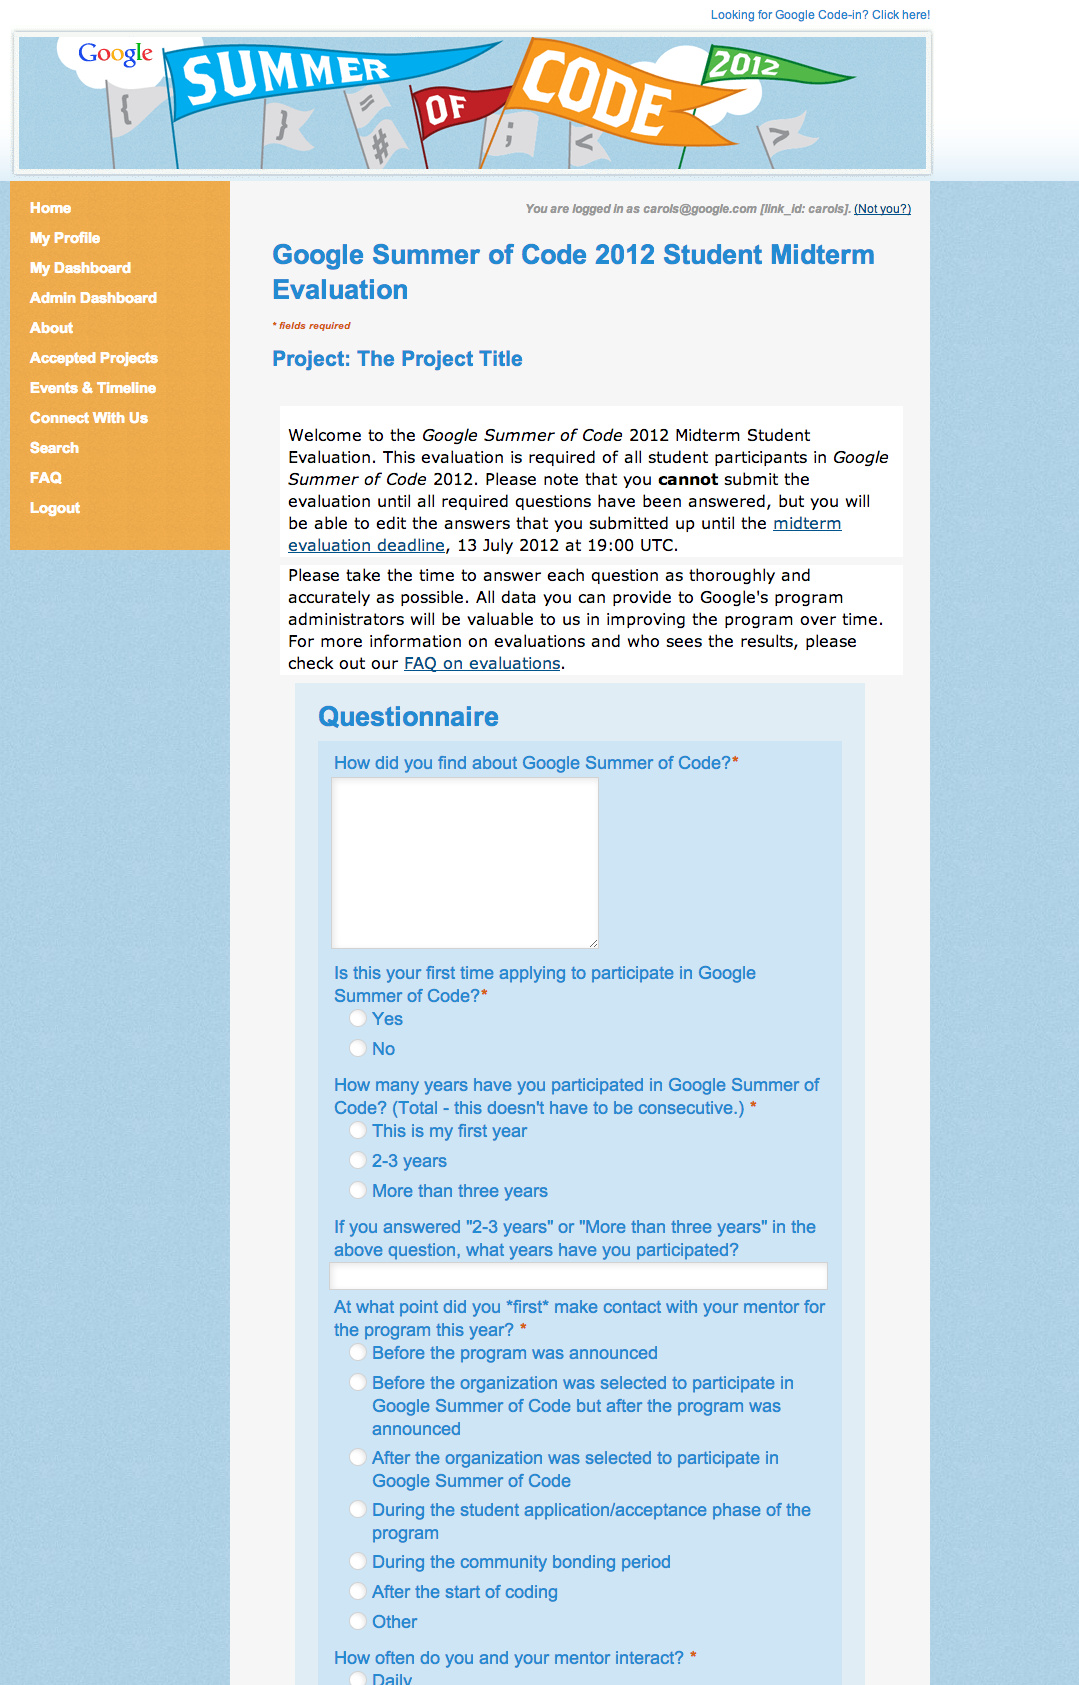
For both the midterm and final evaluations, as soon as you press Submit, the evaluation will be automatically visible to the Organization Administrator, but not to the Mentor associated with your project (unless your Mentor is an Organization Administrator). You can edit your evaluation until the evaluation window closes. After that, you cannot change anything.
After the evaluation window closes, you will receive an e-mail to notify you of your evaluation status with information about whether you have passed or failed. You can view submitted evaluations by visiting My Dashboard -> Evaluations.
Once the window closes your project will be in one of three states:
- Pass: The Student submitted an evaluation of their Mentor before the deadline, the Mentor submitted an evaluation of the Student before the deadline, and the Mentor marked the Student as "pass" on the evaluation.
- Fail: The Student fails if she submits an evaluation of her Mentor and the Mentor marks the Student as "fail" on the Student's evaluation. The Student also automatically fails if she does not submit an evaluation of her Mentor before the deadline, regardless of the grade the Mentor gives the Student.
- Undecided: The Student submitted an evaluation of her Mentor, but the Mentor did not submit an evaluation of the Student by the deadline. The Student is in this state until the Program Administrator manually changes the Student's grade to either a pass or a fail.
Student Proposal Period
During the Student proposal phase, a Student can create a profile in the program, research projects, and reach out to the Mentoring Organizations they are interested in learning more about.
Creating a Melange Profile
Before you can apply to participate in Google Summer of Code you must create a profile in Melange. Please note: you must have a Google account in order to register and create a profile with the program. If you don't have a Google account, you will need to sign up for one at accounts.google.com/signup.
Once you have a Google account and have logged in, the first step to create a profile is to press the Create Profile button. (If you don't see the Create Profile button, you haven't logged in to your Google account yet.) Be careful to register as a Student, not a Mentor.
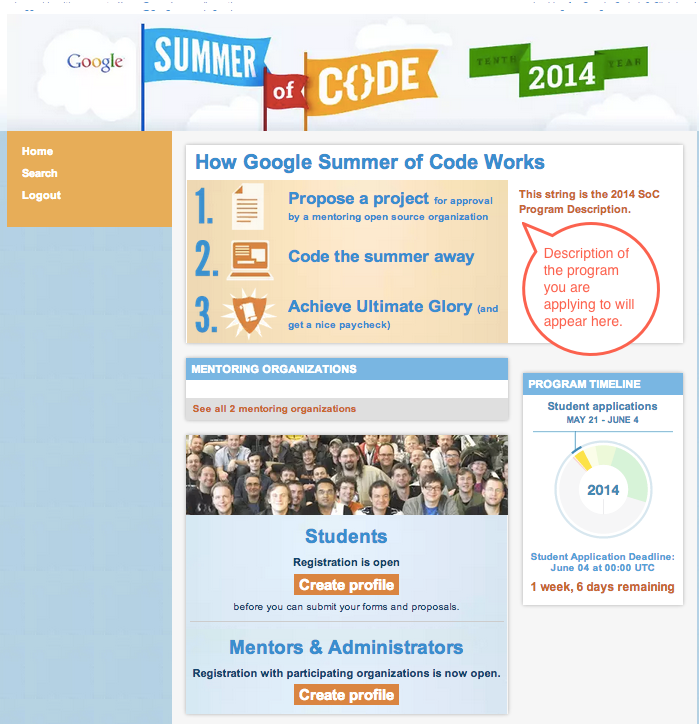
This will bring you to the Create Student Profile page. This is where you create your profile by registering. You will need to fill in your name, email address, home address, and other information.
IMPORTANT: you should only create one profile for the specific program year. Having multiple student profiles in one year will result in your removal from the program.

Important Points About How to Enter Your Information
Make sure that your Public Name and User Name are professional and consistent with the name or handle you may already be using online. For example, if your name is Jane Chow and you go by "jchow" on your project mailing list, you might choose "Jane_Chow" or "jchow" as your "Public Name". If you have registered for Google Summer of Code in previous years it will be helpful to the program administrators if you use the same spelling of your name, school, etc as in years past. Please do not choose a Public Name or User Name that is potentially offensive, such as "cerealkiller".
"Usernames" can only be used once in Melange but do carry over from one year to the next, so if you have registered before, please use your old username.
For "Public Email", please enter an email address to be used by Organization Administrators or Mentors seeking additional information. Please use the email address associated with the Google Account information you provided during the application process. This email will be used as the primary mode of contact by Google throughout the program, e.g. the email address which we will use to subscribe you to the Google Summer of Code Students-only mailing list.
Your "Residential Address" should be your legal address; for example, where you are registered to vote. Your Shipping Address may be different. If you want your tee shirt, etc sent to a different address, please check the box to reveal more fields to be filled out.
IM Handle and Home Page and Blog URL: please note that these are not required text fields. If you do not use IM, blog, etc. or you prefer not to share that information, leave the fields blank.
Your School Name refers to your college or university, not your department or program. For example, if you are studying at the "Institute for Software Design in the College of Engineering at BITS Pilani", your School Name should be entered as "BITS Pilani", not "Institute for Software Design", or "College of Engineering". Please review the school names in the dropdown list before entering your school name as text.
Similarly, your School URL should be the top level domain for your school, not that of your department or program.
Press Submit at the bottom of the page.
If you do not fill out a required field or put invalid data in the form, fields with errors will be highlighted in red.

If you have successfully completed your profile, the top of the form will now be labeled "Edit Profile" instead of "Create Profile".
When your profile is saved you will see two new options in your sidebar - My Profile and My Dashboard.
You can visit My Profile at any time to edit your personal information. My Dashboard is where you will find links to your Proposals page, a list of Important Documents and a list of Shipments sent to you. If you are accepted it will eventually display links to your evaluations, and more.
Submitting your Proof of Enrollment
You have one last important step to complete before you can submit a proposal to Google Summer of Code - submitting your proof of enrollment in an accredited institution of higher learning. Begin by returning to the homepage.
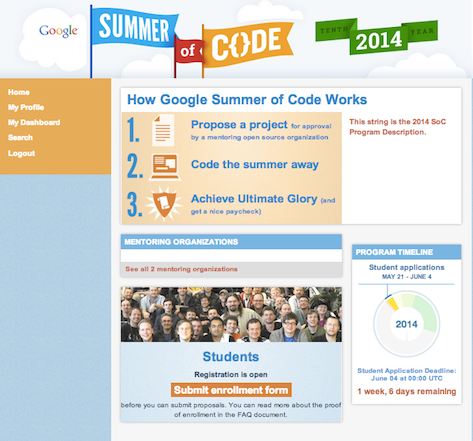
Click on Submit enrollment form, choose the file to upload it into Melange, and hit Submit. Be sure that your file image is is legible before you upload it! You should see a green "Data Saved successfully" bar across the top of the page.
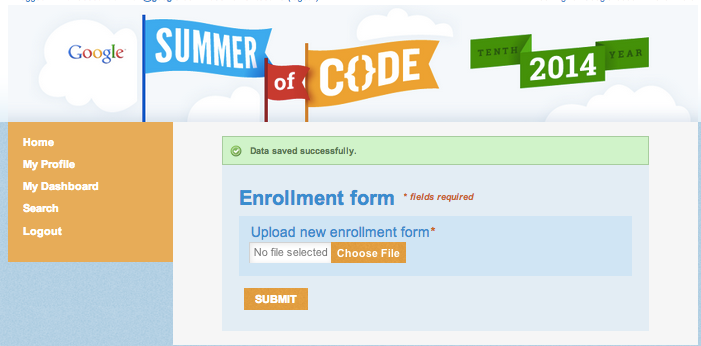
The Proposal Process
Submit a Proposal
Now that you've created a profile, you can apply to participate in Google Summer of Code by submitting at least one proposal to a participating organization. (You should have already browsed through the list of accepted organizations that interest you, searching by relevant tags (such as C++, HTML, Python, etc.) that may help you make your decision about which organization(s) to apply to.) On the GSoC homepage, click on Submit Proposal: a list of participating organizations will appear.
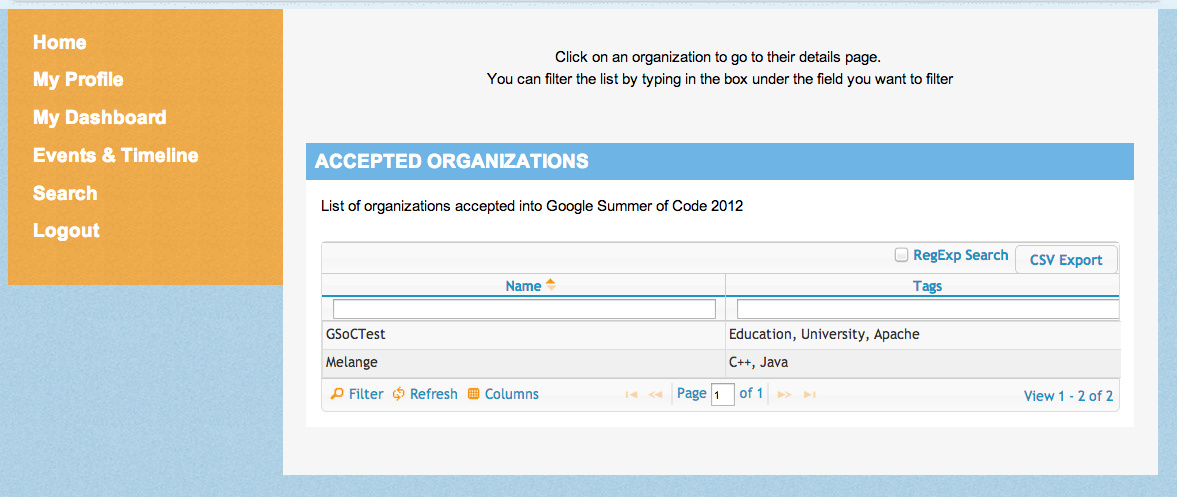
When you click on an organization, you will be taken to a "Submit a new proposal" page. Please fill out all the required information in as much detail as possible.
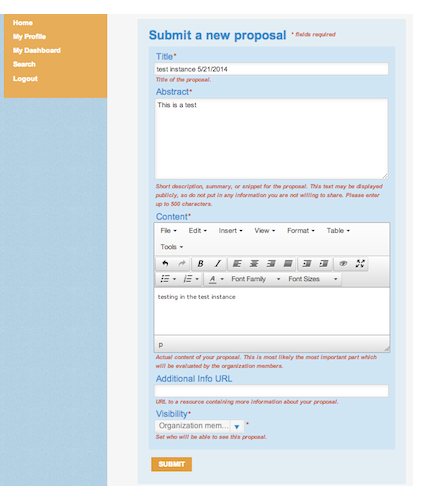
Special Notes Regarding Saving Your Proposal:
- There is no automatic save for drafts in Melange. If you want to save your proposal to come back to it later you should click Submit. But please note, when you click Submit, your proposal is immediately visible to the organization. Proposals in an incomplete state are acceptable (and expected) as it is better to have an incomplete proposal in the system than to miss the deadline entirely in case of emergency or poor connectivity. You can continue to edit your proposal until the submission deadline.
- You may choose whether your proposal is to all the other students or public. The default is that your proposal is only visible to the Organization you submit it to. A public proposal can be viewed by anyone who has the URL, but the URL is not publicized by Melange. If your proposal is accepted, certain details of the project will be publicly visible; this public/private setting only applies during the proposal period.
- After you click on Submit, you'll be taken to a read-only view of your proposal. To edit you must click on Edit Proposal under the title. If your submission is accepted into the system, you will see a green bar across the top of the form which says, "Data saved successfully". If you do NOT see this green bar, your proposal has not been saved and you MUST click Submit again.

Do not wait until the deadline to submit your proposal.
Editing a Submitted Proposal
To access and edit your submitted proposal before the deadline, visit My Dashboard and click on Proposals. This will display the list of all the proposals you've submitted. Please note that there is a limit on the number of proposals that can be submitted, so please refer to the FAQ related to the current year of Google Summer of Code for the proposal limit. Click on the proposal you want to edit to pull up an edit window.
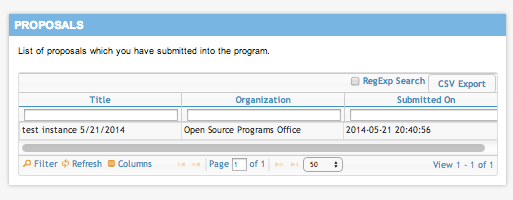
Submit Multiple Proposals
To submit multiple proposals for the same or a different organization, click on Apply from the Organization page on the Google Summer of Code website, as described in the "Submit a Proposal" section in the chapter.
Withdraw Proposal
You cannot delete a proposal, but you can withdraw your proposal before the application period deadline by moving the Withdraw slider on the left side of the page to display Yes or No.

Please Note: there is a limit to the the number of proposals you can submit, but if you withdraw a proposal you will be able to submit a new one in it's place.
Once the deadline has passed you won't be able to change your proposals visibility, or withdraw it. If you need to make changes to the proposal after the submission deadline, email the contact listed on the organization's main page and request a later edit. They may not allow this, so don't count on being able to make changes.
Comments on your Proposal
Mentoring Organizations have the ability to make comments on your proposal. If a new comment is made, you will receive an email from Melange notifying you. Visit the link provided in the email or click on the My Dashboard link on the Melange homepage, then Proposals and select one of the proposals. From that page, you can see the organization's comment.
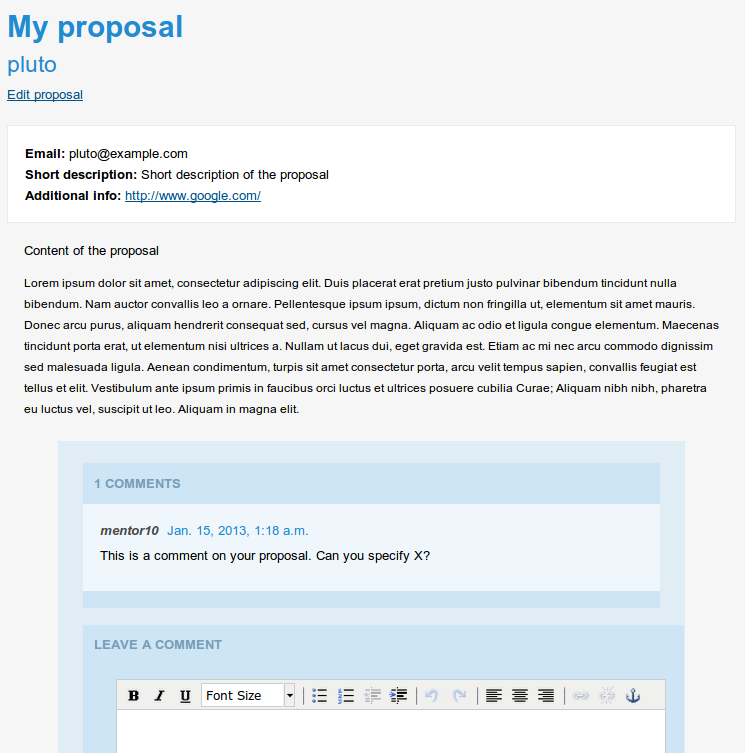
From the same interface you can answer the comment and edit your proposal if necessary. You cannot edit or delete submitted comments. Please note that the comments you make are visible to all Mentors and Organization Administrators from that organization, but are not visible to others.
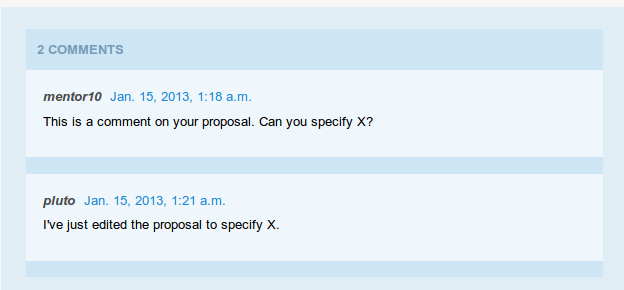
Checking the Status of your Proposal(s)
To check on the status of your project proposal(s), go to My Dashboard, and select Proposals. From there, select a proposal from the list of your proposals to see the comments or make updates.
Mentors and Organization Administrators of the Mentoring Organizations to which you have submitted proposals can still comment on your proposals and you'll be able to answer the comments even after the proposal submission deadline. They also have access to a capability in Melange to allow you to edit your proposals again. If they ask you to edit one of your proposals you will see the Edit proposal link become active again until the Mentors disable it or the project is accepted or rejected.
Remember, the proposal can be edited at any time before the student application deadline, and can be edited after the deadline if a Mentor requests it.
Acceptance/Rejection
After the program deadline you will receive an email from Melange specifying whether your proposals have been accepted or rejected by the organization(s) named in the proposal(s).
If one of your proposals has been accepted, you'll also notice that My Dashboard will have changed.
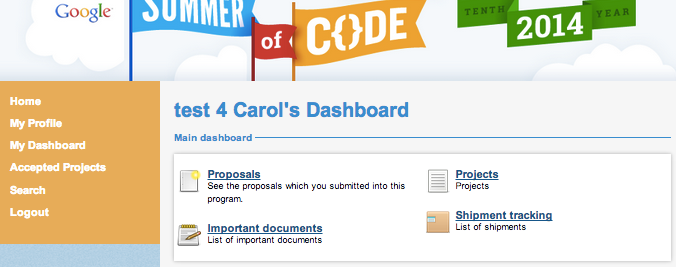
In the Projects page you'll find a proposal that has been accepted. All your proposals will be still available in the Proposals section as before. The Important documents link shows the documents you need to submit to participate in the program after you have uploaded them successfully. Shipment tracking is where you will find tracking information for packages sent to you during the program.
Your accepted project will also be displayed on the Accepted Projects section of the homepage from the left hand navigation bar, along with all the other projects accepted into this instance of the program.
Tax Forms
Detailed instructions for obtaining these documents will be sent to the private students' mailing list. Completed forms should be saved as PDFs and uploaded to Melange by:
- Visit My Profile and scroll to the bottom of the page to where it says 7. Forms.
- Your Proof of Enrollment form that you uploaded before submitting your proposal(s) will be shown first. If you need to re-upload a fresh copy you can do that here.
- Below that you will see Tax Form. The option to upload will only be available to you at the appropriate time during the program, so don't be concerned if you don't see an Upload button - just come back later.
- If the Upload button is available, choose the file you'd like to upload and press Submit.
Withdrawing from Google Summer of Code
If for some reason you cannot or do not want to complete Google Summer of Code, please contact your Organization Administrator.
After The Program
You can always access your submitted Students' evaluations by going to My Dashboard -> Student Evaluations.
You can also see your Student's (or any Student's) submitted code samples by clicking on Accepted Projects -> the Student's project. The code sample is located at the bottom of the Student's project page.
If you participated as a Mentor in Google Summer of Code in any other year and would like to access My Dashboard from a previous year, you can simply choose the program year that you want from the drop-down menu which is located just above My Dashboard.
Troubleshooting
Sometimes you will run into a problem with Melange that you're not sure how to fix. Here are some answers to common questions we've run into with the website in the past.
Where do I file bugs or feature requests for Melange?
We track all the bugs and feature requests for the website at http://code.google.com/p/soc. You can look at all the current issues in the Issues list or file a new issue with the Issues -> New Issue link.
What do I do if I can't log in anymore?
There are various reasons why you might not be able to log in to the website. Try some of these options:
- If you use multiple email addresses regularly, you might want to try logging in with a different email address. It is possible to create a profile in Melange using a different email address than your Google account email address: try logging in with one or the other.
- If you were using either an @gmail.com or an @googlemail.com email and migrated to the other, you will have trouble logging in. You'll need to contact a Melange developer on the melange-soc-dev@googlegroups.com mailing list to have it fixed.
Why doesn't "Connect With Us" have direct contact information?
We are a small team administering this program and can't answer your questions individually. Please make use of the IRC channel, mailing lists, and social networking sites we use to connect with our users so that we can distribute the workload amongst us evenly. Thank you for being patient when you ask a question on our mailing list or in IRC. We'll try to respond as soon as we're able. The GSoC Discuss mailing list, available at http://groups.google.com/group/google-summer-of-code-discuss, is the best place to ask questions as other students, mentors, and organization administrators are likely to respond to your inquiry quite quickly (there are thousands of people on the list who enjoy helping out fellow open source enthusiasts).
I got a 404 error -- what do I do now?
A 404 error means that the webpage is not found. Most likely you are trying to access a webpage that doesn't exist, has been moved, or has been deleted. If you feel like this is really a mistake, please contact the Melange developers at melange-soc-dev@googlegroups.com to see if the page was mistakenly moved.
I got a 500 error -- what do I do now?
Most often the solution to this error is to wait a little while and refresh the page. Melange sometimes has intermittent timeouts or has load issues. Try again a little later. If the defect is persistent and repeatable, please contact the Melange developers at melange-soc-dev@googlegroups.com with as many details about it as possible. Helpful details include which operating system and browser you are using, including the version number of each, what you were trying to do when you encountered the problem, and exactly what happened.
What is a Mentor?
A mentor is a member of an organization that is designated by the Organization Administrator and helps guide a student through Google Summer of Code. In Melange, a Mentor can do the following tasks:
- Create a personal profile
- Request to mentor a particular student project
- Leave public or private comments on a student proposal
- Complete midterm and final evaluations for students
What is a Program Administrator?
A Program Administrator is a Google Open Source Programs Office employee who manages the program.
Program Administrators:
- decide the timeline, scope (number of Mentoring Organizations and Students), rules, rewards, and all other program details
- decide admission into the program for Mentoring Organizations and can designate others as Program Administrators
- are the principal point of contact for program-wide problems
- are responsible for ensuring that the program complies with all data protection requirements
- are the final authority for any disputes during the program
What is a Student?
A student is someone who has applied and been accepted into the Google Summer of Code program.
What is an Organization Administrator?
An Organization Administrator participates in Google Summer of Code on behalf of a Mentoring Organization.
Organization Administrators:
- approve, assign, and manage Mentors within their Mentoring Organization
- create the initial application for the organization to apply for the Google Summer of Code
- many Organization Administrators also choose to mentor one or several Students during Google Summer of Code
- make sure Mentors are submitting their evaluations of students on time


 Registering as a Mentor throughout the Program


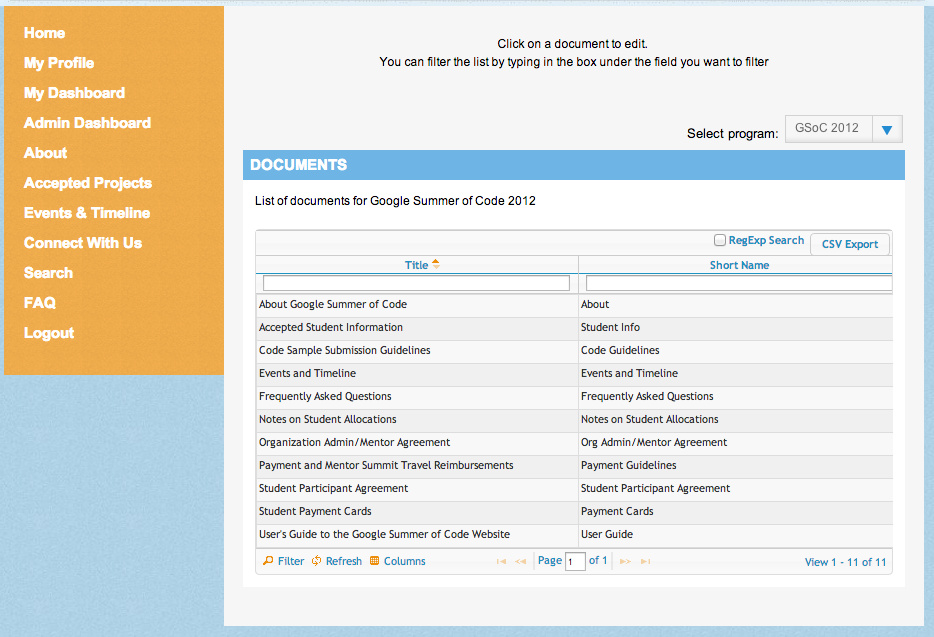
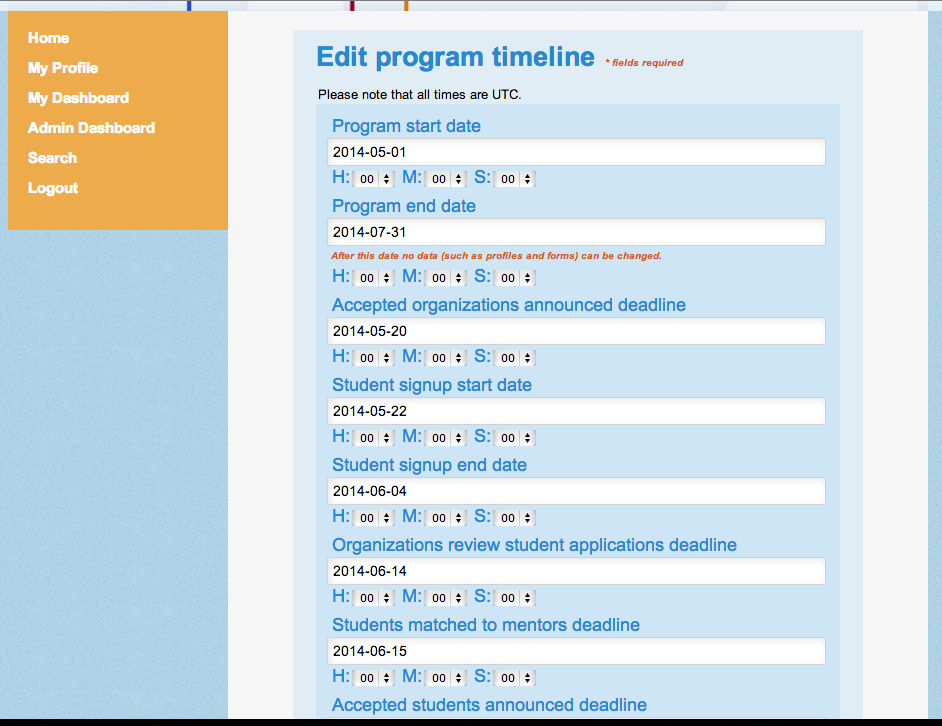


.png)


