About This Manual
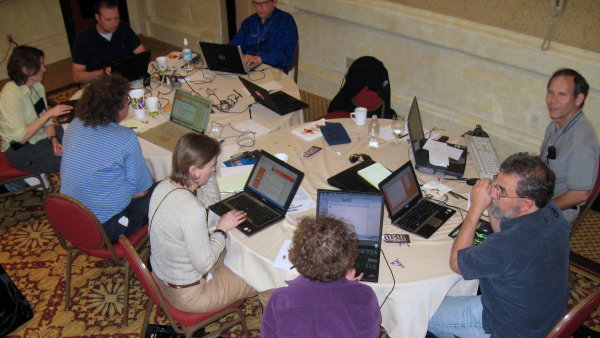
This manual evolved during a two-day Book Sprint at the Doctrain West conference. Scott Abel extended the invitation, and the sprint was a collaborative effort by FLOSS Manuals, Doctrain West, and the Mozilla Foundation.
Janet Swisher and Anne Gentle did the organization for the event with assistance by David Tenser (Mozilla) and Adam Hyde.
Chris Hofmann (Director of Special Projects at Mozilla) also attended.
25 writers collaborated over two days in virtual and real space to produce a book in two days! In addition to original content, large amounts of material was reused from the excellent Firefox Support Knowledge Base.
On the 16th May 2009 the Mozilla community got together for a one-day sprint to copy-edit and polish the manual. Lastly, on the 16th of July 2009, the Mozilla community once again came together to update this manual for Firefox 3.5. This consisted of simple things such as updating screenshots to major jobs such as writing about new Features for this release. We would like to thank all who participated for their hard work to create this excellent resource.
Before You Get Started
Firefox is entirely free software. You do not have to pay anything to download and install it.
Taking advantage of its popularity, some sites have recently appeared on the Web that attempt to charge money for the download, installation, or support services of Firefox. Such sites are not authorized by the Mozilla Foundation and may misuse personal information that you give to them. If you spot one of these sites, or hear about someone being charged for Firefox, please report it at http://www.mozilla.com/legal/fraud-report/index.html. If you can include the actual address of the site where the download was offered or the site where you submitted your credit card, that helps in tracking down the bad guys. Your credit card records might also list details about the business or name of the company charging your account. This kind of information helps the Mozilla team investigate for trademark and fraud violations and get bad sites shut down.
The official and free download of Firefox can be found at http://getfirefox.com or http://mozilla.com. Free support for Firefox can be found at http://support.mozilla.com. These are the sites you should use for downloading or getting continued support for Firefox.
What is FLOSS?
FLOSS is an abbreviation for Free/Libre/Open Source Software. The terms Free, Libre, and Open Source are all used to describe software that guarantees certain freedoms both to users and to programmers. Groups that promote the use of FLOSS software often use different terms to refer to it. For example, the Free Software Foundation and the GNU project often refer to "free" software, while other groups including Debian and the Open Source Initiative promote "Open Source" software. In English, the term "free" can mean either "no-cost" or "having liberty", so "libre software" is often used to emphasize that the software provides freedom rather than simply being free of cost.
The ideas encapsulated in the terms "free" and "open" are similar but not identical. While there are dozens of variations of these terms in use, all FLOSS software shares some of the same basic ideals of software freedom, including:
- Freedom to run the program
- Free access to complete source code
- Freedom to study the code
- Freedom to modify the code
- Freedom to redistribute the modified code
The specific freedoms provided by each software project can vary, but these ideas form the basis for most FLOSS licenses. From a user's perspective, FLOSS software is always free to use and to copy, both now and in the future. There are some unclear boundary lines and gray areas that must be kept in mind when copying or distributing FLOSS software, including trademarks and "proprietary" drivers in the Linux kernel. Each FLOSS software project includes detailed information on what rights are guaranteed by the software license. A wide variety of FLOSS is available for all common platforms, including Windows, Mac OS, and Linux.
Firefox
For many users, Firefox is their first introduction to FLOSS and the ideas it represents. FLOSS is a core aspect of the Mozilla project, which develops the Firefox web browser. As a result, everyone is free to use, copy, improve, and extend Firefox. Another core aspect of the Mozilla project is its participatory development strategy, which means anyone can get involved with making Firefox better. Millions of community members help make Firefox better every day.
Who are these people and how are they connected?
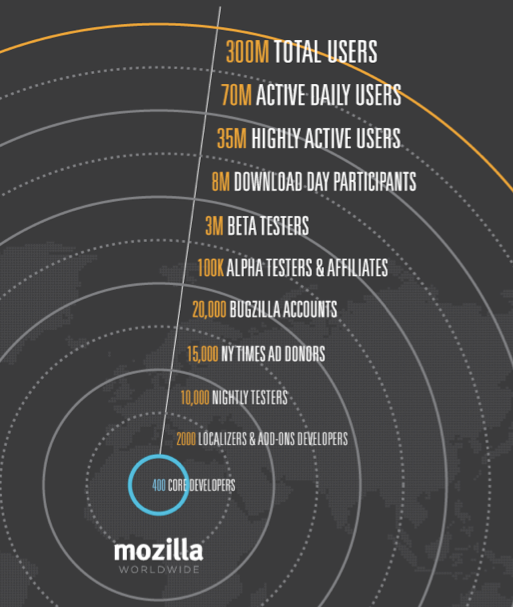
Growing the use of Firefox is a grassroots effort. With no massive advertising campaigns and mostly word-of-mouth and technology-based message passing, the user base of Firefox has reached 220 million people. One way to describe the growth is "viral" (but in a good way, not like "software viruses") — passing from developers, to bloggers, to users, to more users.
At the core, around 400 developers work on the source code that powers Firefox. More than 30% of Mozilla code is contributed by volunteers, with the rest being contributed by full-time contributors who are paid either by Mozilla or by other companies involved in Mozilla development. In case you were wondering, "Mozilla" was the original name of the dinosaur-like mascot created in 1994 for Netscape Communications Corporation. "Mozilla" is now the name of both the non-profit foundation and its fully owned corporation that brings us Firefox and maintains the code base that it's built on.
All participants in the Mozilla project, from volunteer coders to paid contributors, highly value the community and collaborative efforts that go into Firefox development. They want to both improve the browser itself and make the web better. Contributors to Mozilla include industry leaders in particular areas of expertise such as networking, CSS, HTML, graphics, and wide array of other technologies that power the web. Mozilla is a diverse set of people, and nearly anyone can make a big difference, whether by developing code, writing documentation, testing software, or just telling friends about Firefox!
Beyond "core" developers, many different groups of dedicated people help make the Mozilla project successful. In the Mozilla community, there are:
- More than 500 people who localize and help to deliver Firefox into over 60 languages.
- Hundreds of other developers of "add-ons", who create extensions to customize Firefox and experiment with innovation.
- 10,000 people who help to test "nightly" development releases and help to maintain quality and provide feedback during the development process.
- 15,000 people who opened up their wallets to contribute $30 each to pay for a $250,000 two page ad in the New York Times to promote the release of Firefox 1.0. The idea for this campaign came from a community of marketing developers that help to promote Firefox in many different ways.
- 20,000 people are active in "bugzilla", the Mozilla Project bug and feature tracking system. All these are contributing to future Firefox improvements.
- 8 Million people recently participated in "Download Day" which set a world record for the most downloads of a software package on the first day of the Firefox 3 release.
These examples demonstrate how many different communities and people with different skills all coming together can build and maintain a viable project. We hope that Firefox serves as an ideal introduction to FLOSS and to the concept of community-powered software development.
How the Internet Works
The Internet is a decentralized worldwide network of computer networks. Although many people use the terms "the Internet" and "the Web" interchangeably, the Internet is the physical connection of computer networks together with certain methods of communication. The Web is one of many ways of communicating using the Internet. You can also use the Internet for e-mail, file sharing, Usenet news, and chat.
Connecting to the Internet
The easiest way to use the Web is often to find a local Internet café or telecenter that provides Web access. If you need to set up our own computer with an Internet connection, you would, typically, open an account with an Internet Service Provider (ISP). You may need some extra equipment, such as a modem or a router, to enable your computer to connect with the ISP.
The ISP in turn may purchase its own Internet access from a national provider (unless it is a branch of a national provider). National providers may similarly receive their connection from one of the multinational companies that maintain and operate the servers and connections that are called the backbone of the Internet. The backbone is made up of major server installations at critical points, and global connections between them via fiber optic cables and satellites. These connections enable communications between Internet users in different countries and continents. National and international providers connect to this backbone through special routers known as gateways, which are connections that allow one network to communicate with another. Gateways, just like other routers, may be a point at which Internet traffic is monitored or controlled.
When you connect to the Internet, your computer is normally assigned a numeric IP address, which can be written as four numbers in the range 0-255, separated by dots. Like a postal address, it uniquely identifies a single computer on the Internet. Depending on your Internet Service Provider, your computer may be assigned different IP addresses at different times that it connects to them. All Web sites and Web servers also have IP addresses. For example, the IP address of www.frontlinedefenders.org is 217.173.101.253.
Visiting a Web site
When you want to visit a Web site, you normally type the "name" of the Web site into your browser and not the IP address. For example, to access the Frontline Web site you would type in http://www.frontlinedefenders.org instead of 217.173.101.253. The name of the Web site is also called the domain or domain name.
After you type the domain name into the browser, your computer sends a message with this name to the Domain Name System (DNS). This system consists of dedicated computers on the Internet that translate names into IP addresses. The DNS means that you need to remember only the Web site's name rather than a complex string of numbers. After the DNS server translates the domain name into an IP address, it shares that information with your computer.
Now your computer can try to connect to the Web site using its IP address. A path from your computer to the destination Web site must be found. This path may travel through countries, oceans and space; it could be thousands of miles long and could pass through numerous computers. How does it know which way to go, when there are hundreds of millions of different Web sites? The task of directing your message to the Web site (and back) is performed by routers, and the process is known as routing.
For our purposes, it's worth noting that routers can be given simple instructions on how to behave and can be used as a tool for censorship. Any router can be manipulated to record, re-direct, or block access to certain Web sites.
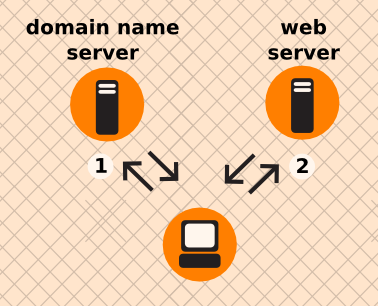
Example of what happens when you find a Web page:
- You type in http://globalvoicesonline.org/. The computer sends the domain name to a selected DNS server (using its numeric address), which sends a message back, containing the IP address for the Global Voices Web site.
- The browser then sends a request for a connection to that IP address.
- The request goes through a series of routers until it reaches a router that finds the specific computer needed.
- This computer sends information back to you, allowing your browser to send the full URL and receive the data to display the page.
Every connection between computers or routers that a message goes through is called a hop. The number of hops is the number of computers or routers your message comes in contact with along its way. Below is a sample path taken by a computer to get to www.globalvoicesonline.org. This request passes through at least fourteen computer connections (hops) before reaching its destination.
traceroute to globalvoicesonline.org (72.249.186.50), 64 hops max, 40 byte packets
1 192.168.1.1 (192.168.1.1) 2.425 ms 0.673 ms 0.637 ms
2 192.168.15.1 (192.168.15.1) 3.824 ms 1.068 ms 1.139 ms
3 10.92.32.1 (10.92.32.1) 10.712 ms 9.581 ms 98.359 ms
4 gig-5-3-lbrtnymtn-rtr1.hvc.rr.com (24.164.160.173) 10.720 ms 10.774 ms 11.147 ms
5 pos-3-1-nycmnya-rtr1.nyc.rr.com (24.164.160.78) 12.533 ms 12.042 ms 11.206 ms
6 tenge-0-3-0-nwrknjmd-rtr.nyc.rr.com (24.29.97.6) 12.456 ms 13.922 ms 13.821 ms
7 ae-4-0.cr0.nyc30.tbone.rr.com (66.109.6.78) 15.844 ms 22.984 ms 14.024 ms
8 ae-1-0.pr0.nyc20.tbone.rr.com (66.109.6.163) 14.605 ms 14.592 ms 43.455 ms
9 207.88.182.73.ptr.us.xo.net (207.88.182.73) 14.707 ms 14.437 ms 22.936 ms
10 te-4-0-0.rar3.nyc-ny.us.xo.net (207.88.12.26) 24.168 ms 16.683 ms 16.947 ms
11 207.88.14.9.ptr.us.xo.net (207.88.14.9) 45.446 ms 45.360 ms 46.136 ms
12 207.88.14.10.ptr.us.xo.net (207.88.14.10) 70.949 ms 69.782 ms 70.112 ms
13 207.88.185.38.ptr.us.xo.net (207.88.185.38) 70.162 ms 73.824 ms 73.137 ms
14 switch19.rimuhosting.com (65.99.204.18) 70.630 ms 70.344 ms 70.264 ms
15 server1.globalvoicesonline.org (72.249.186.50) 72.347 ms 72.747 ms 74.179 ms
Destination reached!

If you have used the Internet, you know that normally all of these complex processes are hidden and you don't need to understand them in order to find the information you need. However, when people or organizations attempting to limit your access to information interfere with the operation of the system, your ability to use the Internet may be restricted.
Why This Matters
Censorship can occur at different points in the Internet infrastructure, covering whole domains or subdomains, individual protocols, or specific content identified by filtering software. The best method to avoid censorship will depend on the specific censorship technique used. You may need to understand these differences in order to use the appropriate measures to use the Internet effectively and safely.
Installing Firefox on Windows
Firefox requires a computer with a minimum of a 233 MHz processor, running Windows 2000 or later.
To check system requirements for Firefox, go to:
http://www.mozilla.com/firefox/system-requirements.html
Download and Install Firefox
- Visit the Firefox Download Page at http://www.mozilla.com/firefox/ in any browser (such as Microsoft Internet Explorer). The download page automatically detects the operating system and language on your computer and recommends the best edition(s) of Firefox for you. If you want to download Firefox for a different language or for a different operating system than the one detected, click "Other Systems and Languages" to see a list of all the others available.

- Click the download button and the setup file will begin to download to your computer. Once the download completes, it is recommended that you exit all your running programs before running the installation.
- Double-click the file to start the Firefox install wizard.
- If you are running Windows Vista, you may get a User Account Control prompt. In this case, allow the setup to run by clicking Continue.
A welcome screen appears.
- Click Next to continue. The Setup Type screen appears. A "Standard" setup is selected by default (using the custom option is only recommended for experienced users).
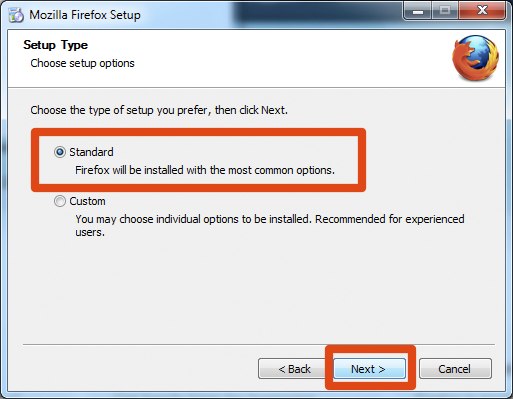
- Firefox installs itself as your default browser. If you do not want Firefox to be your default browser, clear the check box Use Firefox as my default web browser.
- Click Next.
- Once Firefox has been installed, click Finish to close the setup wizard.
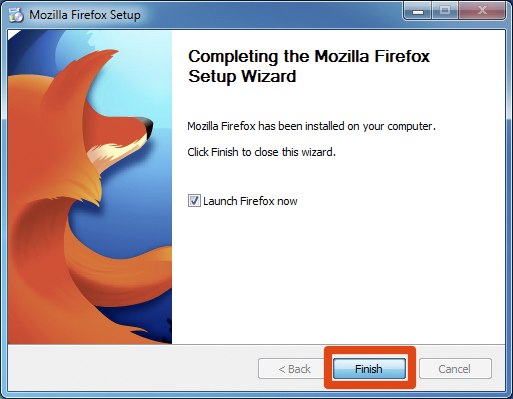
If the Launch Firefox now check box is checked, Firefox will start after you click Finish.
Windows Vista Users:
If at any time throughout the installation process you are prompted with a User Account Control (UAC) window, press Continue, Allow, or Accept.
Troubleshooting
If you have problems starting Firefox, see http://support.mozilla.com/kb/Firefox+will+not+start
Installing on Mac OS X
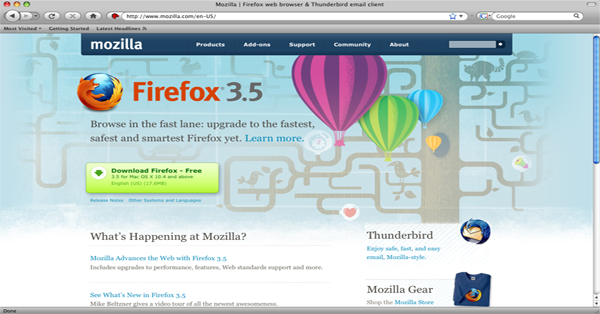
- To download Firefox, visit http://www.mozilla.com/ and click on the big green button labeled "Firefox 3.5 Free Download." The page shown below opens, and the download starts. If it does not, click the link on the page.

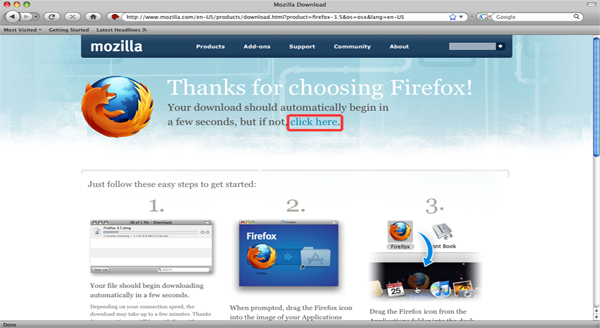
- When prompted, click OK.
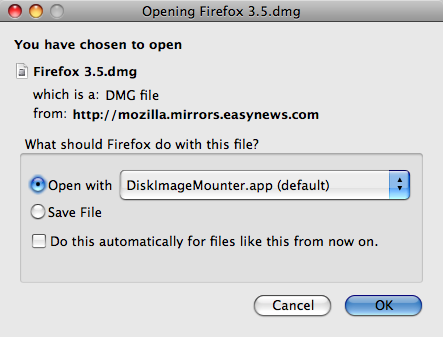
Once the download is complete this window appears: 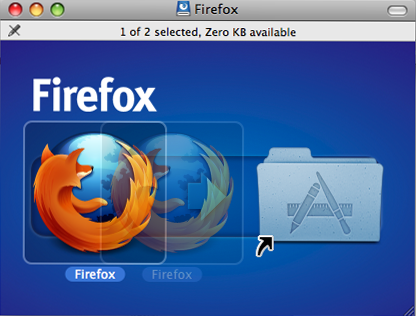
- Click and hold the Firefox.app icon, then drag it on top of the Applications icon. When it is on top of the Applications icon, release the mouse button. This starts copying the program files to the Applications directory on your computer.
- When the installation step is finished, close the two small Firefox windows.
- Eject the Firefox disk image. If this does not work by normal means, select the disk image icon and then, in the Finder menu, select File > Eject Firefox.
- Now, open the Applications directory and drag the Firefox icon to the dock:
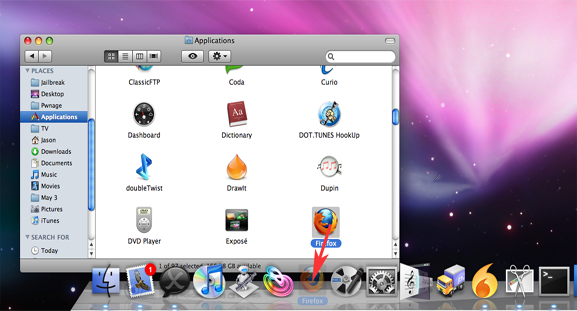
- Click either icon (in the Dock or the Applications folder) to start Firefox. The Import Wizard dialog box appears:
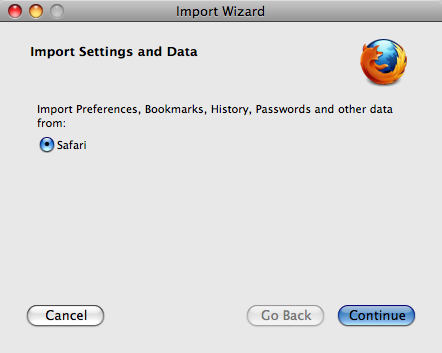
- To import your bookmarks, passwords and other data from Safari, Click Continue.
- Click Continue. Now you see the Welcome to Firefox page.
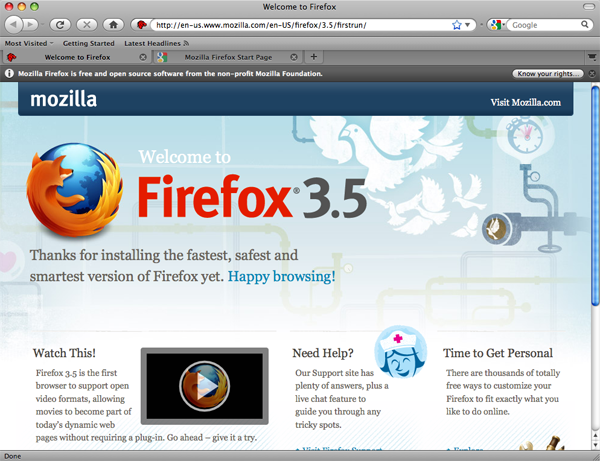
- To learn basic information about Firefox, click Getting Started.
- For assistance, click Visit Support.
- To customize your new installation using the addons wizard, click Customize Now!
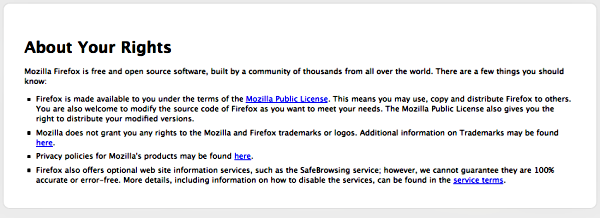
- In the upper right of the Welcome page is a button labeled Know your rights. Click this button to display the following screen, which tells you about your rights under the Mozilla Public License and provides links to Mozilla's privacy policies and service terms, as well as trademark information.
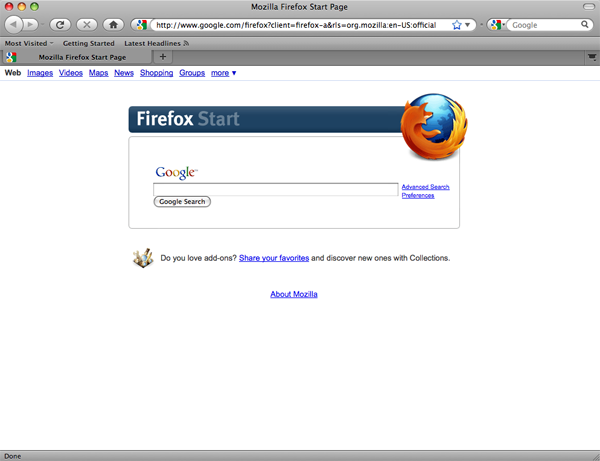
- Close the Welcome to Firefox page (click the x in the tab at the top of the page). Now you see the Firefox Start page.
Congratulations, you are now ready to use Firefox!
If you have permission problems when trying to copy Firefox from the disk image to your Applications folder, first try deleting your old Firefox copy, then proceeding.
If you're installing a beta and that you want to keep your former Firefox copy, first rename your old Firefox copy to something like "Firefox old" and then copy the beta to your Applications folder.
Installing Firefox on Ubuntu
Firefox is already installed on Ubuntu as part of the normal installation. If you want to install a different (most commonly newer) version of Firefox on your Ubuntu system (or other GNU/Linux systems) that is also possible and is explained below.
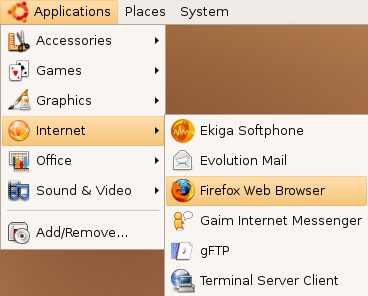
Accessing it is easy. If you are using an installation of Ubuntu with no changes to the default Desktop, select Applications > Internet > Firefox Web Browser:
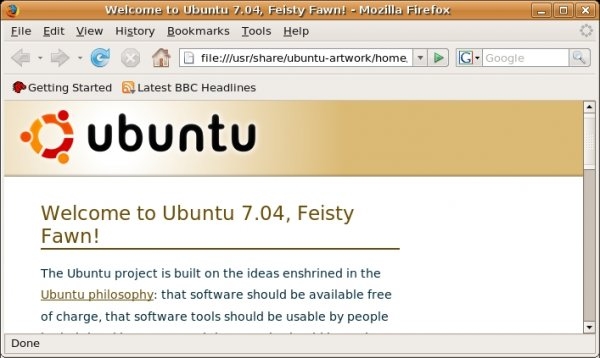
Firefox starts and a welcome window opens:
If you want to install a newer version of Firefox on your system, such as a beta version or a new stable version, which is not offered for your older distribution, there are a few different ways to upgrade.
Upgrading Firefox through Ubuntu
If you want to upgrade the version of Firefox included with Ubuntu to the latest version, replacing your existing version, a detailed guide is available on the Ubuntu wiki at https://help.ubuntu.com/community/FirefoxNewVersion
Manually installing multiple versions of Firefox
Reading the rest of this manual and the Ubuntu wiki page will give you a full overview of how to manage different versions of Firefox in your system, including how to test a beta version. How to test a beta version of Firefox alongside your normal, everyday installation is the focus of the rest of this manual. These steps require advanced file management and extensive use of the command line. If you are new to Ubuntu, using the steps in the previous section is advised.
The very first thing you should do is to backup your existing Firefox settings and add-ons. All of your Firefox related files are stored in a folder with an unusual name in this location:
/home/user/.mozilla/firefox
It can be something like:
/home/user/.mozilla/firefox/d1eukl01.default
Navigate to that folder by clicking:
Places --> Home
Then press CTRL+H to view hidden files - or go to "View" and choose "Show hidden files"
Scroll down until you find the folder ".firefox". Double click on its icon to enter the folder.
Unless you have used the profile manager your default settings and add-ons will be located in a folder with the extension .default
If you have used the profile manager you probably know what you are doing and which folder contains what.
THIS IS BEST DONE WHEN FIREFOX IS NOT RUNNING!! Copy the default folder by highlighting it with a single left mouse click. Then press CTRL+c and paste it into the same folder by pressing CTRL+v - or simply by right-clicking on the folder and choosing "copy", then click in the white area of the screen, finally right-click and choose "paste".
You now have an exact copy of all your Firefox settings in a folder called something like:
/home/user/.mozilla/firefox/d1eukl01.default (copy)
No matter what happens you can always restore all your current Firefox settings.
Now you have to download the current beta version, which can be found here:
http://www.mozilla.com/en-US/firefox/all-beta.html
Find the version you want to test and download it to somewhere where you can find it again.
Then go to the Terminal and create a folder to which you have permission in your /opt/ folder. This is a two-step operation. First:
user@box:~$ sudo mkdir /opt/user (press enter)
.. where "user" is your user name (or whatever you might want to call it).
Then you need to gain ownership of that folder, which you get by typing (followed by Enter):
user@box:~$ sudo chown user -v /opt/user
You now have a folder in the /opt(ional) directory into which you can unpack the file you downloaded from the Mozilla website. Navigate to it and right-click and choose to open it with "Archive Manager" (or unpack it in your usual way):
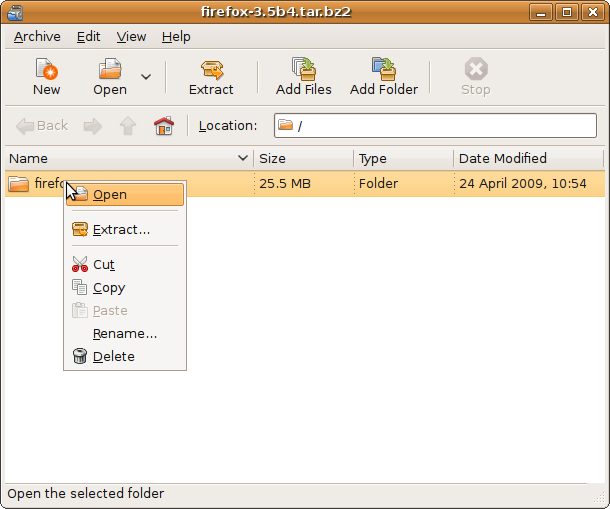
You guessed it: "Extract.." the contents of the file to:
/opt/user/
That means you have a folder called:
/opt/user/firefox
There are now two different way that you can proceed. Either you can run the beta version with a copy of your existing settings and add-ons or you can run a fresh, clean version.
If you want to run the Firefox beta version with its "own" fresh settings, the next step is to create a new profile. This is done by running Firefox with the ProfileManager option. It is best done from the Terminal / Command Line Interface / Virtual Console, which can be found by going to:
Applications --> Accessories --> Terminal - or by pressing ALT+F2 and typing:
gnome-terminal (once you have typed "gnome-term" it will auto-complete and you can simply press enter)
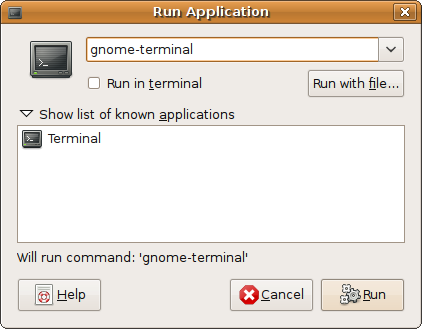
Inside the Terminal type:
user@box:~$ /opt/user/firefox/firefox -profilemanager
.. and press enter. This will bring up the Firefox Profile Manager, which is a little dialog box that manages different profiles for the use of Firefox.
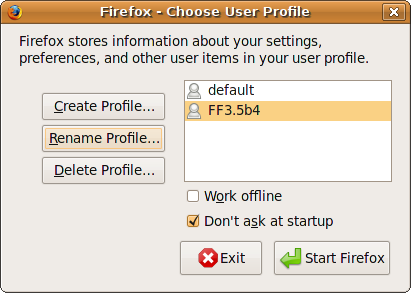
You need to create a different profile, so that you can test the beta version without affecting or screwing up your existing Firefox settings and add-ons. Create an identity with a name that makes sense for what you are doing. It could be: FF3.5b4, for instance, to indicate that the profile is for the testing of Firefox 3.5Beta4. Follow the simple instructions of the Profile Manager and finally run Firefox. That's it - You are now running a beta version of Firefox!
You can also choose to test Firefox with all your current settings and add-ons. However, if you are testing Firefox 3 with your Firefox 2 settings there are certain incompatibilities that might cause minor issues. It is not recommendable, but you can test if you want to see for yourself, perhaps it works just fine.
That is done by navigating to the new folder, which would be called something like:
/home/user/.mozilla/firefox/dhytrklgs.FF3.5b4
.. and deleting all the contents (by clicking CTRL+a and pressing Del) and then pasting the contents of your original folder into it. Your original folder was called something like:
/home/user/.mozilla/firefox/d1eukl01.default
.. which you paste into the folder of the test profile (see above) and then you run Firefox, again with the Profile Manager as described above and create a profile for it, such as the FF3.5b4 profile you created earlier.
That's it! You are now running a beta version of Firefox, which has all your current settings and add-ons without affecting the settings and add-ons of your current and stable version of Firefox that is installed by default in your Ubuntu system. The first time you run it, Firefox will search for updates to your add-ons, some of which might be incompatible with the newer beta version. If that is the case they will simply be disabled.
If something screws up at any point with the new version, either if running it with your current settings or for some other reason, all you have to do is to shut it down, run it again with the Profile Manager option and delete the FF3.5B4 (or whatever you called it) profile and create a new profile:
user@box:~$ /opt/user/firefox/firefox -profilemanager
Alternatively, you can also delete all the contents of the test profile folder:
/home/user/.mozilla/firefox/dhytrklgs.FF3.5b4
.. and run Firefox with the Profile Manager option again. Firefox will (re-)generate the basic settings, so that you can start afresh. Once you get the hang of this and understand the principles, you can move your settings and add-ons easily from one version of Firefox to another. The most important thing is to remember to always make a backup of your settings, so that you never lose your bookmarks, passwords and so on.
You can easily add a short cut to your Gnome panel, so that you don't have to go to the Terminal to run the optional Firefox version. Right-click anywhere on any of the panels where there are no icons and where you want the short-cut to be located. Choose "Add to panel.." and double-click on "Custom Application Launcher":
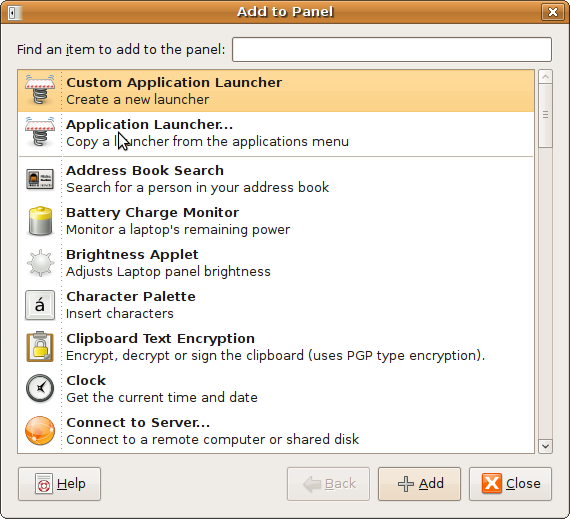
In the next dialog box you enter a sensible name and comment for your short-cut in the "Name" and "Comment" fields. The command you used to run Firefox from the Terminal you enter in the "Command" field:
/opt/user/firefox/firefox -profilemanager
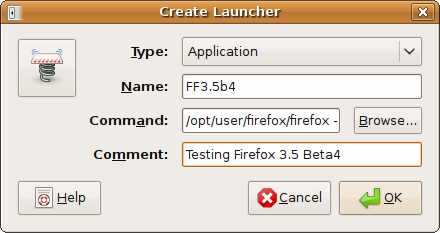
You can add an icon of your choice by clicking on the funny spring in the top left-hand corner of the dialog box.
Updating Firefox
You can configure Firefox to check automatically for updates to the application, search engines, and any installed add-ons. This chapter describes how to configure Firefox for automatic updates and how to check for updates manually if desired.
Checking for updates automatically
By default, Firefox is configured to check for updates automatically.
- When an update is available, the Software Update dialog is automatically displayed. To begin updating your software, click OK. The new versions of any selected updates are downloaded and installed.
- When the install process is complete, you must restart Firefox. To close Firefox and re-open it, click Restart Firefox Now.
Checking for updates manually
You can check for updates at any time.
- Click Help, and then click Check for Updates.
- If updates are available, click Download & Install Now to begin the process.
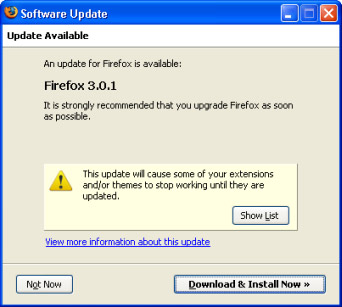
If no updates are available, click Finish to close the window.
- When the install process is complete, you must restart Firefox. To close Firefox and re-open it, click Restart Firefox Now.
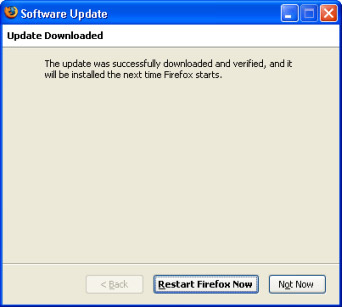
After Firefox restarts, you will be running the latest version.
Configuring update options
By default, Firefox is configured to check for updates automatically. While we strongly recommend that you keep the automatic updates active since the updates of Firefox usually include important security fixes, you can still disable automatic updating if you want to.
- On the Firefox menu bar, select Tools > Options.
- Click the Advanced icon.
- Click the Update tab. The auto-update options are displayed.
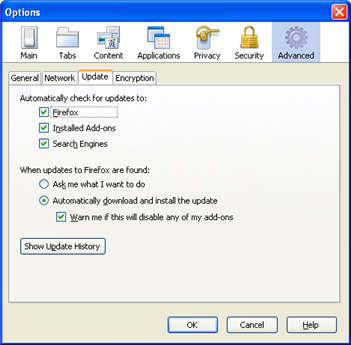
- Update options:
-
Automatically check updates for updates to: Select the component types for which you want Firefox to check for updates. Firefox can check for updates for the Firefox application, any installed add-ons, and search engines.
- To disable automatic checking for updates, deselect all three options.
-
When updates to Firefox are found: Choose how you want Firefox to manage any updates it finds.
- Ask me what I want to do: Firefox lets you choose if you want to download and install the update. If you do not choose to do so, you can download it at a later time.
- Automatically download and install the update: Firefox automatically downloads and installs updates. If you want to be prompted if the downloads will disable any installed add-ons, select that option.
- To review the history of updates that have been downloaded and installed, click Show Update History.
- Click OK to close the Options dialog box.
Updating Firefox on Linux (Ubuntu)
If you're using the version of Firefox that ships with Linux, you cannot use the the update steps above. Instead, you should use Ubuntu's Update Manager which can be found under System > Administration > Update Manager. After updating, simply restart Firefox. It may take a few days for updates to Firefox from Mozilla to show up on Ubuntu's update channel.
Uninstalling Firefox
You can remove Firefox from your computer if necessary. If you are planning to uninstall and reinstall Firefox to fix problems you may be having, you should first read Basic troubleshooting: http://support.mozilla.com/kb/Basic+troubleshooting.
Note: If you want to preserve your data and settings (to reapply after reinstalling), see Backing up your information: http://support.mozilla.com/kb/Backing+up+your+information.
Why Are You Leaving?
Before uninstalling Firefox, please consider why you are doing so. If there is an error, or something you don't like about Firefox, you can submit a bug for it to be fixed. To do this, go to http://bugzilla.mozilla.org *Note that you must register on BugZilla to file a bug.
Now, if you would still like to uninstall Firefox, you may do so by following the instructions below.
Uninstalling Firefox on Windows
Windows:
To uninstall Firefox on Windows, follow these steps:
- Exit Firefox. On the File menu, click Exit.
- From the Start Menu in the Windows taskbar, select Control Panel. The Control Panel opens.
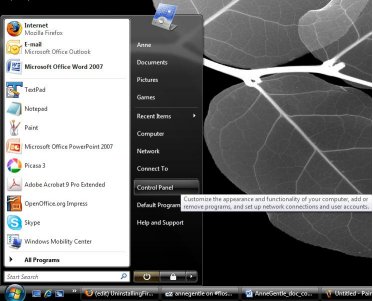
- Open the Windows program listing.
- (Windows Vista) Click Uninstall a program (or click the Programs and Features icon in the Classic view).
- (Windows 2000/XP) Double-click Add or Remove Programs.
- From the list of currently installed programs, select Mozilla Firefox
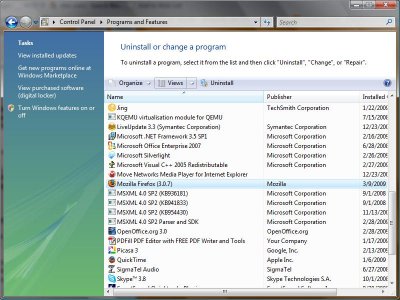
- To begin the uninstall:
- (Windows Vista) Click Uninstall.
- (Windows 2000/XP) Click Remove.
- In the Mozilla Firefox Uninstall Wizard that opens, click Next.
- Click Uninstall.
- If you want to remove your Firefox data, select the Remove my Firefox personal data check box. If you select this option, Firefox deletes your bookmarks, saved passwords, and other data. If you then reinstall Firefox, you must restore your data from a backup, or start fresh.
- To provide feedback on your Firefox experience to the development team, select Tell us what you thought of Firefox.
- Click Finish.
- To remove added plugins or other files and folders that may not be removed by the uninstall you must manually delete the Firefox installation folder, which is located here by default: C:\Program files\Mozilla Firefox.
Mac OS:
- Open the Applications folder.
- Drag the Firefox application to the Trash.
Your uninstall of Firefox is finished.
Linux:
If you installed Firefox with the distro-based package manager, you should use the same way to uninstall it - see Installing Firefox on Linux for details.
If you downloaded and installed the binary package from the Firefox dowload page, simply remove the folder firefox in your home directory to uninstall Firefox.
Uninstalling Firefox on Linux
If you installed Firefox with the distro-based package manager, you should use the same package manager to uninstall it. See your package manager help (or the man page or info, if you use command line tools) for details.
If you downloaded and installed the binary package from the Firefox download page, simply remove the folder firefox in your home directory to uninstall Firefox. For a complete uninstallation, you should also remove the hidden file .mozilla from your home directory.
Uninstalling Firefox on Mac
Windows:
To uninstall Firefox on Windows, follow these steps:
- Exit Firefox. From the menu at the top of the Firefox window, select File and then select the Exit menu item.
- From the Start Menu in the Windows taskbar, select Control Panel. The Control Panel opens.

- Open the Windows program listing.
- (Windows Vista) Click Uninstall a program.
- (Windows 2000/XP) Double-click Add or Remove Programs.
- From the list of currently installed programs, select Mozilla Firefox

- To begin the uninstall:
- (Windows Vista) Click Uninstall.
- (Windows 2000/XP) Click Remove.
- In the Mozilla Firefox Uninstall Wizard that opens, click Next.
- Click Uninstall.
- If Firefox is still open, you must close Firefox to proceed with the uninstall.
- (Firefox 3) If you want to remove your Firefox user data and settings, put a check mark in the box that says Remove my Firefox personal data. If you select this option, Firefox will not preserve your bookmarks, saved passwords, and other data if it is installed again.
- To provide feedback on your Firefox experience to the development team, select Tell us what you thought of Firefox.
- Click Finish.
- To remove added plugins or other files and folders that may not be removed by the uninstall you must manually delete the Firefox installation folder, which is located here by default: C:\Program files\Mozilla Firefox
Mac OS:
- Open the Applications folder.
- Drag the Firefox application to the Trash.
Your uninstall of Firefox is finished.
Removing user data and settings
On Linux and Mac, uninstalling Firefox does not remove your user profile, which includes personal information such as bookmarks, passwords and cookies. To do a clean uninstall on these operating systems, you should remove these files.
Windows:
- Enable viewing hidden files and folders in your Windows:
- (Windows Vista) From the Start Menu in the Windows taskbar, type Folder Options in the Start Search box and click the Folder Options shortcut that appears. Click the View tab and select Show hidden files and folders.
- (Windows 2000/XP) Open Windows Explorer (or My Computer). From the menu, click Tools, select Folder Options, click the View tab and select Show hidden files and folders.
- Delete the Firefox profile folder. The default locations are:
- (Windows 2000/XP) C:\Documents and Settings\<username>\Application Data\Mozilla\Firefox\
- (Windows Vista) C:\Users\<username>\AppData\Roaming\Mozilla\Firefox\
- Delete the folder(s) that contain temporary data. The default locations are:
- (Windows 2000/XP) C:\Documents and Settings\<username>\Local Settings\Application Data\Mozilla\Firefox\
- (Windows Vista) C:\Users\<username>\AppData\Local\Mozilla\Firefox\ and C:\Users\<username>\AppData\Local\VirtualStore\Program Files\Mozilla Firefox\ (if it exists)
- (Windows XP/Vista) C:\WINDOWS\Prefetch\FIREFOX* files.
Interface Overview
The main Firefox window includes menus, buttons, toolbars, and a search box. The following image shows the main window.
For an explanation of each numbered pointer, see the table following the image.

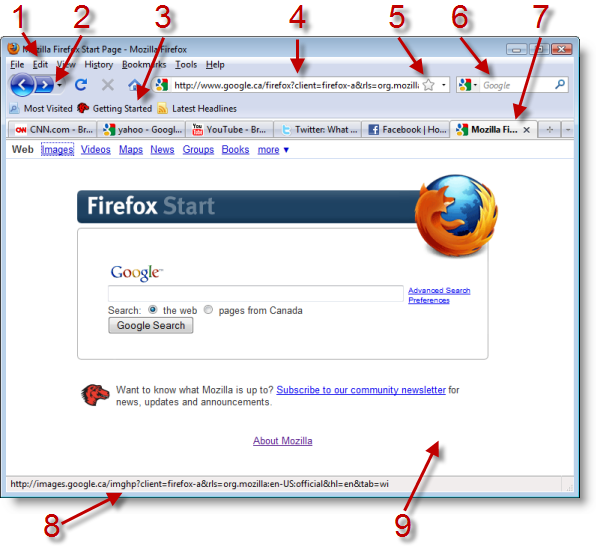
| Pointer |
Feature |
Description |
| 1 |
Menus |
Provide various commands for using Firefox. |
| 2 |
Browse Buttons |
Used when browsing the web. These include Back, Forward, Refresh, Stop, and Home buttons.
|
| 3 |
Toolbars |
Used for navigation and bookmarking, among many other functions.
|
| 4 |
Location Bar |
Text box for typing the URL of a web page. |
| 5 |
Edit Bookmark Tools |
Enable you to remove, name, move, or tag a bookmark. |
| 6 |
Search Box |
Text box for typing a search term, with a menu of search engines to select from. |
| 7 |
Tabbed Pages |
Allow you to open multiple web pages at the same time and switch between them by clicking on a tab. |
| 8 |
Status Bar |
Shows the current status of the web page, such as security alerts. |
| 9 |
Main Content Pane |
Shows the currently displayed web page.
|
Using the Location Bar
Going to a website in Firefox is easy. Just type a website address (also known as a "URL", for "Uniform Resource Locator") into the location bar and press Enter.

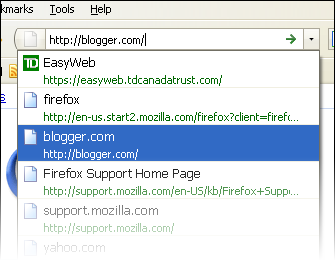
It is not necessary to type "http://" at the beginning of the address. While you are typing, Firefox looks for visited and bookmarked page titles and tags along with visited web addresses, making guesses at which sites or pages you want to visit. This way, if you don't remember the URL of a page you've visited or bookmarked, you can type some words from the title of the page, and Firefox will display some suggestions.
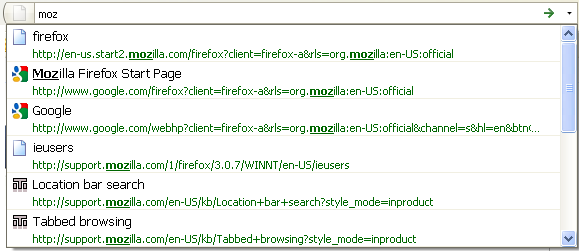
This powerful search feature of the Location Bar is the reason why some Firefox developers affectionately call it the Awesome Bar instead. It allows you to use the Down Arrow key or your mouse to highlight the URL of the site you want to visit. Press Enter or click your selection. The website you selected appears.
The Location Bar learns which sites you visit most frequently and optimizes the result listing to match your personal style. After a few weeks, it can require as little as typing a single letter in the location bar to get to frequently visited pages.
Web keyword searches
If you enter text into the Location Bar that is not a valid web address, Firefox tries to direct you to the location it believes you intended.
Firefox first tries to send your request to an Internet Keyword search service. This service is Google's Browse by Name (http://toolbar.google.com/bbn_help.html) service by default. For example, If you type mozilla foundation into the location bar, Firefox sends that text to the Google Browse by Name service, since it is not a valid URL address. The service directs you to its best match for your request, in this case: http://www.mozilla.org. For an entry without a clear match to a URL, Firefox displays search results for the entry.
Domain guessing
If you enter an incomplete web address, Firefox tries to "fix" the address by adding a prefix, suffix, or both to what you type. For example, if you type "www.mozilla" in the location bar, Firefox appends ".com" to complete the address. If you type "mozilla.org" Firefox adds the ''www." prefix to complete the address. This "guessing" is secondary to the Internet Keywords search described above - it does not work unless Internet Keywords are disabled.
For more information about key word searches and domain guessing, see the following Knowledge Base article: http://support.mozilla.com/kb/Location+bar+search.
Clearing the history
Firefox keeps a "history" of the Web sites and pages that you've visited. It uses this list to generate suggestions as you type in the location bar. However, you might not want the history of pages you've visited to be stored on your computer.
You can clear a single item or all items from location bar history.
To clear a single item:
- Click the drop-down arrow in the location bar.

-
Press the Down Arrow key, or move your pointer, to highlight the entry to delete.
-
Press the Delete key to delete the item.
You can clear many items from the location bar by removing Browsing History via the Clear Recent History dialog window. For more information, see the section on Privacy in Firefox.
Showing only History or only Bookmarks in the Location bar
By default, Firefox shows and searches both History items and Bookmarks when using the Location bar. If you want to only show one or the other, you can change this preference.
- Open the Options window via Tools > Options (Windows), Firefox > Preferences (Mac OSX) or Edit > Preferences (Linux)
- Select the Privacy Pane
- Under Location Bar, select the appropriate option after When using the Location Bar, suggest
- Press OK
Navigating Web pages
When you start Firefox, you see your home page. By default, you see Firefox's home page.
Tips:
- To display more web content on the screen, you can use Full Screen mode. Full Screen mode condenses the Firefox toolbars into one small toolbar. To enable Full Screen mode, select or press F11.
- To go to your home page quickly, press Alt+HomeOpt or use the Home button on the Firefox toolbar.
Navigating to another page
You can navigate to a new web page by typing its Web address (or URL) into the location bar. URLs normally begin with "http://" followed by one or more names that identify the address. One example is "http://www.mozilla.org/".
- Click the location bar to select the URL that is already there.
- Type the URL of the page you want to visit.
The URL replaces the former text in the location bar.
- Press EnterReturn.
Tip: To quickly select the text in the location bar, press Ctrl+LCmd.
Don't know a URL? Try typing something specific to the page you want to visit, e.g. a name, into the Location Bar and hit EnterReturn. This will take you to the top result in Google for that term.
Been there before? Start typing words from the title or URL that you're trying to get back to. Firefox will suggest sites that match out of your history and bookmarks to let you get back to frequently visited sites faster.
Clicking a link
Most web pages contain links you can click to move to other pages.
- Move the mouse pointer until it changes to a pointing finger. This happens whenever the pointer is over a link. Most links are underlined text, but buttons and pictures can also be links.
- Click the link once. While the network locates the link's page, status messages will appear at the bottom of the window.
Retracing your steps
There are several ways to revisit pages:
- To go back or forward one page, click the Back
 or Forward button.
- To go back or forward more than one page, click the small triangle by the Back and Forward buttons.
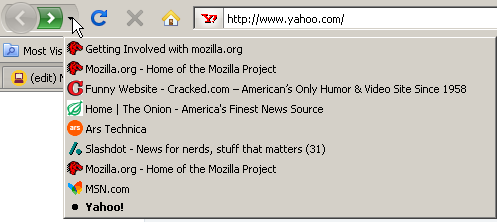
Firefox shows a list of pages you've recently visited. To return to a page, choose it from the list. The current page is marked with a small black dot.
- To see a list of frequently visited URLs you've typed into the location bar, click the down arrow at the right end of the location bar. To view a page, choose it from the list.
- To choose from pages you've visited during the current session, click the History menu and use the list in the bottom section of the menu.
-
2.0:
To choose from pages you've visited during the past several sessions, open the History menu and choose Show in Sidebar. You will see the History Sidebar. The History Sidebar displays a list of folders. Clicking the folders displays subfolders or titles of web pages. You can click a page's title to view that page.
3:
To choose from pages you've visited during the past several sessions, click the History menu and choose Show All History. The Library window displays a list of folders. Clicking the folders displays subfolders or titles of web pages. You can click a page's title to view that page.
Stopping and reloading
If a page is loading too slowly or you no longer wish to view a page, click the Stop button. Firefox displays what has been loaded so far. You can then navigate to a different page using the back button or the location bar.

To reload the current page or to get the most up-to-date version, click the Reload button or press Ctrl+R.Cmd

Bookmarking Sites
This chapter explains what bookmarks and tags are, why they are useful, and how to create them. It also explains how to organise bookmarks and tags.
Bookmarks
Bookmarks (also called "Favorites" in some browsers) are links to Web pages. By saving bookmarks in your Firefox browser, you can easily revisit pages without having to remember the address or search for them again, much like using bookmarks in a book. Firefox includes a set of default bookmarks, including an example of Live Bookmarks.
This chapter describes how to bookmark Web pages and how to access and organise your bookmarks.
To import lists of bookmarks from another application, see Importing Bookmarks from an HTML file in the Firefox Knowledge Base at
http://support.mozilla.com/en-US/kb/Importing+Bookmarks+from+an+HTML+file
If your bookmarks are missing or if you are having other problems with bookmarks, see the Troubleshooting section at
http://support.mozilla.com/en-US/kb/Bookmarks#Troubleshooting
How to bookmark a page
There are many ways to bookmark a page. Listed below are the most common ways of bookmarking a page for later use:
3:
Bookmark star
You can use the bookmark star inside the location bar to create or remove a bookmark.
No Bookmark:

Page Bookmarked:

To create a bookmark using the bookmark star
- Click the star:
- Click once to automatically place the bookmark in the Unsorted Bookmarks folder.
- Click twice to open the Edit Bookmark dialog (below).
- Fill in the required information and choose a folder. For a complete list of folders click the drop-down arrow to the right of the Folder box.
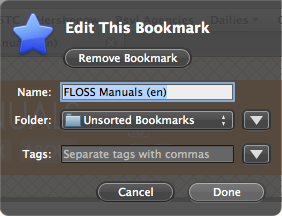
To remove a bookmark using the bookmark star
- Click the star to open the Edit Bookmark dialog.
- Click Remove Bookmark.
What each field means
- Name: This is the title of your bookmark. It appears everywhere the bookmark does. Firefox automatically fills in this field with the title of the current page, but you can always change it.
-
Folder: This is where the bookmark is stored. It can be a default folder or a folder you create. There are three standard choices:
- Bookmarks Menu: The drop down menu on the menu bar.
- Bookmarks Toolbar: The optional toolbar; for help with this toolbar see How to customize the toolbar: http://support.mozilla.com/kb/How+to+customize+the+toolbar
- Unsorted Bookmarks: This contains bookmarks that are not shown in your menu or toolbar.
You can put your bookmarks in sub-folders of these folders by instead selecting Choose... and picking a folder from the Folder dropdown.
- Tags: Tags are optional descriptive words or short phrases that help when organizing or searching bookmarks. For example, tags for an artist supply store might be "art supplies, paint".
To bookmark the page you are currently viewing, click the Bookmarks menu and choose Bookmark This Page. This brings up a dialog very similar to the one above with the Bookmark Menu selected as the default folder.
Keyboard shortcut
To bookmark a page using the keyboard, press Ctrl+D (Cmd+D on Mac). This displays the Edit Bookmarks dialog box as above.
Right-clickHold down the Ctrl key while you click anywhere on the page and choose Bookmark This Page. Or, right-clickhold down the Ctrl key while you click the title in the page's tab and choose Bookmark This Tab.
2.0:
Add Bookmark Dialog

Firefox will automatically fill in the page title as the name of your bookmark, but you can edit the Name: field to call it anything you like.
The default location to save bookmarks is directly in the Bookmarks menu. If this is where you'd like the bookmark click OK.
To save the bookmark to an existing folder:
- Click the drop-down arrow to the right of the Create in: field.
- Find the folder you'd like to use and select it.
- Click OK to save the bookmark.
To save the bookmark to a new folder:
- Click the arrow button to the right of the Create in: drop-down. This will open a tree view of the existing folders.
- Find the existing folder that you'd like the new folder to be created in, and select it
- Click the New Folder button to create the new folder, this will open the 'Properties for "New Folder"' dialog.
- Name your new folder and add a description if you like, then click OK to return to the 'Add Bookmark' dialog.
- Make sure the new folder is selected and click OK to create the bookmark.

Drag and drop
- Click and hold the tab that is displaying the page you want to bookmark, or click and hold the favicon in the location bar. (The favicon is the Web page's icon, just to the left of the page title in the location bar.)

- Drag and drop the tab or favicon on the Bookmarks toolbar. The bookmark is automatically created (Firefox uses the page title for the bookmark's name).
You can also drag the bookmark to the Bookmarks menu or sidebar and drop it in an existing folder.
Where to find bookmarks
Your bookmarks can be displayed in a toolbar, a sidebar, or a menu. These are explained below.
The first place you'll see bookmarks is the bookmarks toolbar. By default it is displayed below the main toolbar. Firefox comes with a few bookmarks on the toolbar to help get you started. You can remove these, or leave them there, and add your own.

If you'd prefer not to use the bookmarks toolbar, you can hide it. On the View menu, point to Toolbars, and then click Bookmarks. (Toolbars that are visible have a check mark next to their names in the View > Toolbars menu.)
The Bookmarks menu shows all your bookmarks, including the bookmarks on the bookmarks toolbar (but not including Unsorted Bookmarks). To see the bookmarks that are in the bookmarks toolbar, click the Bookmarks Toolbar folder. The Mozilla Firefox folder (located in the lower part of the Bookmarks menu) contains some bookmarks to help you with using Firefox and getting to know Mozilla.
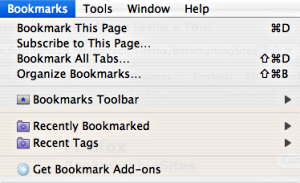
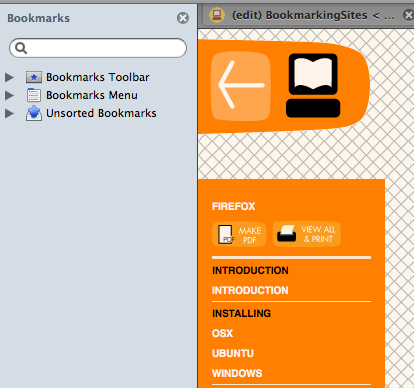
You can also see all your bookmarks (including Unsorted Bookmarks) by opening the bookmarks sidebar, a small panel that opens to the left of the page you're viewing.
To open the bookmarks sidebar, click the View menu, click Sidebar and then click Bookmarks. You can also open the bookmarks sidebar using the keyboard, by pressing Ctrl+B (Cmd+B on Mac).
3:
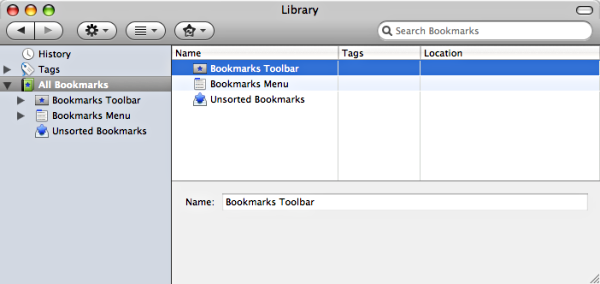
Library window
You can see both your bookmarks and history using the Library window. To open the Library window, click Bookmarks > Organise Bookmarks.
The Library window lets you:
- Browse your bookmark folders
- Search for pages you've bookmarked
If you want to find a page you've bookmarked, but you can't remember the location where you saved it, open the Library window and search using its Search Bookmarks bar.
The "Smart Location" Bar
You can quickly find pages you've bookmarked in the location bar. When you type a few letters of the bookmarked page's name, web address, or tag name, the "Smart Location" feature displays a list of your bookmarks matching what you typed. Click the link of the page you want to display.
If none of your bookmarks match the text you typed in, then you can click the right-arrow and Firefox searches the Web for that text.
Organizing Bookmarks
2.0:
You can change the order in which bookmarks appear in the Bookmarks menu with the Bookmarks sidebar or the Bookmarks Manager.
3:
You can change the order in which bookmarks appear in the Bookmarks menu with the bookmarks sidebar or the Library window.
To re-arrange bookmarks or bookmark folders using the bookmarks sidebar:
- Display the bookmarks sidebar (click View menu > Sidebar > Bookmarks).
- Expand the folder you want to re-arrange by double-clicking on it.
- Click and drag the bookmark or folder you want to move. If you want to move it into a different folder, drag it on top of that folder.
The item you moved will now appear in the position or folder you specified.
To make a new folder, right-clickhold down the Ctrl key while you click somewhere in the sidebar (not on another bookmark) and select New Folder from the context menu.
Re-arranging using the Library window
To re-arrange bookmarks or bookmark folders using the Library window:
- Display the Library window (click Bookmarks > Organise Bookmarks).
- Open the folder you want to re-arrange by double-clicking it.
- Click and drag the bookmark or folder you want to move. If you want to move it into a different folder, drag it on top of that folder.
- If you want to make a new folder, click the Organise icon and then click New Folder.
The bookmark you moved will now appear in the position or folder you specified.
To change the position of a bookmark on the bookmarks toolbar, click and drag the bookmark you want to move. If you want to move it into a folder on the bookmarks toolbar, drag it on top of that folder.
Sorting bookmarks
2.0:
You can sort bookmarks alphabetically with the Bookmarks sidebar or the Bookmarks Manager.
3:
You can sort bookmarks alphabetically with the bookmarks sidebar or the Library window.
To sort bookmarks by name using the bookmarks sidebar:
- Display the bookmarks sidebar (click View menu > Sidebar > Bookmarks).
- Right-clickRight-click while you click on the bookmarks folder you want to sort and select Sort By Name from the context menu.
The bookmarks in the folder will be sorted alphabetically by name. Only the bookmarks in the folder you specify will be sorted. The sub-folders inside it are not sorted unless you specify them.
2.0:
Sorting using the Bookmarks Manager
To sort bookmarks by name using the Bookmarks Manager:
- Display the Bookmarks Manager by clicking on the Bookmarks menu and selecting Organize Bookmarks.... The Bookmarks Manager will appear.
- In the Bookmarks Manager, change the bookmarks view to manual sorting by clicking on the View menu and selecting Unsorted.
- Note: The sorting options in the View menu only apply to the Bookmarks Manager window; they do not affect the Bookmarks menu or Bookmarks Sidebar.
-
Right-clickHold down the Ctrl key while you click on the bookmarks folder you want to sort and select Sort By Name from the context menu.
- To sort the main Bookmarks folder, right-clickhold down the Ctrl key while you click on a blank spot in the right half of the window and select Sort By Name from the context menu.
The bookmarks in the folder will be sorted alphabetically by name. Only the bookmarks in the folder you specify will be sorted - the sub-folders inside it will not be sorted unless you specify them.
3:
Sorting using the Library window
To sort bookmarks by name using the Library window:
- Display the Library window (click Bookmarks > Organise Bookmarks).
- Open the folder you want to sort by double-clicking it.
- Right-clickRight-click on the bookmarks folder you want to sort and select Sort By Name from the context menu.
The bookmarks in the folder will be sorted alphabetically by name. Only the bookmarks in the folder you specify will be sorted. The sub-folders inside it are not sorted unless you specify them.
Smart Bookmarks folders
You can create "Smart Folders" in the Places Library. These folders are like saved searches that update automatically. For information on using Smart Folders, see Smart Bookmarks Folders: http://support.mozilla.com/kb/Smart+Bookmarks+Folders
Deleting bookmarks
2.0:
You can remove bookmarks using the Bookmarks sidebar or the Bookmarks Manager.
3:
You can remove bookmarks using the bookmarks sidebar or the Library window.
To delete a bookmark or bookmark folder using the bookmarks sidebar:
- Display the bookmarks sidebar (click View menu > Sidebar > Bookmarks).
- Right-clickHold down the Ctrl key while you click the bookmark or bookmark folder you want to delete. Then click Delete in the context menu.
The bookmark or bookmark folder and its contents are removed.
2.0:
Deleting using the Bookmarks Manager
To delete a bookmark or bookmark folder using the Bookmarks Manager:
- Display the Bookmarks Manager by clicking on the Bookmarks menu and selecting Organize Bookmarks.... The Bookmarks Manager will appear.
- Find and select the bookmark or bookmark folder you wish to delete.
- On the toolbar, click Delete.
The bookmark or bookmark folder and its contents will be removed.
3:
Deleting using the Library window
To delete a bookmark or bookmark folder using the Library window:
- Display the Library window (click Bookmarks > Organise Bookmarks).
- Find and select the bookmark or bookmark folder you wish to delete.
- On the toolbar, click Organise > Delete.
The bookmark or bookmark folder and its contents are removed.
Note: If you accidentally delete a bookmark or bookmark folder, you can undo the deletion by clicking
Edit > Undo.
Searching the Web
Firefox lets you easily search for information on the Web using a number of different search engines, which are web-based programs that catalog and retrieve Web pages based on specific information.
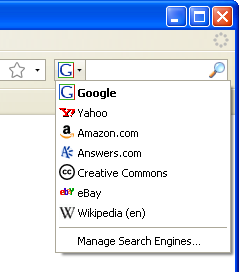
The Firefox search bar comes pre-loaded with access to search engines from Google, Yahoo, Amazon, eBay, Answers.com and Creative Commons. Wherever you are on the Web, you can enter a search term in the search bar and receive immediate answers from the search engine that you’ve chosen. You can select a new search engine from the drop-down menu next to the search bar at any time. From the same menu, you can also add, remove and rearrange search engines using the Manage Search Engines... option.
Searching for Web pages on a particular topic is as easy as typing a few words into the search bar of Firefox.
For example, if you want to find information about the World Cup:
- Click in the search bar:

- Type the phrase world cup. Your typing replaces any text currently in the search bar.
- Press EnterReturn or click the magnifying glass to search.
The search results for "world cup" appear in the Firefox window.
Searching for words in a web page
Firefox allows you to search the web for words you select on a web page:
- Select (highlight) any words in a web page with the mouse.
- Right-clickPress Ctrl, click the mouse button, and choose Search (name of search engine) for "(your selected words)" from the pop-up menu.
Firefox opens a new tab and uses the currently selected search engine to search for your selected words.
- Switch to that tab to see the search results.
Searching for text within a page
To find text within the page you are currently viewing in Firefox:
2.0:
- Press CtrlCmd+F or select to open the Find Toolbar at the bottom of Firefox.
- Type the text you want to find. The search automatically begins as soon as you type something into the search box.
- The Find Toolbar offers the following choices:
- Next: find text in the page that is below the current cursor position.
- Previous: find text that is above the current cursor position.
- Highlight all: highlight occurrences of your search string in the current page.
- Match case: limit the search to text that has the same capitalization as your search string.
3:
- Press Ctrl+FCmd or select to open the Find Toolbar at the bottom of the Firefox window.
- Type the text you want to find. The search automatically begins as soon as you type something into the search box:

- The Find Toolbar offers the following choices:
Next: Find text in the page that is below the current cursor position.
Previous: Find text that is above the current cursor position.
Highlight all: Highlight occurrences of your search string in the current page.
- Match case: Limit the search to text that has the same capitalization as your search string.
To find the same word or phrase again, press F3 or select .
Tip: In , select the Advanced panel, click the General tab, and enable the Search for text when I start typing optionpreference to enable the Quick Find mode of the Find Toolbar.
When enabled, the Quick Find toolbar automatically opens and starts searching as soon as you type something. Unlike the Find Toolbar, the Quick Find toolbar will close automatically after a few seconds of inactivity.
Included search engines
By default, Firefox includes the following search engines, each one suited to a specific type of search:
3:
- Google for searching the Web via Google.
- Yahoo for searching the Web via Yahoo.
- Amazon.com for searching the Amazon.com retail website.
- Answers.com for searching the Answers.com online dictionary and encyclopedia.
- Creative Commons for looking for images, documents and other media available for reproduction and other uses.
- eBay for looking up items for sale or auction at eBay.
- Wikipedia for searching the Wikipedia free online encyclopedia.
2.0:
- Google for searching the web via Google
- Yahoo for searching the web via Yahoo
- Amazon.com for searching the Amazon.com retail website
- Answers.com for searching the Answers.com online dictionary and encyclopedia
- Creative Commons for looking for images, documents, and other media available for reproduction and other uses
- eBay for looking up items for sale or auction at eBay
Switching search engines
The name of the active search engine is listed in the Search Bar and is identified by its small icon. In the following example, the active search engine is Google. To change the active search engine, click the down arrow next to the search engine's icon, then select a new search engine.
Managing search engines
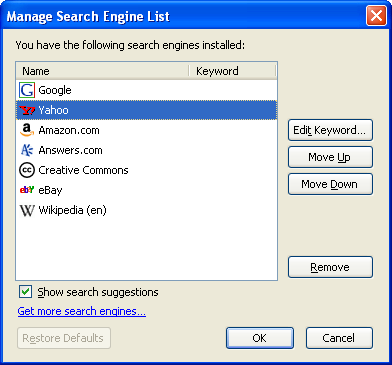
The Search Engines Manager helps you download and install additional search engines for Firefox. You may find that you need additional search engines to look for specific types of content, such as encyclopedia articles, recipes, movies, or song lyrics.
- To open the Search Engines Manager, click the search engine icon and select Manage Search Engines.
Adding search engines
There are several methods to add search engines to the search bar.
Through the Search Engines Manager
In the Search Engines Manager, you can add new search engines that have been released for use with Firefox.
-
With the Search Engines Manager dialog box open, click Get more search engines. The Mozilla Add-ons Search Engines page is displayed in a new browser tab.
- To add one of the displayed search engines, click the Add to Firefox button next to the search engine you want. The Add Search Engine dialog is displayed.
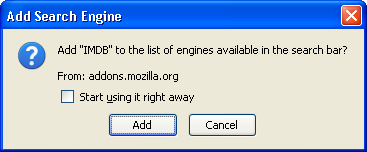
- To begin using the search engine immediately after you add it, click Start using it right away.
- Click Add. The search engine is now available through the search engines list in the search bar. If you selected Start using it right away, the new search engine is automatically selected in the search bar.
While visiting a website
Some Web sites offer search engines that you can add to Firefox. These search engines are specific to the Web site.
- For example, when you visit the YouTube (http://www.youtube.com/) Web site, the search engine button acquires a colored glow, indicating that the website offers a search engine that can be installed in Firefox:
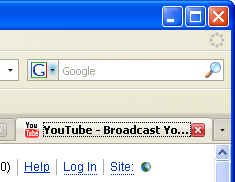
- To add the site-specific engine, open the search engine list and select Add "YouTube Video Search". (The menu label is different for other Web sites.)
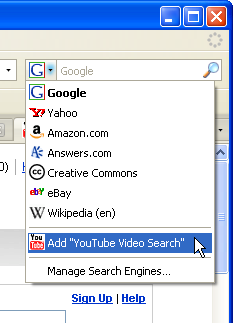
- The search engine appears in the search engines list.
Removing a search engine
- With the Search Engine dialog box open, select a search engine in the list, and click Remove.
If you accidentally delete a default search engine, click Restore Defaults to recover the default search engines.
If you accidentally deleted a search engine that you installed, you must re-install it.
Re-ordering search engines
You might want to re-order the search engines in the list, to put the ones you use most at the top.
With the Search Engines Manager dialog box open, select the search engine you want to move. To move it up in the list, click
Move Up. To move it down, click
Move Down.
3:
Search suggestions
If you want, you can allow Firefox to prompt you with search suggestions. When search suggestions is enabled, as you type in the search bar, Firefox shows a list of suggested matches based on the letters that you have typed so far. Instead of typing the remainder of the search string, you can scroll through the list to find the search suggestion you wish to search for.
To enable search suggestions for all your installed search engines, check the box next to
Show search suggestions in the Search Engines Manager dialog box.
Keywords
Keywords provide an easy way to search specific Web sites directly from the Firefox location bar instead of using the search bar. For example, you could assign a keyword such as eBay to the eBay search engine, then type eBay lamps in the location bar. Firefox then searches eBay.com for lamps. For more information, see Smart Keywords: http://support.mozilla.com/en-US/kb/Smart+Keywords
In the Search Engines Manager dialog box, you can assign keywords to search engines in your search bar.
- With the Search Engines Manager dialog box open, select the search engine you would like to assign a keyword to.
- Click Edit Keyword.
- In the Edit Keyword window, type the keyword you would like to use for that search engine, and click OK.
The Search Engines list has a keyword column, where you can see the keyword for each search engine in the list.
Clearing all search items in the History
To clear all items in your search history, right clickhold down the Ctrl key while you click on the input field of the search bar, and select Clear Search History. Your search bar history is cleared.
If Clear Search History cannot be selected, that means there are no items in your search history to clear.


Clearing an individual search item
To clear individual items from the search bar history, click on the search bar input field. Press the down arrow key on the keyboard to display and scroll the list of items. To delete a highlighted item, press Delete on the keyboard.
Moving or removing the search bar
The search bar is an item on the toolbar like any other. You can move or remove the search bar by customizing the toolbar. For details, see Customizing the toolbar: http://support.mozilla.com/en-US/kb/How+to+customize+the+toolbar
3:
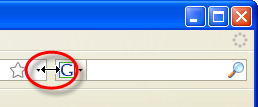
Resizing the search bar
You can increase or decrease the size of the search bar by placing the pointer to the left of the search bar until the pointer turns into a two-ended arrow. Click and drag the two-ended arrow to the left or right to increase or decrease the size of the Search Bar.
Setting Your Home Page
When you open Firefox for the first time, you see the Mozilla Firefox Start Page with a Google search box. This is the standard Firefox home page.
You can change the home page to show your preferred page or a series of pages. The following procedures explain various ways to do this.
Setting a Home Page by Dragging and Dropping
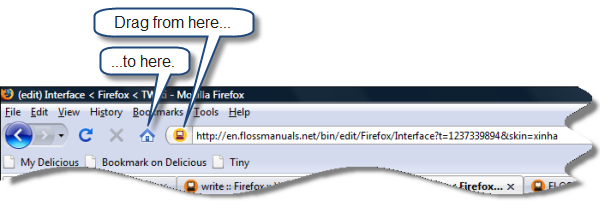
You can set the currently displayed page as the home page by dragging its URL to the Home button. To complete the procedure, follow these steps:
- Navigate to the page that you want to become your home page.
- Click the icon to the left of the Location Bar.
- Press and hold the left mouse button, then drag the Location Bar icon to the Home icon.
Setting a Home Page by Typing the URL
You can set your preferred home page by simply typing the URL. This method works best when you want to set a single home page.
To set a home page by typing the URL, follow these steps:
- Click the following menu commands: Tools>Options.
- In the Options window, click the Main tab.
- In the Home Page box, highlight the URL text.
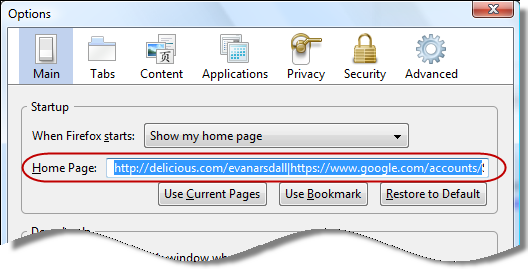
- Type the URL for your preferred home page. The typed text replaces the selected text.
- Click OK.
Setting a Home Page by Copying and Pasting the URL
You can set a home page by copying the URL and pasting it in a Firefox window setting. This method works best when you want to set a single home page.
To set a home page by copying and pasting the URL, follow these steps:
- Browse to the page that you want to set as your home page.
- Click inside the Location Bar. This selects the URL.
- Copy the URL.
- Click the following menu commands: Tools>Options.
- In the Options window, click the Main tab.
- Paste the URL in the Home Page box.
- Click OK.
Setting the Currently Displayed Page as Your Home Page
You can set the open page as your home page. If you have a group of pages open, you can set the entire group as home pages.
To set one page or a group as home pages, follow these steps:
- Open the page or group that you want to set as home pages.
- Click the following menu commands: Tools>Options.
- In the Options window, click the Main tab.
- Click Use Current Pages.
- Click OK.
Resetting the Home Page to the Mozilla Firefox Start Page
To restore the Mozilla Firefox Start Page, follow these steps:
- Click the following menu commands: Tools>Options.
- In the Options window, click the Main tab.
- Click Restore to Default.
- Click OK.
Configuring your Browser
Options windows reference: http://support.mozilla.com/en-US/kb/Options+window (use this to create task-based configuration procedures)
Making Firefox your default browser
Firefox displays web pages on the Internet and on your computer. To easily open web pages, you can make Firefox your default browser.
2.0:
To make Firefox your default web browser, select and click the Check Now button in the Main panel.
3:
To make Firefox your default web browser, select and click the Check Now button in the Advanced panel.
Accessing Firefox Configuration Settings
You can configure Firefox by:
- Using the Tools > Options dialog
- Using the about:config page
Using the about:config page
You can access the in your browser window by entering about:config into the Firefox window. You will receive the following warning:

Click I'll be careful, I promise! You're now on the advanced configuration page. From here, you have access to all Firefox configuration variables. You should have a solid grasp of the configuration variables before making any changes to avoid unwanted browser behavior.
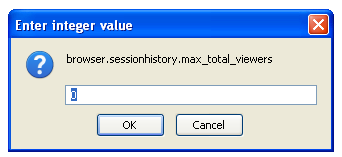
You can search for a specific configuration variable by using the Filter field. To find a specific configuration variable, enter all or part of the configuration string in the Filter field or scroll through the list. Double-clicking a variable will allow you to change the value of that variable within the Firefox configuration by either switching the Boolean value or prompting you for a value.
Improving speed and efficiency
Managing different file types
Firefox can handle many types of files. However, for some files such as movies or music, Firefox needs Plugins or external applications that can handle those files. If Firefox doesn't have the needed Plugin or doesn't know what application to use to open the file, it can still save the file to your hard disk. When saving files, you can keep track of them using the Download Manager.
Plugins extend Firefox's functionality and run within it. Plugins like Sun Java, Adobe Flash, and RealNetworks RealPlayer allow Firefox to show multimedia files and run small applications such as movies, animations, and games. You can find common Plugins on the Plugins page at Mozilla Add-ons.
When files cannot be opened within Firefox, you can choose to open them with applications outside of Firefox. For example, you can use the media player of your choice to play MP3 files.
2.0:
You can specify how Firefox handles files it can't display in the Download Actions dialog. To open this dialog, select , open the Content panel, and click the Manage… button in the File Types section. You can change the action for a file type or remove it. More information about this dialog is available in File Types optionspreferences.
3:
You can specify how Firefox handles files it can't display in the Applications panel. To open this panel, select , and click the Applications panel. You can change the action for a file type or remove it. More information about this dialog is available in Applications optionspreferences.
When you click on a file and Firefox doesn't know how to handle it, an Opening dialog box is displayed, offering these choices:
- Open with: Firefox opens the file using the default program in your system settings. You can also choose a different program by selecting Other… in the drop-down list.
- Save to Disk: Firefox allows you to select a location to save the file. If you have selected Save files to (this folder) in the Main panel of OptionsPreferences, the file will automatically be saved to the default folder; otherwise Firefox will ask you where to save it.
- Do this automatically for files like this from now on: When this is selected, Firefox will automatically perform the selected action the next time you download a file of this type.
2.0:
Tip: You can clear your saved optionspreferences for Do this automatically for files like this from now on in the Download Actions dialog.
3:
Tip: You can clear your saved optionspreferences for Do this automatically for files like this from now on in the Applications panel.
Changing cache settings
Firefox stores copies of frequently accessed pages in the cache. By doing this Firefox doesn't have to retrieve the page from the network each time you view the web page.
To set the size of the cache:
- Select .
- Open the Advanced panel and click the Network tab.
- Enter a number in the Use up to field to specify the size of the cache. The default size is 50MB.
Important: A larger cache allows more data to be quickly retrieved, but more of your hard disk space is used.
When you quit Firefox, it performs cache maintenance. If maintenance takes longer than you wish, try reducing the size of the disk cache.
To reload a page at any time, click the Reload button in Firefox's Navigation Toolbar. Firefox then loads and displays the latest version of the page.
Using Tabbed Browsing
Tabbed browsing enables you to open several web pages in a single Firefox window. Each page appears in a separate tab.
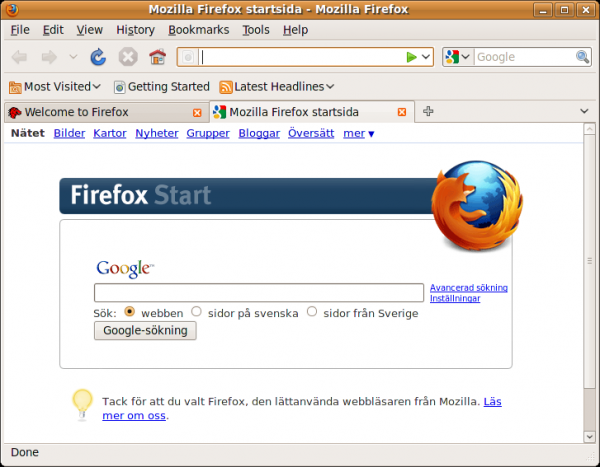
When you start Firefox for the first time, you see a single window with two tabs displayed. Firefox will show the "Welcome to Firefox" page and default start page.
Setting Up Tabbed Browsing
To set up tabbed browsing, follow these steps:
- Click the following menu command: Tools > Options for Mac OS X, or Edit > Preferences on Linux and Windows.
- In the Options window, click the Tabs icon.
- Under New pages should be opened in, click a new tab.
- Check the following options:
- Always show the tab bar
- When I open a new tab, switch to it immediately
- Click OK.
- Note: you can always right-click a link and choose "Open Link in New Tab" or "Open Link in New Page" regardless of the above settings.
Opening a New Tab
You can open a new tab using any of the following techniques:
- Use this menu command: File > New Tab.
- Press Ctrl+T on Windows and Linux, or CMD+T (⌘+T) on Mac OS X.
- Double-click an empty space in the Tab Bar.
New tabs will open immediately to the right of the current tab in Firefox 3.6 and later. In earlier versions of Firefox, the tab would be opened to the right of
all open tabs.
Opening a Link in a New Tab
To open a link in a new tab, do one of the following:
- If you have a mouse with a scroll wheel, click the wheel while pointing to a link.
- Drag the link and drop it on an empty space in the Tab Bar.
Note: If only one web page is open, the Tab Bar may be hidden. See Setting Up Tabbed Browsing above for information on how to turn on the Tab Bar.
- Drag and drop the link on a tab to open the link in that tab.
- Right-click the link, then select Open Link in New Tab.
- To open a link in a new tab from the Location Bar, type the URL, then press Alt+Enter.
Moving Tabs Within a Window
Tabs appear in the order in which you open them. This may not always be what you want.
To move a tab to a different location in the Firefox tab bar, simply drag it there using your mouse. While you are dragging the tab, Firefox displays a small indicator to show where the tab will be moved. You can also use keyboard shortcuts to move tabs within a window.
Moving Tabs Between Windows
You can move tabs between windows or create a new window with a single tab by dragging the tab off the tab bar. Firefox will create a new window with just that tab. You can move tabs between windows by dragging tabs from the tab bar in one window to the tab bar to another. If you drag away the only tab in a window, Firefox will close that window.
Bookmarking a Set of Tabs
To bookmark a set of tabs, do either of the following:
- Click the following menu command: Bookmarks >Bookmark All Tabs.
- Press Ctrl+Shift+D.
Opening a Set of Bookmarks in Tabs
To open a set of bookmarks in tabs, follow these steps:
- Click the Bookmarks menu, then click a bookmark folder.
- In the sub-menu, click Open All in Tabs; or
If you have a mouse with a scroll wheel, click the wheel while pointing to the folder.
Setting Multiple Home Pages as Tabs
Instead of using only one web page as your home page, you can set up a collection of home pages using multiple tabs.
To set up multiple tabbed home pages, follow these steps:
- Navigate to a page that you want to include in your collection of home pages.
- Open a new, blank tab, then navigate to another page that you want to include.
- Continue opening tabs and navigating to pages until you have set up the entire collection.
- Click the following menu command: Tools > Options.
- Click the Main icon.
- Under Startup, click Use Current Pages.
Now, whenever you start Firefox or click the Home button on the Navigation toolbar, Firefox displays the entire collection of tabbed home pages.
Closing Tabs
To close a single tab, do any of the following:
- Click the Close Tab button
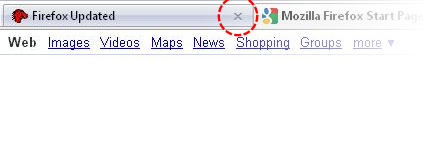
- Press Ctrl+W.
- If you have a mouse with a scroll wheel, click the wheel while pointing to a tab.
- Click the following menu command: File > Close Tab.
To close all tabs except the current one, right-clickhold down the Ctrl key while you click the tab, then click Close Other Tabs.
If you close the last tab in a window, FIrefox will close the window.
Restoring Closed Tabs
Firefox tracks the tabs that you have recently closed. To restore one or all closed tabs, follow these steps:
- Click the following menu command: History > Recently Closed Tabs.
- Do any of the following:
* Click the name of the tab that you want to re-open.
* Click Open All in Tabs to restore all of the closed tabs.
* Press Ctrl+Shift+T to open each tab one by one in reverse order.
Related Tasks
Downloading Files
Perhaps the most essential function of the Internet is the ability to quickly transfer data files from one location on the Internet to another location. These files can be programs, images, music, video or documents. When you click a link, it is handled according to the type of link and Firefox's settings.
Almost any link can be saved as a file to your computer for later use. To make sure you get what you want, you must watch for some cues and clues. These will be discussed further on.
The Downloads window
When you download a file from the Internet to your computer using Firefox, it opens a Downloads window which shows your downloading progress and a list of completed downloads.

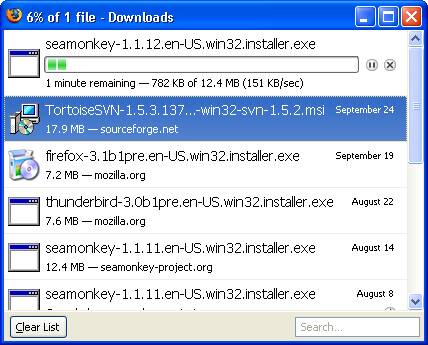
To pause a download, press 
 . To resume downloading, press
  .
.
To cancel a download, press  .
.
If a download failed or if you canceled it, you can retry by pressing  .
.
 To remove all completed downloads from the list of files, click Clear List.
You can remove any single download from the list by right-clicking it and selecting Remove From List.
To quickly locate a downloaded file on your computer, right-click the filename in the download window and select Open Containing Folder.
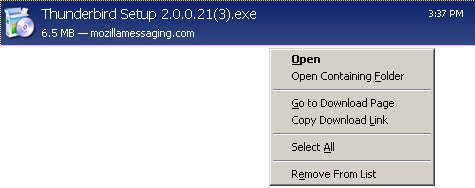 .
.
Once a file has completed downloading, you can open it by double-clicking on it in the Download Manager window or in the location on your computer where it has been saved.
File download options
You set options such as file locations and visibility of the download window from the Tools > Options dialog, on the Main tab.
By default, Firefox will put downloaded files on your desktop. To have Firefox ask you where to save a downloaded file go to Tools > Options > Main and select Always ask me where to save files.

To save downloaded files in a single location of your choosing, select Save files to and browse to the new location.
If you want the Downloads window to close as soon as the download finishes, select Close it when all downloads are finished.
Downloading Files Without Displaying Them
Even if a file will display in your browser, you may want to save it for later, rather than reading it immediately. In many cases, you can right click on a link, and select Save Link As...
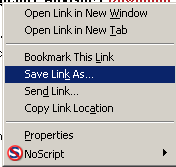
Depending on your download settings, Firefox will attempt to download the file or show you a dialog box to select file destination and file name.
Note that some links go to a confirmation page or otherwise don't point precisely to the file they advertise. You should check the file to make sure that it's what you wanted.
Downloading Really Big Files
The term "really big" is subjective, depending on the speed of your connection to the Internet and depending on how fast the owner of the file can (or is willing to) send it. Generally, a file must be transferred in one session. You can't expect to stop in mid-download, shut the computer off, and expect to resume it the next day. Also, the longer a file takes to download, the more likely an interruption or download problem becomes.
If you frequently have problems with downloads or need to do them in smaller chunks, there are "download managers" which can help. There's probably an Add-on or Extension to help. See those chapters or see the Mozilla site to find suitable aids.
Copy, Save, & Print
Copying, saving, and printing are three fundamental task you will wish to use pretty early on. Here are some quick tips on each :
Copying Text
- Select the text.
- On the menu, click .
You can paste the text into other programs.
To copy a link (URL) or an image link from a page
- Position the pointer over the link or image.
- Right-clickPress Ctrl and click on the link or image to display a pop-up menu.
- Choose Copy Link Location or Copy Image Location. If an image is also a link, you can choose either menu item.
You can paste the link into other programs or into Firefox's Location Bar.
Saving a page
- On the . The Save As dialog box appears.
- Choose a location for the saved page.
- Choose a format for the page you want to save:
- Web Page, Complete: Save the whole web page along with pictures. This choice allows you to view it as originally shown with pictures, but it may not keep the HTML link structure of the original page. Firefox creates a new directory where the page is saved to save pictures and other files necessary to show the whole web page.
- Web Page, HTML Only: Save the original page without pictures. This choice preserves the original HTML link structure in one file.
- Text file: Save the original page as a text file. This choice will not preserve the original HTML link structure, but will allow you to see a text version of the web page in any text editor.
- Type a file name for the page and click Save.
To save a frame from within a web page
- Position the mouse pointer within the frame.
- Press Ctrl and click onRight-click the frame to display a pop-up menu.
- Click on the submenu. The Save As dialog box appears.
- Choose a location for the saved page.
- Choose a format for the page you want to save.
- Type a file name for the page and click Save.
Saving a file onto your hard drive lets you view the page when you aren't connected to the Internet.
To save an image from a page
- Position the mouse pointer over the image.
- Right-clickPress Ctrl and click on the image to display a pop-up menu.
- Click . The Save Image dialog box appears.
- Choose a location for the saved image.
- Type a file name for the image and click Save.
To save a page without displaying it
This technique is useful for retrieving a nonformatted page that isn't intended for viewing.
- Position the mouse pointer over a link to the page.
- Right-clickPress Ctrl and click on the link to display a pop-up menu.
- Click The Save As dialog box appears.
- Choose a location for the saved page.
- Type a file name for the page and click Save.
Important: Some links automatically download and save files to your hard drive after you click them. The URLs for these links often begin with "ftp" or end with a file-type extension such as "au" or "mpeg." These links might transmit software, sound, or movie files and can launch helper applications that support the files.
Tip: To set an image as your desktop background, right-clickpress Ctrl, click the mouse button on an image and click Set As Desktop Background on the pop-up menu.
Printing a page
To print selected text
- Select the text in the current page.
- Click . The print dialog box appears.
- Under Print Range, click Selection.
Settings by the web page's author and the size of the printed page, not the size of the onscreen window, determine placement of content on the printed page. Text is wrapped and graphics are repositioned to accommodate paper size.
Previewing a printed page
To have an early look at how a page will look before it is printed, you can use Print Preview:
- On the . Firefox switches into Print Preview mode.
In Print Preview mode, you can do the following with pages you want to print:
- View a preview of each page: Click the Next
 , Previous
  , First
  , or Last
  button to move between pages.
- Change the scale (size) of pages: In the Scale drop-down menu, choose "50%" to make each page half the size of the original page. To automatically resize pages so that they fit the width of the paper, choose "Shrink to Fit". You can also type in your own percentage by choosing "Custom".
- Change the orientation of the page: Choose Portrait
 to position the page with the shorter side facing up. Choose Landscape
 to position the page sideways with the longer side facing up.
- Change the page setup: Click Page Setup to further customize pages you want to print.
- Print: Click Print to print the pages.
Note: Some Print Preview functions are different or unavailable on Mac OS and Linux.
Changing the page setup
Note: Some Page Setup functions are different or unavailable on Mac OS and Linux.
To customize how pages are printed in Firefox, you can use Page Setup:
- Click . The Page Setup dialog box appears.
In the Page Setup dialog box, you can change the following settings for pages you want to print:
-
Format & Options tab: Choose the orientation, scale, and other options:
-
Orientation:
- Portrait: Choose Portrait
 to position the page normally, with the shorter side facing up.
- Landscape: Choose Landscape
 to position the page sideways, with the longer side facing up.
-
Scale: Type in a percentage of the original size. For example, type "50" to make each page half the size of the original page.
- Shrink To Fit Page Width: Select this to automatically resize the page to the width of the paper.
-
Options:
- Print Background (colors and images): Select this to print background images and colors. If the check box is not selected, only pictures and color in the foreground (in front) are printed.
-
Margins & Header/Footer tab: Click this tab to set up margins, headers, and footers:
-
Margins:
- Top, Bottom, Left, Right: Type a margin in the given units for the top, bottom, left, and right margins.
-
Headers & Footers: Each drop-down list represents either a header or a footer area. The top row of drop-down lists are for the left, center, and right header areas. The bottom row are for the left, center, and right footer areas. In each drop-down list, choose one of the following options:
- --blank--: Show nothing in this area.
- Title: Show the web page title.
- URL: Show the web page URL (URL's usually start with "http://").
- Date/Time: Show the date and time when the web page is printed.
- Page #: Show the page number of each page.
- Page # of #: Show the page number along with the total number of pages. For example, if you print a five page web page, "3 of 5" would be shown on the third page.
-
Custom: Type your own text. You can include any of the following codes to print specific information:
- &PT: Page Number with Total (Example: "3 of 5")
- &P: Page Number
- &D: Date
- &U: URL
- &T: Page Title
Tip: To see a preview of changes made to Page Setup, use Print Preview.
Customizing Your Toolbars
Toolbars appear in the rectangular area above the main content area in your web browser. Typically their backgrounds are gray in color.
- Menu Bar: Browser menus such as File, Edit, View, Help, and so on.
- Navigation Bar: The Location Bar, the buttons used to navigate websites, and the Search box.
- Bookmarks Toolbar: Bookmarks that you place in your Bookmarks Toolbar Folder.
Firefox allows you to add additional tools, re-arrange spacing, and more. Customizing toolbars lets you re-arrange, organize, add, and remove buttons or fields to change your Firefox experience to suit your needs.
To customize your toolbar, from the Firefox menu, select the View menu, and then select the Toolbars sub-menu, inside of which you should select the Customize... item to open the Customize Toolbar window.
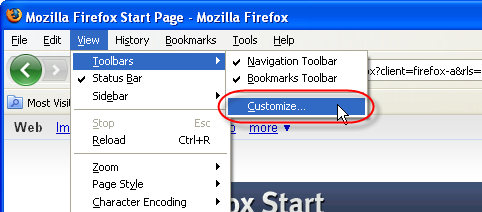
You can add or remove items on the toolbar to customize it according to your specific needs.
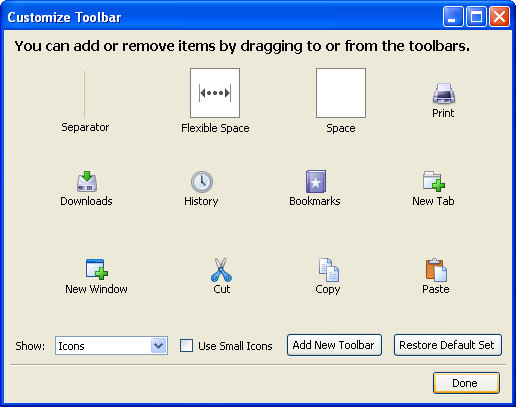
- From the Customize Toolbar window, click the item you wish to add to your toolbar and drag it onto the toolbar.
- The item is added to the toolbar.
If you're looking for a specific item that doesn't appear in Customize Toolbar window, you can download add-ons for more items at addons.mozilla.org.
- Click Done.
- From the Customize Toolbar window, click the item in the toolbar and drag it to the Customize Toolbar window.
- The item is removed from the toolbar.
When the Customize Toolbar window is open, you can re-arrange items in the toolbar by clicking and dragging them.
To reposition a toolbar item, click it and hold down the mouse button. As you drag it, a black line indicates its destination. To place it in the indicated location on the toolbar, release the mouse button.
At the bottom of the Customize Toolbar window, there are additional options for changing the appearance of the toolbar.
- Show. From the Show drop-down, you can choose what to display on the toolbar: Icons, Text, or Icons and Text together. By default, Firefox shows Icons.
- Use Small Icons. To conserve screen space in the toolbar, select Use Small Icons to display tools using smaller icons.
- Restore Default Settings. To restore your toolbar to its default settings, click Restore Default Set. Any changes to the default toolbar and any custom toolbars that you added will be lost.
Adding special items
The following special items can be added to the toolbar to group items and to change spacing between them:
- Separator. This item is a vertical separator bar that can be used to group similar tools together.
- Space. This item creates a small space between two items in the toolbar. Add multiple instances of the Space item to create larger space.
- Flexible Space. This item adds space of an adjustable width to the toolbar so that the toolbar fills the width of the browser window.
Adding a New Toolbar
You can create a new toolbar for items that you use often. The new toolbar appears below the default Firefox toolbar.
- Select View > Toolbars > Customize.
- Click Add New Toolbar.
- In the New Toolbar dialog, enter a name for your toolbar, and click OK.
- Click Done.
The toolbar appears as a blank band across the screen below the default toolbar. You can add new items by clicking and dragging them into this band.
Showing or Hiding Toolbars
You can show or hide a toolbar at any time by doing one of the following:
- Right-clicking a toolbar and either selecting it or de-selecting it from the menu. When selected, a toolbar shows a checkmark next to it on the menu.
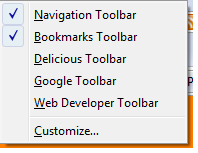
- Selecting View > Toolbars and selecting or de-selecting a toolbar.
Add-ons and Plugins
Through the installation of Add-ons and Plugins Firefox can be extended to deliver new features. The difference between Add-ons and Plugins is a bit of a grey area, mostly historical, and is narrowing to mean the same thing with each new release of Firefox. The installation and updating of Plugins and Add-ons still remains slightly different but in future releases of Firefox this may also be streamlined and unified.
Plugins
Where they came from: In the early Netscape days a variety of multi-media companies bombarded Netscape with ideas to include new multimedia formats into web pages and into the content supported by the browser. As a solution to this problem Netscape added a Plugin programing interface so any of these companies could add support for new content types and extend the browser's capability.
Some Popular Plugins: Flash, Java, Quick-time, Windows Media Player, Adobe PDF Reader, Real Video/Audio are popular plugins for Firefox but there are many more. For example there's a plugin to replace many advertisements on web pages with fine artwork. See the Mozilla site (below) and search for add-art plugin. You can also go to https://addons.mozilla.org/en-US/firefox/addon/6846
Where to Find Them: See https://addons.mozilla.org/firefox/browse/type:7 for the mentioned plugins and many more.
Why Bother Getting Plugins: Each of these plugins allow web pages to show audio, video, or publishing formats beyond the language of the web that is HTML, CSS, and Javascript. For example, Adobe Reader plugin lets the user open PDF files directly inside the browser, and the QuickTime and RealPlayer plugins are used to play special format videos in a web page. If you are viewing a site like YouTube and you aren't seeing video, chances are you are missing the Flash Plugin and you need to install it.
Add-ons
Add-ons are a newer invention. Add-ons don't offer support for new types of content like plugins, but they do allow content to be manipulated and changed to meet a users perception of what a web site or web page should look like. The greasemonkey add-on is an example of this kind of add-on ( https://addons.mozilla.org/firefox/addon/748 ). Other add-ons allow you to customize the user interface and add all kinds of new features to Firefox.
The add-on system allows the basic user interface for Firefox to remain clean and simple from release to release, but also be extended in thousands of different ways to meet personal preferences. It is a great source of innovation for the browser. When a new add-on is developed and becomes widely popular to all kinds of users, the Firefox development team looks at how that add-on can be integrated as a new feature.
I love Firefox, but if it only could....
The development team often hears this kind of request, and chances are someone has had the same idea. If you have something new that you would like to see Firefox do the first step is to check the add-on site at Mozilla.org (https://addons.mozilla.org/firefox) and search for the new feature that you are looking for. You can also get to the add-ons site through the Tools > Add-ons menu option in Firefox.
Often downloading and installing an add-on can be a fast path to satisfying your desire for that new feature. Recently the add-on site has also offered a "Fashion Your Firefox" (https://addons.mozilla.org/firefox/fashionyourfirefox) to provide collections of add-ons you might be interested in depending on the way you use your browser. Check this site out for collections of add-ons you might be interested in.
Some recommended functions
Both for security and convenience, three of the most-requested functions are
- Protection from unwanted popup and popunder windows
- Protection from scripts on Web pages
- Help with entering repeated data
Many Web pages serve advertising. This pays for a lot of services, and when done well, as at Google, is helpful and unobtrusive. The most obtrusive advertising appears in popup windows in front of what you were trying to look at. Another annoyance is popunders, which hang around until you close the main browser window. Then you don't even know which site is responsible for them. The most obnoxious of all pop up new windows when you close the old ones, sometimes more than one each. You may have to reboot to get rid of the chain reaction.
There are a great many add-ons for Firefox. You may wish to explore them yourself. The following are not proposed as the absolute best of everything, but they meet the requirements of many users.
- Popupmaster is a popup blocker. It places an icon in the Firefox status bar. Clicking that icon brings up a menu that lets you block popups on the current Web site and manage your the blocks you have set previously.
- NoScript's original purpose was to prevent execution of Java and Javascript except where the user permits it. Several other security functions come with recent versions of NoScript, such as a setting to force a list of sites to use Secure HTTP. It can also block other plugins, cross-site scripting, and more at the user's choice. Updates are fairly frequent.
- Google Toolbar serves many functions, providing one-click access to many Google services. AutoFill automatically fills in forms with your standard information, such as name, address, telephone numbers.
Using add-ons
Firefox can do a lot more than your average browser. One of the ways you use Firefox for something other than just browsing the web is to install add-ons. Firefox add-ons are small pieces of software that add new features or functionality to your installation of Firefox. Add-ons can augment Firefox with new search engines, foreign-language dictionaries, or change the visual appearance of Firefox. Through add-ons, you can customize Firefox to meet your needs and tastes.
The installation process is the same for Firefox on any Operating System, so you can install them on Windows, Linux, or MacOSX (you must first have Firefox installed!).
What is a Firefox Add-on?
An add-on is a software module which lets Firefox do something more, or do things differently. To use an add-on, you must download the module and install it. Then Firefox gets the functionality of this new module.
There are several types of add-ons: extensions, plugins, and themes.
- Extensions provide additional functionality to Firefox.
- Themes change the visual appearance of Firefox.
3:
- Plugins manage Internet content that Firefox can't process by itself. Ex.: Flash, Java, etc.
The functionality available from add-ons is quite wide. You can add dictionaries to Firefox, change the look of Firefox, display the time in different countries in the browser, or an add-on might suggest other websites you can visit that are similar to the one you are looking at.
To see available add-ons, see the Firefox add-ons page:
https://addons.mozilla.org/firefox/
The list of Add-on categories are here :
https://addons.mozilla.org/firefox/browse/
You can browse the list and see whats available.
It is possible to create add-ons that can do a number of things you might not like. An add-on can read a lot of information from your browser as you browse sites or might use various tricks to get, add, alter, or destroy data on you have on your computer. It is for this reason that you should never install an Add-on unless it is from a trusted source. We recommend that you never install an add-on for Firefox unless it is available from the official Firefox add-on pages.
Acquiring add-ons
You can acquire new extensions and themes through Firefox itself:
3:
- At the top of the Firefox windowOn the menu bar, click the Tools menu and select Add-ons to open the Add-ons window.
- In the Add-ons window, the list of recommended add-ons is displayed.
- If the Get Add-ons panel is not already selected, select it.
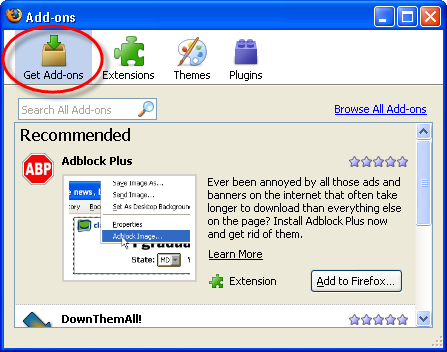
2.0:
- At the top of the Firefox windowOn the menu bar, click the Tools menu and select Add-ons to open the Add-ons window.
- In the Add-ons dialog, the list of currently installed extensions is displayed.
- By default, Firefox includes a single extension. The Talkback extension enables you to send messages about your experience using Firefox to its team of developers.
- To see the list of available themes, click the Themes tab. Themes are described in detail later.
- To acquire new extensions, click Get Extensions.
- The Firefox extensions page is displayed. Through this page, you can access a very large collection of extensions and other items available for download.
Finding and installing add-ons
- In the Get Add-ons panel of the Add-ons window, search for an add-on by typing the search term in the Search All Add-ons field, then press EnterReturn. A list of add-ons matching your search term will display.
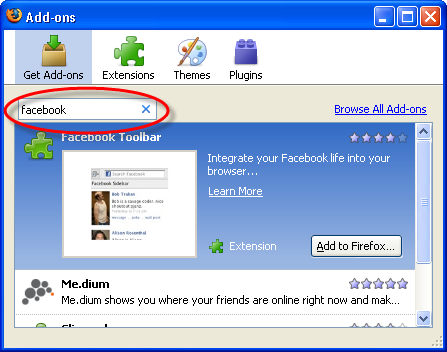
- To begin installing an add-on, select it and click on Add to Firefox....
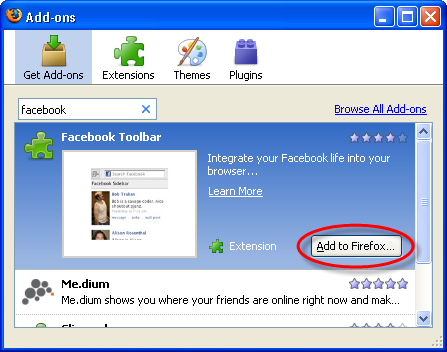
- You may be required to review and accept the End User License Agreement. To continue with the installation, click Accept and Install.
- Firefox will then fetch the add-on, and display the Software Installation window. To begin the installation, click Install Now.
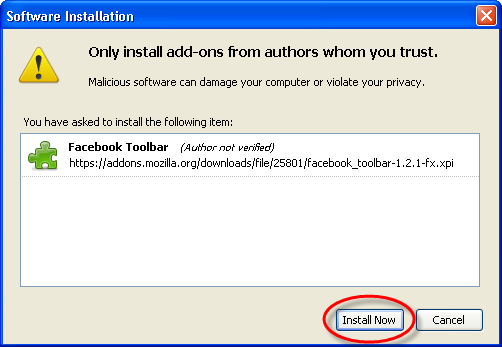
- After the installation is complete, you must restart Firefox to start using the new add-ons. To restart, click Restart Firefox that appears after installation is complete.
- When Firefox restarts, the installed add-on is displayed with previously installed ones.
More Ways to Find Add-ons
You can also browse and install add-ons by clicking on Browse All Add-ons, which will take you to the Firefox Add-ons page. By default, the page features top-rated Firefox extensions. There are several ways to specialize your search.
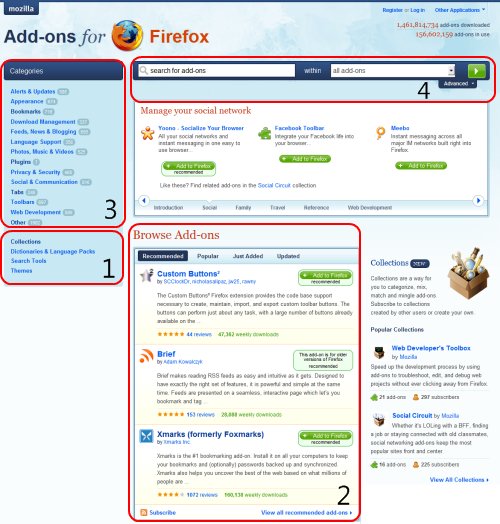
The following item numbers below refer to the illustration above.
- In the lower left there are links for:
- Themes to change the appearance of Firefox.
- Dictionaries allow you to check your spelling in additional languages.
- Search Plugins allows you to add more search engines to the search bar.
- The Browse Add-ons section lets you see some of the latest recommended add-ons, most-installed add-ons, new add-ons, and recently updated add-ons. Click at the top of the section to change the category, and click the View all link at the bottom of the section to view more add-ons.
- To browse a category of extensions, select the category name under the Category Panel on the left side.
- To search for an add-on by name, type the name in the search box and press Enter.
- A list of most popular add-ons is available. To see more 'popular' add-ons, click View All.
Installing an Add-on
To begin installing an add-on, click its name on the page. Detailed information on the add-on is displayed.
- Firefox automatically verifies add-ons compatible with your version. If the button is grayed out, the add-on is not compatible with your version.
To install the add-on, click the green Add to Firefox button.
- You may be required to review and accept the End User License Agreement. To continue with the installation, click Accept and Install.
After the installation is complete, you must restart Firefox to enable the add-on. To restart, click Restart Firefox at the bottom of the Add-ons window. When Firefox restarts, the installed add-on is displayed with previously installed ones.
Fashion Your Firefox
Fashion Your Firefox is a simple Web application that customizes your Firefox browser based on your interests and online activities. Fashion Your Firefox helps you select add-ons that fit your needs, and enables you to install them with just one click.
For more information about the application, visit fashionyourfirefox.com. There you can find a list of frequently asked questions (https://addons.mozilla.org/en-US/firefox/pages/fashionyourfirefox_faq).
Personas for Firefox
Personas are free, easy-to-install “skins” for Firefox that make changing the look of your browser as easy as changing your shirt. With Personas, you can choose hundreds of artist-created designs from sports, fashion, cause, and music categories, seeded with new styles from leading brands and gifted designers. You can also turn Firefox into a canvas and create your own design to share with the community.
Find out more by visiting GetPersonas.com. There you can find a list of frequently asked questions. And after you give Personas a shot, you're also encouraged to let the developers know what you think.
Managing Add-ons
Add-ons are tools that increase your productivity with Firefox. You can install add-ons that automate tasks, change the appearance of the browser, and enhance the ability of Firefox to handle specific file formats and multimedia.
Firefox enables you to download and install the following three types of add-ons: extensions, themes, and plugins. This section explains how to update and delete each type.
Managing Extensions and Plug-ins
Extensions and plug-ins are essentially programs, and like all programs, they require periodic updating. Firefox automatically checks for updates to add-ons.
Verifying That Add-on Update Settings Are Enabled
If automatic updates for add-ons do not seem to be working, follow these steps to check the settings:
- Select the following menu command: Tools > Options.
- Click the Advanced icon.
- Click the Update tab.
- Under the Automatically check for updates to: setting, ensure that the box preceding Installed Add-Ons is checked.
- Under the When updates are found setting, check your preferred option:
- Ask me what I want to do: With this option enabled, Firefox asks your permission before downloading and installing an update, and you have the chance to allow or prevent the update.
- Automatically download and install the update: With this option enabled, Firefox downloads the update and installs it automatically.
- Click OK.
Uninstalling Extensions
- At the top of the Firefox windowOn the menu bar, click the Tools menu and select Add-ons. The Add-ons window will open.
- In the Add-ons window, select the Extensions panel if it is not already selected. The set of installed extensions is displayed.

- Select the extension you want to remove to display the "OptionsPreferences", "Disable", and "Uninstall" buttons for that extension.

- Click the Uninstall button.

- You will be asked to confirm whether or not you want to uninstall the extension. In the Uninstall window, click Uninstall to confirm that you want to remove that extension.
The extension will be gone the next time you start Firefox.
-
Note: You can uninstall multiple extensions before you restart Firefox to complete the process.
Uninstalling themes
-
Note: Make sure you are not currently using the theme you want to uninstall.
- At the top of the Firefox windowOn the menu bar, click the Tools menu and select Add-ons. The Add-ons window will open.
- In the Add-ons window, select the Themes panel if it is not already selected. The set of installed themes is displayed.

- Select the theme you want to remove to display the "Use Theme" and "Uninstall" buttons for that extension.

- Click the Uninstall button.

- You will be asked to confirm whether or not you want to uninstall the theme. In the Uninstall window, click Uninstall to confirm that you want to remove that theme.
The theme will be gone the next time you start Firefox.
3:
Enabling, Updating, and Disabling Plugins
Plugins are programs that display content on certain web pages, such as PDF files or video on websites. You can use the Add-ons window to view installed plugins, as well as to enable or disable them.
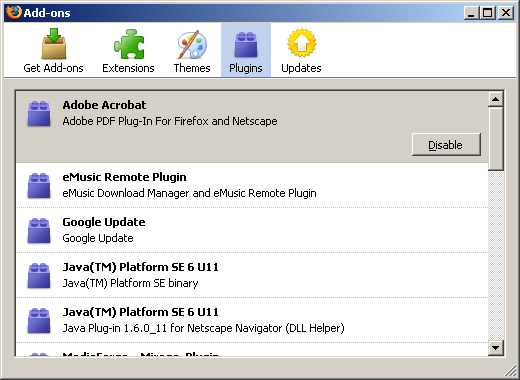
- Use the Tools > Add-ons menu item to display the Add-ons window.
- Select the Plugins tab. (Disabled plugins are displayed with a grayed out icon)
- Click on the Plugin you want to enable or disable.
- Press the button to enable or disable that plugin.
If a plugin is already enabled, a 'Disable' button appears.
If a plugin is disabled, an 'Enable' button appears.
Changes to enabled plugin take effect immediately - you do not need to restart Firefox after disabling or enabling plugins.
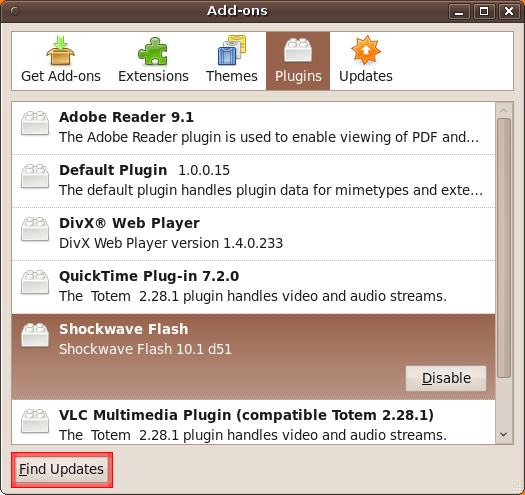
With Firefox 3.6, you can also check for updates to plugins using the Add-Ons window. In the lower left-hand of the Plugins tab, you will see a Find Updates button. Click this and Firefox will check your installed plugins against its database of plugins.
Uninstalling plugins
The Add-ons window cannot be used to uninstall plugins, but can be used to enable or disable them. In most cases, disabling plugins is sufficient.
If you are sure that you need to uninstall, rather than disable a plugin, check the Popular plugins article on Mozilla's support site for information on the plugin you are interested in removing.
FireFTP
FireFTP is a Firefox add-on that gives you a free, open source, cross-platform FTP client. If you have access to a Web server and you have an FTP account on that server, then using FireFTP you can put all your HTML files, podcasts, media files, backup files, or anything you want online. It works on Mac OS X, Windows, and Linux; this is very useful if you ever find yourself on someone else's machine or if you travel and find yourself stranded in an Internet cafe in desperate need of an FTP application. It's free software, the download size is extremely small, and even better — the FireFTP installation process is simple. It's truly a wonderful thing.
Installing
FireFTP is a Firefox add-on.
- To install the add-on, you must visit the Firefox addons page: https://addons.mozilla.org/firefox/
- Next, search for fireftp. Type 'fireftp' in the search box within the addons page:

- Click
 . You see something like this:
- Now, click Add to Firefox and you see the Software Installation window.
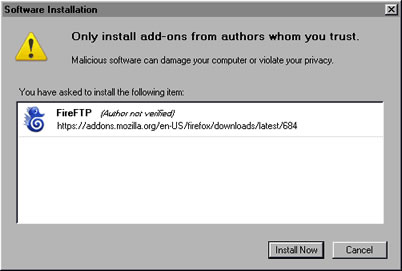
- Click Install Now. When the download and installation finishes, you see the Add-ons window.
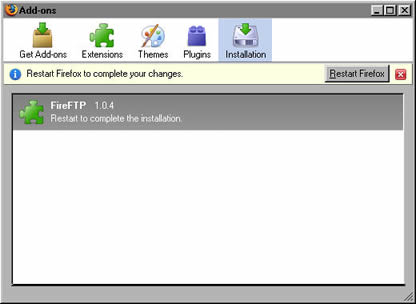
- Press Restart Firefox, then confirm that you want to restart Firefox. After the browser restarts, the Add-ons window confirms that FireFTP is installed.
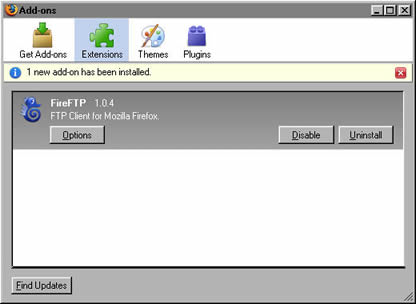
Now, you can start FireFTP.
Starting FireFTP
To start FireFTP, click Tools>FireFTP.
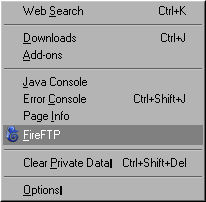
FireFTP opens in a new window within Firefox:
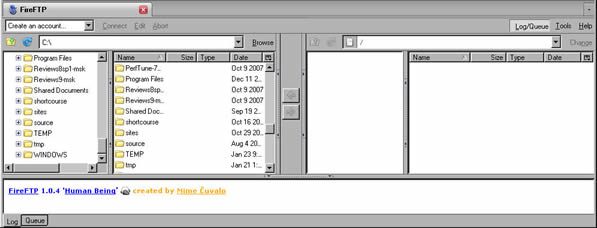
Although FireFTP opens in a browser as a web page, it is actually a full-featured FTP application. As you use FireFTP, you can appreciate the convenience of its browser-based interface. You can upload files to a website using FireFTP, and then simply click a browser tab and refresh to see the changes in your web page.
The first time you open FireFTP, you see the homepage of the FireFTP web site. From this site, you can access support and developer information.

Do not donate if you don't want to. FireFTP is absolutely free and a donation to this worthwhile cause is completely optional.
Sending a file to your server
This section covers how to upload a file to a server, assuming the server does not impose security restrictions beyond authenticating your logon credentials. You need the following information to connect to the server:
- Host: the domain name or IP address of your web server
- Login: the user name for the account on the server
- Password: the password for the account
To obtain the connection information, contact the person or organization, such as your Internet service provider, who created the account for you. You can store this information in FireFTP, so you can access the web server quickly. To store the connection information, click Create an account.

You see the Account Manager window.
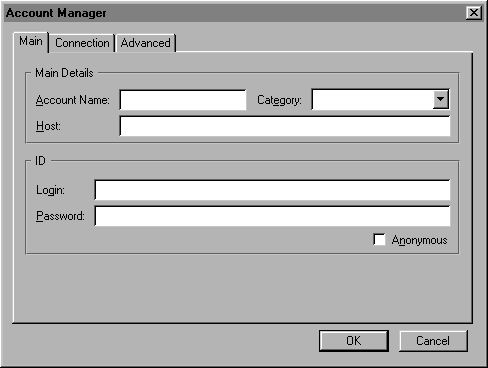
In
Account Manager, enter the connection information. In
Account Name and in
Category, you can type any names you like. If you do not type an account name, FireFTP copies the information you type from the host field to the account name field. After you fill in the fields in
Account Manager, the window looks something like this:
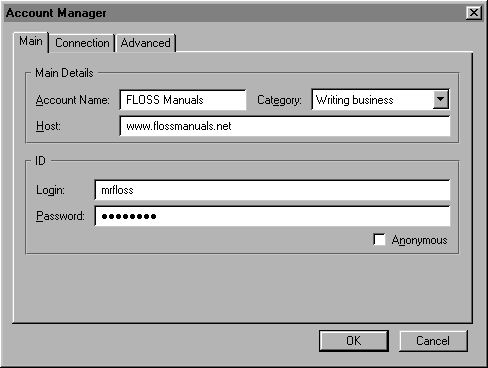
Click OK.
Connecting
After creating an account, click Connect. FireFTP connects to the server, as shown in the log messages in the lower part of the window. Files on the web server appear on the right side of the window. Files on your computer display on the left side of the window.
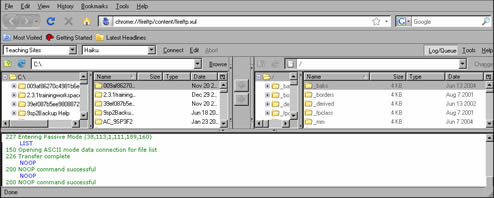
Transferring files
You can transfer files from your computer to the server, or from the server to your computer. Navigate to the files you want to transfer and select the folder on the other side of the window where you want to transfer the files.
Click the arrow pointing to the right to transfer file from your computer to the server.

Click the arrow pointing to the left to transfer files from the server to your computer. You see that the status of the transfer in the log at the bottom the window:
That's it. You have transferred your first files from your computer to a web server using FireFTP. You can also transfer entire directories and multiple files.
Changing the look of Firefox
Firefox has two ways to change the way that the Firefox window itself looks.
- Personas change the background design of the toolbar area and status bar. It's very easy to switch personas, so you can change Firefox's look to fit your mood.
- Themes change the way the toolbar and buttons look, and can even make Firefox look like a completely different program.
Using Personas
The personas feature is built into Firefox version 3.6, so you don't need to do anything special to be able to use them. In Firefox 3.0 or 3.5, you must first install an add-on in order to use personas.
If you are using Firefox 3.0 or 3.5:
- Go to the web page for the Personas Plus add-on:
https://addons.mozilla.org/en-US/firefox/addon/10900
- Click the Add to Firefox button. A Software Installation window appears.
- Click the Install Now button when it becomes clickable.
- Click the Restart Firefox button when it appears. When Firefox restarts, you can use personas.
Switching Personas
You can browse a gallery of personas and try them out at Mozilla's Personas page: http://www.getpersonas.com/
- To "try on" a persona to see what it looks like, move your mouse pointer over it. Firefox temporarily switches to display that persona.
- If you want to keep using that persona, click its Wear It link. A notification bar appears just under the tabs that says "A new theme has been installed". You can click the Undo button on the notification bar if you immediately change your mind.
To return to the default persona at any time, click on the fox in the bottom left corner of the Firefox window (next to the status bar), and select Default on the menu that pops up.
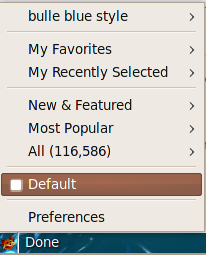
Note that you can also use this menu to browse personas.
Installing Themes
A theme changes the appearance of Firefox of toolbar buttons, boxes, and other items that are not part of any web page. They can affect every window and dialog box in Firefox.

To install a theme:
- Browse themes in the Add-ons for Firefox site:
https://addons.mozilla.org/en-US/firefox/browse/type:2
- When you see a theme in the list that you like, click it to see details about it.
- Click the Add to Firefox button. The Software Installation window appears.
- Click the Install Now button when it becomes clickable.
- Click Restart Firefox when prompted. When Firefox restarts, it appears using the theme you installed.
After you have downloaded and installed Firefox themes, you can manage them through the Add-ons window.
- At the top of the Firefox windowOn the menu bar, click the Tools menu, and select Add-ons to open the Add-ons window.
- In the Add-ons window, click the Themes tab.
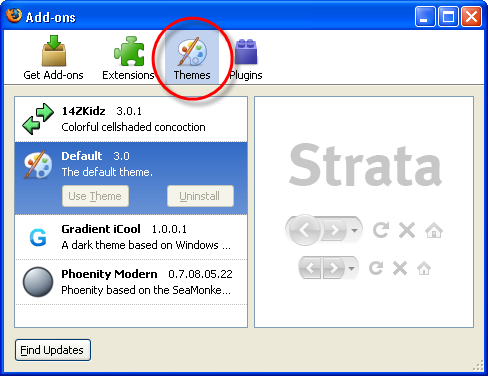
- Select the theme you want to use.
Note: The theme named "Default" restores Firefox to its original appearance.
- Click Use Theme.
- Click the Restart Firefox button when it appears.
Note: In Firefox version 3.6, you cannot use a theme and a persona at the same time. When you select a persona, Firefox switches to the default theme; when you select a theme, Firefox switches to the default persona.
Live Bookmarks
Websites are updated regularly. If you want to keep track of updates from a particular site you ask Firefox to inform you when new content is published. This process is called 'Live Bookmarking' in the Firefox world.
Not all sites can be tracked in this manner. A website has to enable this functionality by using what is also known as 'RSS' (also commonly called a 'feed'). Typically feeds are used on news sites so you can keep track of headlines, however it can be used by any website and RSS is also the technology behind Podcasts.
When you keep track of a website via RSS, this is usually known as 'subscribing' to the content or 'subscribing to a feed'. However Firefox calls this 'Live Bookmarking'.
The advantage of subscribing to content in this manner is that you don't have to keep visiting the website to see what's new. Firefox tracks the site for you and inform you of changes. If you use Live Bookmarking to subscribe to a Podcast then Firefox sends the subscription information to whichever software you have that manages your Podcasts.
When Firefox discovers a feed associated with the web page you are visiting, an orangeblue icon automatically appears in the location bar. To review and subscribe to the website's feed, click the orangeblue web feed icon. A list of all available feeds from the website is displayed.
To subscribe to any listed feed, click its name in the list.
When you select the feed, preview some of its recent content to verify that it contains useful information for you.
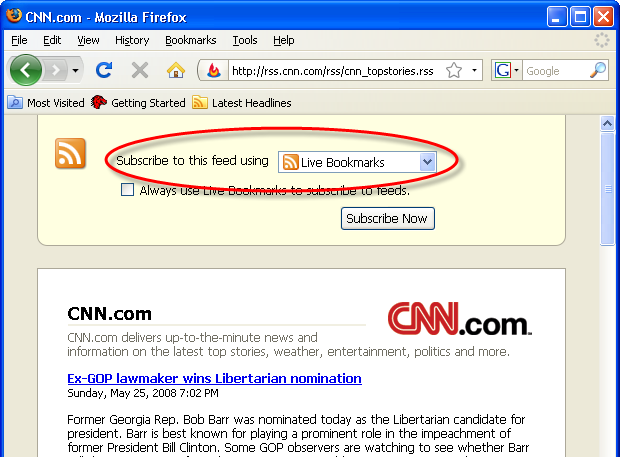
- To add the feed as a Live Bookmark, select Live Bookmarks from Subscribe to this feed using list. Then, click Subscribe Now.
- Firefox enables the use of other web feed readers such as Bloglines, My Yahoo!, and Google. To subscribe to the web feed using one of these readers, select it from Subscribe to this feed using list.
If you subscribed using Firefox's Live Bookmarks, the Add Live Bookmark dialog appears.
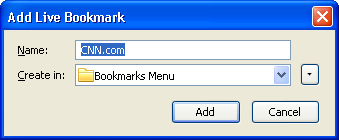
- Name: Enter a name of your choosing, to refer to the feed as it will appear in your bookmarks.
- Create in: Select where you want to save this bookmark.
Click Add. You are now subscribed to the feed through a Live Bookmark. Live Bookmarks are placed in the same structure as other bookmarks.
Manually adding a Live Bookmark
3:
- Type (or paste) the address of the web feed in the location bar and press EnterReturn. The feed preview will display.
- To add the feed as a Live Bookmark, select Live Bookmarks from Subscribe to this feed using list. Then, click Subscribe Now.
2.0:
- At the top of the Firefox windowOn the menu bar, click on the Bookmarks menu, and select Organize Bookmarks... to open the Bookmarks Manager.
- In the Bookmarks Manager, click on the File menu, and select New Live Bookmark.

- Name: Enter a name for the Live Bookmark.
- Feed Location: Type or paste the address of the feed.
- Description: Although this field is optional, it is displayed in the Bookmarks Manager and may be used to provide helpful identification information for the feed.
- Click OK. The Live Bookmark is created.
- After a Live Bookmark is created, you can move it to a different location through the Bookmarks Manager.
Using Live Bookmarks

Live Bookmarks are identifiable by the web feed icon next to the bookmark's name.
- To use a Live Bookmark, select it to view the latest items from the feed.
- To view a page from the feed, select the item in the bookmark.
- To view all listed items in the feed, select Open All in Tabs. Each listed item is opened in a separate tab in the current window.
3:
- To view the feed home page, select Open feed-name (e.g. Open "CNN.com").
Reloading manually
- Locate the desired Live Bookmark, and right-clickhold down the Ctrl key while you click on it.
- From the context menu that appears, select Reload Live Bookmark.
Mac OS:
3:
Note: Context menus are not available on bookmarks, except in the Bookmarks Toolbar. To reload such items, click the Bookmarks menu, and select Organize Bookmarks..., and locate the Live Bookmark in the Library window that opens.
2.0:
Note: Context menus are not available on bookmarks, except in the Bookmarks Toolbar. To reload such items, click the Bookmarks menu, and select Organize Bookmarks..., and locate the Live Bookmark in the Bookmarks Manager window that opens.
Changing the automatic reload rate
By default, Live Bookmarks are set to reload every 60 minutes. To change the reload rate, you need to set a hidden preference:
- In the Location bar, type about:config, and press EnterReturn.
- The about:config "This might void your warranty!" warning page may appear. Click I'll be careful, I promise!, to continue to the about:config page.
- The about:config page will appear. Right-clickHold down the Ctrl key while you click anywhere within the list of preferences. In the context menu, mouse over New, and select Integer.
- When you get asked to enter the preference name, enter browser.bookmarks.livemark_refresh_seconds.
- You will then be asked to enter a value. The unit for the value is seconds; so if you wanted the reload rate to be 5 minutes, the value would be 300 (as in 300 seconds).
-
Note: The minimum accepted value here is 60 (1 minute). If the value you enter is less than 60, Firefox will treat it as 60.
Sidebars
Sidebars enable you to quickly access your browsing history and bookmarks while browsing. Each sidebar appears to the left of the current web page and can be hidden when not in use. This topic explains how to use the History and Bookmarks sidebars that Firefox provides.
Displaying Sidebars
You can display sidebars using menu commands or keyboard shortcuts.
Menu Commands
- Click the following command: View > Sidebar.
- Click either of the following: Bookmarks or History.
Keyboard Shortcuts
- Use the following keyboard shortcuts to display sidebars:
-
- Press Ctrl+B to show the Bookmarks sidebar.
- Press Ctrl+H to show the History sidebar.
Using the Bookmarks Sidebar
The Bookmarks sidebar allows you to view your bookmarks in a separate pane that opens to the left of the main content pane. The Bookmarks sidebar shows the following information:
- Bookmarks Toolbar - Displays all bookmarks stored on the toolbar, including Most Visited, Getting Started, and Latest Headlines. Click a bookmark to visit the corresponding page.
- Bookmarks Menu - Displays all bookmarks stored in your bookmarks menu. Click a folder to expand it, or click an individual bookmark to display the corresponding page.
- Unsorted Bookmarks - Displays bookmarks that are not included on the toolbar or menu. To add bookmarks to this list, click the Edit this bookmark icon on the right of the Location Bar.

Using the History Sidebar
The History sidebar shows your browsing history in a separate pane that opens to the left of the main content pane. Click the View button to display a list of view options. The options enable you to view your history by date and site, site, date, most visited, or last visited.
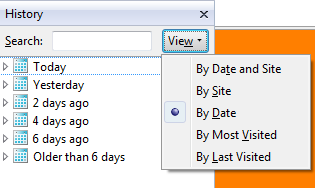
Using the Sidebar Search field
Both the Bookmarks and History sidebars include a Search field. Use this field to search for a bookmark or page in your browsing history.
Search results appear in the Sidebar pane, below the Search field. Click a result to go to the corresponding page.
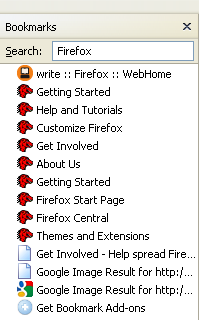
Using Forms on the Web
You are often asked to fill out forms at an online website, for example when making an online purchase. Firefox remembers what you have typed in similar forms and presents a drop-down list which can be used to reduce the amount of typing required.
Personal information such as name, address, phone number and credit card number will be retained on the computer upon which you have entered this information. As this can present a security risk, you should clear this information from any computer which is not secure.
To use your previous entry in a form:
- Type the first few letters of the entry into the form field. Firefox will display a drop-down menu with what you've typed into the form before.
- You may see a list of all the entries stored for a particular form field by pressing the down arrow key when the field is empty.
- Press the down arrow key to select the entry you want to re-use. Press Enter when the appropriate entry is highlighted. The text of the entry will appear in the form field. You may also use the mouse to click on the entry.
If you want to remove one of your previous form entries from Firefox's history:
- Click on the form field and press the down arrow key to display all the saved entries. You may type the first few letters of the entry to limit the number of entries displayed.
- Use the down arrow key or the mouse pointer to highlight the entry you wish to delete.
- Press Delete. The entry will be removed.
You may repeat the process for any number of entries for a particular form field.
Clearing form history
If you want Firefox to forget all of your previous form entries:
- At the top of the Firefox windowOn the menu bar, click on the Tools menu, and select Clear Recent History.
- Select the time range to clear at the top of the Clear Recent History dialog. If you want to clear all entries, choose Everything from the drop-down list.
- Click the down arrow by Details to show the list of data to clear. Make sure only Form & Search History is checked
Warning: make sure that any types of data you want to keep are unchecked. Data that is cleared cannot be restored.
- Click Clear Now.
The dialog box will disappear and your form history will be erased.
If you don't want Firefox to remember what you've entered into form fields, you can turn off the auto form fill feature:
- At the top of the Firefox windowOn the menu bar, open ToolsFirefoxEdit > Options.Preferences
- Select the Privacy panel.
- Under History, make sure use custom settings for history is selected.
- Remove the check mark from the box that says remember search and form history.
- Click OK to close the Options windowClick Close to close the Preferences windowClose the Preferences window.
NOTE: Disabling form history also prevents Firefox from storing search history for the Search Bar in the Navigation Toolbar. For more information, see http://support.mozilla.com/kb/Search+bar.
For an add-on which can perform customizable autofill of forms, see http://autofillforms.mozdev.org/
Accessibility Features
Firefox includes many features to make the browser and web content accessible to all users, including those who have low vision, no vision, or limited ability to use a keyboard or mouse.
Internet security
More than a billion people use the Internet, passing every kind of information in all directions. Much of the information is public, so that there is no concern about others accessing it. However, much is intended to be private (perhaps shared with close friends or family), or even secret. Given the large number of ways of communicating, the varying degrees of concern about keeping data away from prying eyes, and the variety of methods for unauthorized access, security on the Internet is a large and complex topic. The greatest difficulty is not in using the best methods for security, which have been crafted by experts, but in knowing that they exist, knowing what you need them for, and knowing where to find them.
A number of tools are built into the way the Internet works that enable data to be kept private and secure. Most significant among these is public-key encryption, which is used both for making data private and for authenticating users and websites. You rarely need to directly use public-key encryption, but when you use a URL that starts with "https://" or when Firefox warns you about a website's security certificate, public-key encryption is working behind the scenes.
Threats
The types of harmful actions that certain people on the Internet try to do fall into several broad categories:
- Defrauding you of money directly
- Stealing your identity (by stealing passwords and other personal information), and then stealing your money
- Harming or hijacking your computer
- Keeping you from accessing certain websites
The "bad guys" have devised a huge variety of strategies for doing these things. People who wish to compromise data security will examine every link in the chain, including you, your computer and its software, your home network, your service provider, the Internet in general, and any sites you might visit, looking for the weakest link. The most valuable information they can get is usually your login name, password, and account numbers for your banking, credit cards, or other financial accounts, in order to assume your identity and drain out as much money as possible.
- Stealing information from websites that you've given it to, such as banks or online merchants. Your bank might not have adequate security on its databases, and someone might steal access information for tens of thousands of accounts. There's not much you can personally do to prevent this. If this happens, the bank must notify you and give you new accounts. Do not reuse your old password.
- Snooping your data traffic and stealing your passwords or personal information. This is what encryption is for, specifically the HTTPS (secure HTTP) protocol. Firefox will let you know when you switch between secure and insecure pages.
- Snooping your data trafic and blocking it from getting through.
- Tricking you into giving them your information or money, via email ("phishing") or phony websites. You can get several kinds of protection from this, but you must still be alert to the warnings you receive, and must be able to recognize phony requests for information. Firefox can help check the identity of websites you visit, to make sure they are run by who they claim to be run by.
- Inserting malicious software onto your computer without your consent. This can happen if your operating system is installed in an insecure way, or is not protected by a firewall.
- Tricking you into installing malicious software. Someone might send you malware in an e-mail. Your mail software can help with this, but you need to understand what not to open.
- Someone might be able to compromise some portion of the Internet, such as a DNS server. They could then reroute traffic to or away from certain sites. This is far less likely than the other possibilities.
Often the same bad guy uses a combination of techniques, such as tricking you into installing malicious software that snoops on your data traffic or that uses your computer to send fraudulent email messages to other Internet users.
Where does that leave you? You have to understand your part in password security and key management, the security settings in your operating system and software, and the signs that you should not open an e-mail or install offered software. Much like you would not leave your keys in your car, and you lock doors when necessary, your participation in security is important and Firefox does a lot to help you with these issues.
On a technical level, the variety of threats present on the Internet include:
- Errors in Web page design, such as malformed or non-standard HTML, misuse of cookies, misuse of Javascript, and carelessness in form design
- Social engineering, such as phishing (asking for sensitive data while pretending to be someone else with authority to do so)
- SQL injection, adding database commands to URLs
- Cross-site scripting
- Malware, malicious software masquerading as something beneficial, or installed without the user's knowledge
- Government or other snooping
The FLOSS Manual How to Bypass Internet Censorship, http://flossmanuals.net/CircumventionTools explains how and why governments snoop, and how to get around snooping, in addition to methods for accessing blocked Web sites.
Firefox assists in detecting phishing Web sites and malware distribution sites. The NoScript plugin allows you to turn off Javascript from selected sources used on selected pages. It detects many of the possibilities for SQL injection and cross-site scripting.
You cannot protect a Web site from its own mistakes. You can tell them when you find mistakes, and you can avoid sites that do not protect themselves properly.
Protecting yourself
Setting up a firewall
In general, if you have an always-on connection to the Internet (such as most broadband connections), you should always use a firewall, rather than connecting your computer directly. The basic reason not to connect directly to the Internet is that it provides too many avenues for someone trying to compromise your computer. Even if you have a perfectly secure setup, you don't want the traffic from those who want to break in and inspect your system or install malware on it. Let your firewall block it once for the whole network.
So how should you connect? Through a router with a built-in firewall. Fortunately, if you have a broadband connection, there is probably a firewall built in to the (cable or DSL) box from your Internet service provider (ISP). Ask your ISP if you're not sure. If you have a wireless router, there is probably also a firewall built into it. Be sure you follow the instructions for setting up your wireless network securely.
Who is left? Those on dial-up. You are OK. You don't need a firewall because you have a connection, but not an IP number. You aren't on the Internet; you can just talk to it.
How do you set up the firewall on your router? Well, probably there is an IP address that you can connect to in the router before you connect to the Internet that will serve a Web page with instructions for the firewall and the Internet connection. Check in the manual, or on the manufacturer's Web site (from a different network, of course, one that has a firewall running), or with your ISP. You want an incoming and outgoing connection to the Web, and you might need an e-mail connection. Don't enable anything else unless you know why you need it.
Setting up security on a new computer
When you connect a new computer to your firewalled network, it may be in a vulnerable state. It certainly does not have the latest security updates for its operating system. Go directly to the update page and get the latest patches or packages. After your system is up to date, then you can think about getting your email or surfing the Web or downloading files.
Passwords
Choose strong passwords. Your browser or your operating system can remember them for you.
Try to avoid using the same password for accounts that contain important personal information, such as credit card numbers, as for accounts that just store non-critical preferences. If bad guys get your password for one site, they are likely to try it on other sites where they've figured out you have accounts.
If you need to use the same passwords on more than one computer, you can take an encrypted copy of the Firefox password file with you. Then you have to remember only the decryption key for that file. A strong password is as random as you can make it, out of whatever characters are permitted on each site. It is also at least 8 characters.
- Weak: 042986 (if that is your birthday or anniversary), any dictionary word, any name, any default password provided by or for a Web site
- Strong: m*N4W3@q. Strong passwords have a mix of upper and lower case letters, numbers, and punctuation characters (some sites do not allow punctuation in passwords). One common strategy is to use initial letters from a phrase or title you'll remember, but then substitute numbers and punctuation for some of the letters.
If your are given the option of creating a password recovery question try to select a question/answer combination that is not commonly known by others (or one that could be searched for like where you went to high school).
Email savvy
If a message is vague throughout, it may come from malware rather than a real person, and if from a person, then someone intent on fraud. If you get an offer that seems too good to be true, assume it is. If a message appears to come from a business, but it has a lot of spelling and grammar mistakes, it may be fraudulent (but even real messages may have some mistakes).
- A legitimate business will never ask for your password, credit card number or other personal information in email. Don't respond to such messages, or click any links in them. If in doubt, go to the main URL for the site by typing it into the Location bar rather than by clicking a link. You could also find and call the customer service number.
- Don't open love letters from strangers. (The I Love You virus).
- Don't respond to offers of millions of dollars from Nigeria or thousands of dollars a week for stuffing envelopes. (Nigerian 429 spam, other spam).
- Don't respond to chain letters. They are illegal as well as pointless.
- If someone says how great your site is, but doesn't mention the name or URL, or anything else about it, they are trying to scam you.
- If someone you never heard of sends you software, don't install or run it. It is probably malware. Don't run it even if it says it is a game or utility you would like. It is probably a Trojan Horse.
- Don't open unidentified files from friends or co-workers. A virus might have sent them. If the message doesn't clearly identify the file and its purpose, ask first. "Here's that spreadsheet I mentioned" doesn't qualify.
- While you are at it, don't pass on scare stories that come to you in e-mail. Most of them are groundless rumors, some rising to the level of Urban Legend. Some are deliberate hoaxes. Real threats will make the news. When you see such a scare story, check it out at Snopes.com, the Urban Legends pages. Check it even if the story claims that the sender "checked on Snopes, and it's real", because hoaxers certainly will lie. (This isn't a security issue, but it keeps you from wasting other people's time with false email messages.)
Safe surfing
- When you go to a bank site, PayPal, or other financial site, look for the https: prefix on the URL, and look at the identity information that Firefox gets from the site.
- Use secure HTTP for Google mail and other sites dealing with your sensitive private information.
- While visiting websites or reading email, pay attention to URLs and filename extensions, and to warnings from Firefox. Make sure the URL really goes where you expect it to. Some examples of phony names:
- google.com.exe is most probably a virus, and certainly not a Web site.
- woohoo.png.exe is not a naughty picture, but most likely a virus.
- mail.google.aoeu.com is not Google mail, and neither is mail.g00gle.com.
Firefox security features
Firefox has several security features that help to keep you safer when you are browsing the web.
This chapter covers two of these features and lists some extra ideas that help you to be safer while on-line.
The Firefox Phishing and Malware protection feature will warn you when a page you visit has been reported as a Web Forgery of a legitimate site (sometimes called “phishing” pages) or as an Attack Site designed to harm your computer (otherwise known as malware).
There are a number of things you can do to help in the battle against bad sites and fight against malware. A section below provides some of these ideas.
The Site Identity Button feature also helps you to identify the owner of any particular site to ensure you are not handing out credit card and personal information to imposter sites.
Phishing and Malware Protection
Web Forgery (also known as “Phishing”) is a form of identity theft that occurs when a malicious Web site impersonates a legitimate one in order to trick you into logging in or filling out a web form, in order to steal this information. The sensitive information might be in the form of user IDs, passwords, bank account details, or credit card numbers. Phishing usually starts with email messages sent to you from an attacker. The email message includes a link that attempts to lure you to the attack site. If you click on the link and visit the site, it might look just like your bank web site, or another legitimate site, but if it is part of a phishing attack, danger is lurking.
Where a phishing attack tries to get you to type in private information to a bad site, malware is software designed to harm your computer by infecting it with attack programs that run on your computer. These programs might also steal your personal information, but without your knowledge. The programs might also take control of your browser, open websites and popups that you don't want to visit, and generally make a mess of your system. The Stop Badware site has a good list of the symptoms you might see if you're computer has been infected by malware (http://www.stopbadware.org/home/badware_symptoms). The Mozilla Support Site also has some good information about how to recover if your computer is ever attacked (http://support.mozilla.com/en-US/kb/Is+my+Firefox+problem+a+result+of+malware)
Attackers might set up their own websites to propagate these phishing and malware exploits, or they might break into legitimate websites to host the bad code. Site owners might not even know about these break-ins. It's estimated that there are well over 10 billion web pages on the Internet, and around 180,000 pages might be trying to attack your computer or steal private information at any one time. In percentage terms, that is a very small chance that you might visit one of these websites, but if you ever do, the effects can be devastating and long lasting.
So, with these dangers lurking how does Firefox help to keep you safe?
When you see this web page appear while surfing the web, Firefox has worked in conjunction with the Stopbadware database of bad sites to identify a site that might put you at risk.
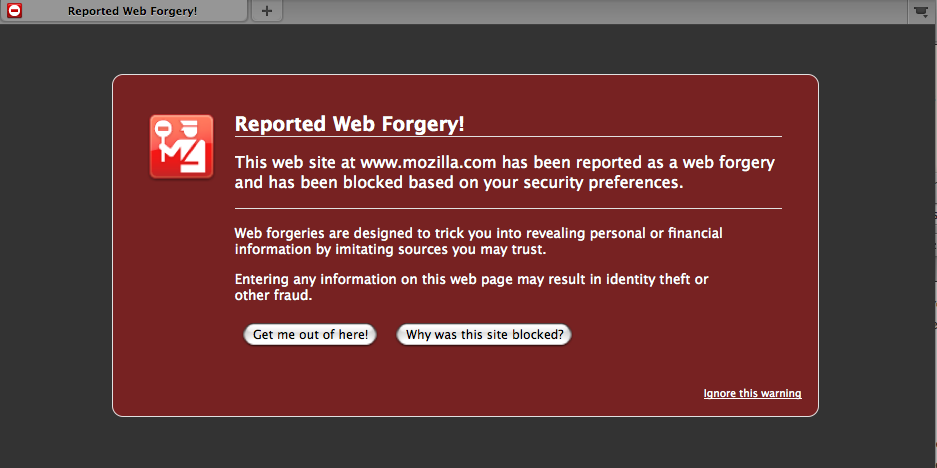
Phishing and Malware Protection works by checking the sites that you visit against lists of reported phishing and malware sites. There are two times when Firefox checks the phishing and malware protection database and web service. The first is during the regular updates to the lists of reporting phishing and malware sites. The list on your PC is automatically updated every 30 minutes or so when the Phishing and Malware Protection feature is enabled. The second is in the event that you encounter a reported phishing or malware site. Before blocking the site, Firefox requests a double-check to ensure that the reported site has not been removed from the list since your last update.
You can test to see if Phishing Protection is active by trying to visit the phishing test site (http://www.mozilla.com/firefox/its-a-trap.html) or the malware test site (http://www.mozilla.com/firefox/its-an-attack.html) to confirm that Firefox is blocking attack sites. With Phishing and Malware Protection turned on, these sites should be blocked from loading and a page should open like the one shown above.
The Phishing and Malware Protection feature is turned on by default, so unless your security preferences have been changed, you are likely already using them. Phishing and Malware Protection options can be found on the Security Preferences pane. On Windows, go to Firefox > Preferences > Security. On Mac OS X, go to Firefox > Preferences > Security. On Linux, go to Tools > Options > Security.
Helping in the fight against malware and maintaining the list of bad websites
There are number of ways that you can help fight the spread of malware on the Internet. The first step is to protect yourself.
Be a conscientious browser. Use the Firefox Phishing and Malware Protection feature to help keep away from bad sites.
Keep Firefox, all addons, plugins, and other software on your computer up-to-date. Attackers often take advantage of security flaws in old versions of software to create their exploits, so if you always stay up-to-date, you reduce your exposure.
You should also consider installing anti-virus and anti-spyware from a trusted source as a back up system if the malware gets though other protections. Read reviews and pick this software wisely. Attackers also ofter rogue versions of anti-virus programs as the way to actually install viruses and malware. Think carefully before installing any software on your computer.
Create safe passwords that might be hard for an attacker to guess or use to break into a website. Like your toothbrush, don't share passwords, even with family and friends. Try to use different passwords for different sites, just like you have different keys for your car, house, and safety deposit box at the bank.
Stay up-to-date on kinds of deception patterns used by bad websites and techniques used by attackers to steal private information. TV, newspapers, books and other forms of media are publishing more of this kind of information and making it easier to understand. Keeping informed helps you to stay ahead of the bad guys.
As you can see, a constant shell game is played out between malware attackers and those trying to develop protections to help keep users safe. Maintaining the list of bad sites can be challenging.
What if the web site isn't malicious?
If you happen to own a site or blog page that was attacked and you have since repaired it, or if you feel that your site was reported in error, you can request that it be removed from the lists. Mozilla encourages site owners to investigate any such report thoroughly, though; a site can often be turned into an attack site without any visible change. To request removal from the list of reported phishing sites, use the form provided by Google at http://www.google.com/safebrowsing/report_error/?tpl=mozilla. To request removal from the list of reported malware sites, use the form at http://www.stopbadware.org/home/reviewinfo, provided by stopbadware.org.
You can also help StopBadware, regulatory agencies, and security companies fight malware, regardless of your level of technical skill. The Stopbadware website has some great resources for addtional ways to get involved ( http://www.stopbadware.org/home/action ).
Site Identity Button
The Site Identity Button is another Firefox security feature that gives you more information about every site you visit. Using the Site Identity Button, you can find out who owns the website, and who verified that ownership, and if the communication channel between you and and the site is encrypted. This provides one more protection to help you avoid malicious websites and protect sensitive information while on-line.
The Site Identity Button is in the Location bar to the left of the web address in the location bar.
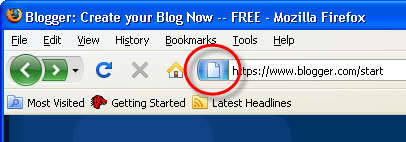
When viewing a website, the Site Identity Button will display in one of three colors - gray, blue, or green. Clicking on the Site Identity Button displays more details security and identity information about the website and a gray, blue, or green "Passport Officer" icon, which helps you to understand how much security and identity is available for the site.

Gray - No identity information
 When the Site Identity button is gray, that indicates that the site doesn't provide any identity information at all. Also, the connection between Firefox and the server is either unencrypted or only partially encrypted. This means it should not be considered safe against possible eavesdroppers that might be watching your browser session on the web.
Most websites have the gray button, because they don't involve passing sensitive information back and forth. A video viewing site like YouTube or your favorite news site really doesn't need to have verified identities or encrypted connections. For sites that don't require any personal information, a lack of identity information is fine. 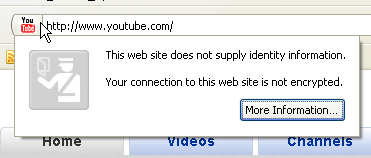
However, if you are sending any sort of sensitive information (bank information, credit card data, Social Security Numbers, etc.) the Site Identity Button should not be gray.
If you click on the Site Identity button when it is gray, you then see something like the picture on the right:
When the Site Identity button is blue, that indicates that the site's domain has been verified, and the connection between Firefox and the server is encrypted and protected against eavesdroppers.
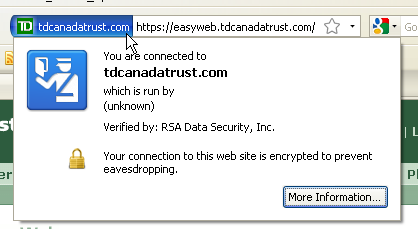
When a domain has been verified, it means that the people who are running the site have bought a certificate proving that they own the domain and it is not being spoofed. For example, the TD Canada Trust website has this sort of certificate and an encrypted connection, so the Site Identity Button displays as blue. When you click on the Site Identity Button, it tells you that the easyweb.tdcanadatrust.com site is verified to be part of tdcanadatrust.com, as certified by RSA Data Security Inc. It also assures you that the connection is encrypted so no one can eavesdrop on the connection and steal your bank login information that way.
However, it is not verified who actually owns the domain in question. There is no guarantee that tdcanadatrust.com is actually owned by the Toronto Dominion Bank. The only things that are guaranteed is that the domain is a valid domain, and that the connection to it is encrypted.
If you are still leery about a site's identity when the Site Identity Button is blue, you can see more information about the site by clicking the More Information button on the Site Identification dialog. This button opens the Privacy panel of the Page Info window, where you can view the site's identity certificate, see if you've visited the site before, and if you have any cookies or passwords stored for the site. For more information on the Page Info window, see http://support.mozilla.com/kb/Page+Info+window.
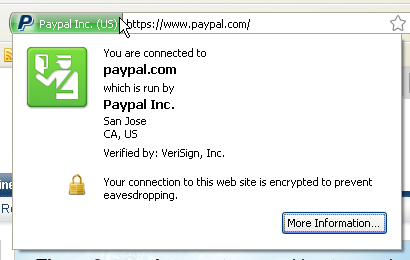
When the Site Identity button is green, that indicates that the site provides fully verified identity information about its owner, and that the connection is encrypted.
If a site makes the Site Identity Button turn green, it means that it is using a new Extended Validation (EV) certificate (for more info, see http://en.wikipedia.org/wiki/Extended_Validation_Certificate). An EV certificate is a special type of site validation that requires a significantly more rigorous identity verification process than other types of certificates. While the blue Site Identity Button indicates that a site's uses a secure connection, the green Site Identity Button indicates that the connection is secure and that the owners of the domain are who you would expect them to be.
With the EV certificate, the Site Identity Button assures you that paypal.com is owned by Paypal Inc., for example. Not only does the Site Identity Button turn green on the Paypal site, it also expands and displays the name of the owner in the button itself. The Site Identification dialog contains further information.
Privacy in Firefox
To improve your experience on the internet, Firefox stores a collection of data relevant to the sites you visit. For example, Firefox may store the following information as you browse:
- Visited page history: This allows you to go back to sites you've visited, find them using the Smart Location Bar and see them in both the History menu, History sidebar and library window.
- Form and Search Bar entries: This remembers what you've filled out in the search bar and on forms on pages to make filling the same forms and performing the same searches easier.
- Logins and passwords: This makes it easier to log in to frequently visited sites. Firefox will never store these without asking.
- Download list: This helps you find files you previously downloaded.
- Cookies: Cookies are small bits of information that sites use to save site preferences and sessions so they can identify you between visits (and remember things like your shopping cart or keep you logged in).
- Web cache: A cache stores pages and other web content that you've already seen so that Firefox can use the stored content rather than having to download it again, greatly speeding up browsing and reducing demands on web servers. By default, this is not stored for secure (https) websites to avoid retaining secure data.
- Browsing sessions: This allows Firefox to restore the tabs you had open when you start it or after a crash.
In general, these can optimize your browsing experience and are very useful. However, you may prefer not to save this information, or to save only some of this information. For example, you may be using another person's computer or visiting sites with sensitive information. You might also wish to remove previously stored data. Firefox 3.6 offers many ways to control what information is stored and prevent it from being stored when you don't want it.
Private Browsing
Firefox 3.6 and later have a feature called Private Browsing where none of the above information is saved until Private Browsing is turned off.
Starting Private Browsing session:
- Click on the Tools menu and select Start Private Browsing.
- The first time you turn on Private Browsing, Firefox will alert you that it will save your current windows and tabs for after you finish using Private Browsing. Click on Start Private Browsing to continue.
- You will then enter Private Browsing mode, and the Private Browsing information screen will appear.
-
When browsing in Private Browsing mode, the Firefox window title will show (Private Browsing) during your session.
Clearing Your History
Firefox allows you to clear some or all of your browsing history. This will delete information from your profile and from disk that could be used to identify your activities online.
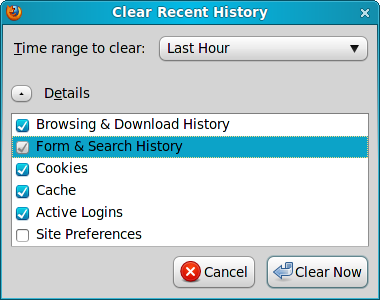
Clearing Firefox History:
- Click on Tools > Clear Recent History.
- Firefox will display the Clear Recent History dialog, with a drop-down menu for the time period to clear. You can choose between the last hour and all saved history.
- If you only wish to delete some of your history, such as the information stored for forms or in search history, click Details. This will open a list of items stored by Firefox, such as Cookies, Cache, and Form & Search History.
- Once you have selected the information you wish to delete, click Clear Now. Note that this cannot be undone.
Privacy Preferences
You can tell Firefox what type of information you'd like stored, and even default to saving no browsing history at all.
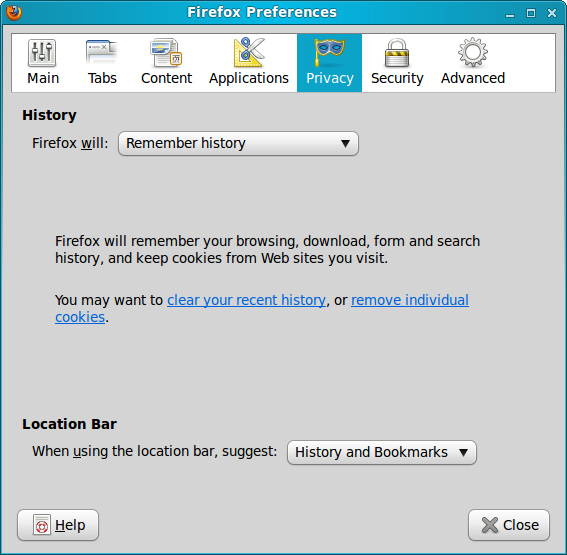
- To configure these settings go to Edit > Preferences on Windows or Linux, or Firefox > Preferences on Mac OS X.
- From the Dropdown menu, select from Remember history, Never remember history, or Use custom settings for history.
- If you've chosen Use custom settings for history, you can define the privacy settings you prefer. This will give very fine-grained control over privacy settings. You can also tell Firefox to always start in a private browsing session if you don't want to ever save browsing information.
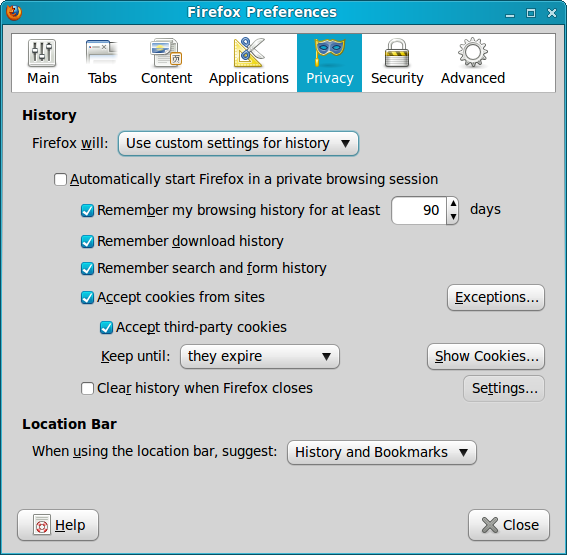
-
You can specify how long Firefox will remember your browsing history. The default is 90 days, but it can be changed to any value.
- You can define whether the location bar will suggest from your browsing history and/or bookmarks. Choose from the dropdown menu next to Location Bar in the dialog.
- Once the preferences are to your liking, click Close.
It should be noted that Firefox's privacy controls do not affect other software. For example, when you visit a website using Firefox using the Private Browsing feature or if you clear the browsing history after the fact, the website will still log requests from your computer. The pages you request may also be visible to anyone monitoring network traffic on your local network. Firefox's privacy settings only control the information stored on your computer.
Support
For more help with Firefox, you can try http://support.mozilla.com/, here are some of the avenues you will find there:
Firefox Knowledge Base
One extremely useful way to get support with Firefox by using the Knowledge Base (KB).
The KB is a series of hundreds of wikis, and they are all at your fingertips. All you have to do is type in the search bar, and press enter. Then you will be given a list of related articles.
The Mozilla KB now also boasts screencasts! You can now view user-submitted screencasts in some articles and more to come. If you see the words "Watch a video of these instructions", click that and a video will the instructions will appear.

Support forums
The Mozilla Support website is also equipped with support forums. You can ask any question there and you will get answers from the Firefox community. You can also make someone else's day and answer their question, if you know the answer.
Live Chat
Another useful method of getting support for Firefox is by chatting with Firefox volunteers. If the KB and Forums aren't doing it for you, you can speak with a real person in real time to try to get your problem resolved. You can do this by going to http://support.mozilla.com/en-US/kb/Live+Chat. However, before joining a chat, you should be aware of the following:
Please see the images below to see how to begin a live chat session.
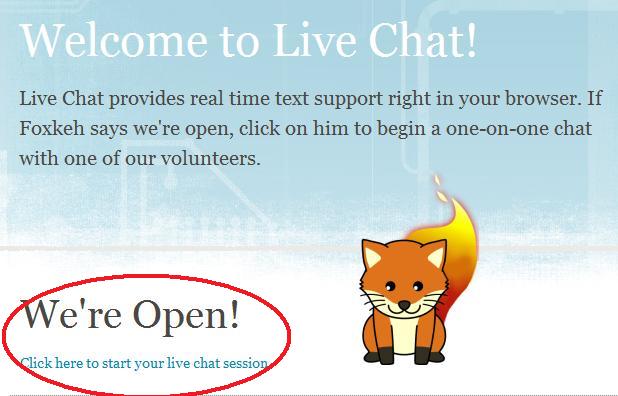
If you see the words "We're Open!" click the link below that. If not, come back another time.
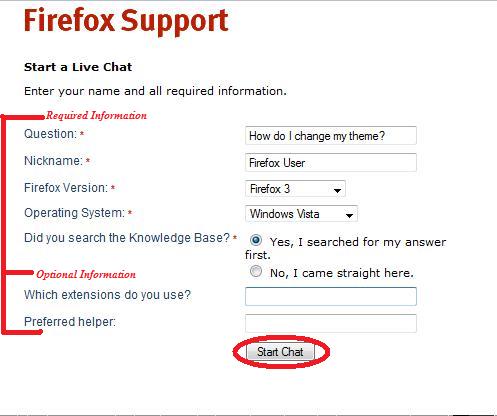
Fill in the required information and optionally enter the optional information. Use the preferred helper field only if you know the nickname of an agent and you want them specifically to help you. When you are done, click Start Chat.
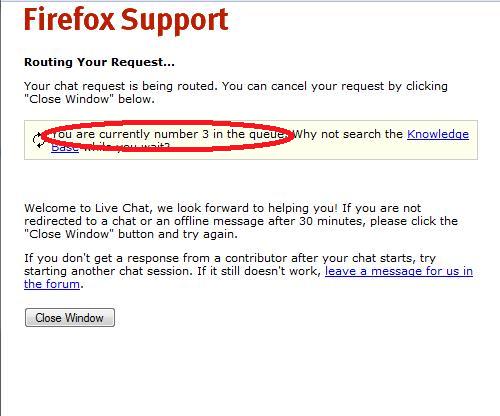
You will then see this screen. Note that your queue number is only approximate.
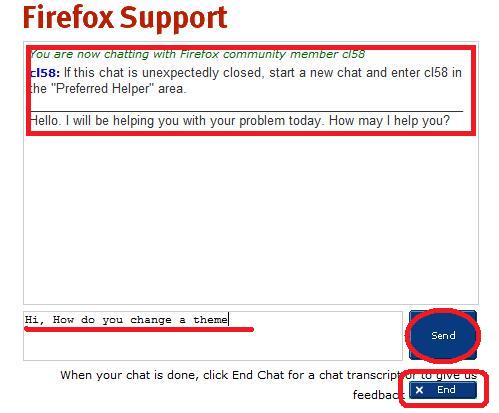
Finally, you are taken to the chat window. In green you will see your volunteer's name. Enter text in the white box and hit enter or click Send. When you are finished, click the End button.
Search the Web
Searching the web is always useful. If you are looking for problems arising from errors reported by the software then try entering the error text into the search engine. Be sure to edit out any information that doesn't look generic when doing this. Some search engines also enable you to try searches of mailing lists, online groups, etc., which can also provide good results.
Mailing lists
Mailing lists are good places to look through for answers to questions. The archives are located here: http://groups.google.com/group/mozilla.support.firefox/topics.
You can also ask a question on the mailing list with this address using a standard email. The email address is: support-firefox@lists.mozilla.org. Remember that this is not a private mailing list though, and everything you say and ask will be archived.
Also, please note the suggestions about posting to forums and mailing lists in the forums section.
IRC
IRC (Internet Relay Chat) is a type of online chat that is not the easiest to use if you are not familiar with it but it is a very good system. There is a variety of client for all operating systems that allow you to use IRC (see links below). For Firefox, you might even think about using the ChatZilla extension. Developers and 'superusers' are often online in these channels. Logging into this channel can be useful, but it is very important that you know exactly what you are trying to find out before trying this route. If you use IRC to get support, you are meant to just to log in, and ask the question immediately. Don't try to be too chatty, as you are probably going to be ignored. The details for the Firefox support channel are:
- IRC server:
irc.mozilla.org
- Channel:
#firefox
For more information on what IRC is and how to use it, see these links:
Other methods
There are other methods to get support for Firefox. They can be found at https://support.mozilla.com/en-US/kb/Other+Firefox+support.
Getting Sites to Work
If a site doesn't show video, or play audio, or show graphics or content as you think it should, it is likely that you are either missing a plugin for Firefox or have a function turned off in Preferences. The Content tab in Firefox Options (Tools > Options in Windows, Edit > Preferences in Linux) lets you turn off pop-up windows, Javascript, and automatic loading of images, and the Plugins tab in Add-ons (on the Tools menu) lets you turn individual plugins on or off.
Clear cookies and cache
Sometimes Firefox can get out-of-sync with content on websites. In these cases the problems can be fixed by clearing the Firefox cache and the cookies associated with the problematic websites. If a web site appears to be broken in Firefox, with problems missing content or error messages, these steps are likely to resolve the issue.
- Open the History menu and select Show All History.
- At the top right corner, type the name of the website in the Search History field, and press Enter.
- In the resulting list, right-click on the site you wish to clear, and select Forget About This Site.
- Close the Library window.
Problems with plugins
Plugins are small programs that can be added to browsers like Firefox to manage Internet content that Firefox is not designed to process. For example, Adobe Systems provides a plugin to manage animated content in the Flash format.
This chapter contains descriptions of the most popular plugins that you are likely to want, but note that the ones listed here are proprietary, not FLOSS. The Mozilla Addon Site has links to download these plugins at https://addons.mozilla.org/en-US/firefox/browse/type:7 . In some cases FLOSS plugins are available, but may not play everything that the proprietary plugins play.
If web sites that use a specific plugin do not work after you have made sure that the plugin is enabled, you may have outdated plugins. To check for outdated plugins and see which plugin updates you need, visit the Mozilla plugin check page at http://www.mozilla.com/plugincheck/ .
Flash
For animation, games, and other non-static content, the Flash format delivers the dynamic visuals from many websites. With widespread available across many platforms, the Flash video format (FLV) has gained popularity for embedding audio and video content. To access Flash content on the web, you must install the Flash plugin. For more information on Flash see the official Adobe website. Flash is not FLOSS. The FLOSS FLV player, gnash, is packaged with most Linux distributions. It cannot play all Flash content.
The Windows Media Player plugin is useful for displaying Windows Media content, which includes a variety of audio and visual formats. The Windows Media Player program is a standard component of the Windows operating system. A plugin is available for playing content through your Firefox browser. The Windows Media Player plugin is no longer supported on the Mac platform. Flip4Mac adds Windows Media playback to Quicktime and is the officially recognized substitute. For more information, see the article at: http://support.mozilla.com/kb/Windows+Media+Player+-+Mac-Linux.
Windows:
The Windows Media Player plugin is designed to work primarily with Windows systems. Note that there are different versions of the plugin, depending on the version of Windows that you are using:
-
Note: Due to differences between Internet Explorer and Firefox, some kinds of media that play through the Windows Media Player in Internet Explorer will play through Quicktime in Firefox. If the content is embedded only for Internet Explorer playback, it may not play at all. For more information, see the Using the Windows Media Player plugin with Firefox article.
Mac OS:
Linux:
The Windows Media Player plugin is not available for Linux, but mplayer with the mplayerplugin allows the playback of embedded Windows media. For more information, see the Windows Media Player - Mac-Linux article.
Adobe Reader
Adobe Reader is used to display of Portable Document Format (PDF) files. PDF is designed for publishing many kinds of documents. A PDF document has an identical appearance across most platforms and requires less storage space than other formats rich in graphics and features. The Adobe Reader program is a free viewer that can display the PDF format and includes a browser plugin. The Adobe Reader program is available for the Mac platform, but the included browser plugin does not work with Firefox. A third-party plugin can be used to display PDF files - for details, see: http://support.mozilla.com/kb/Using+the+Adobe+Reader+plugin+with+Firefox .
Adobe Reader is not FLOSS.
http://support.mozilla.com/kb/Using+the+Adobe+Reader+plugin+with+Firefox for details. Adobes Reader is not FLOSS. <br /> </p> <div style=" class="showfor_label" id="wikiplugin_showforlabel3">
Adobe Reader is available from the official Adobe website.
Mac OS:
Quicktime
The Quicktime plugin is required for Quicktime media formats. The Quicktime plugin can also play common media formats like MPEG, WAV and MP3, which may not play back through the Windows Media Player plugin. More information on Quicktime is available from the official Apple website.Quicktime is not FLOSS.
Linux:
An official plugin is not available for Linux, but mplayer with the mplayerplugin allows the playback of Quicktime media.
Java
Many websites embed small Java applications such as games or utilities into web pages. To display Java content, you must install the Java Runtime Environment (JRE), which includes a browser plugin. Java is not FLOSS, although Sun Microsystems says it is working on putting it under a Free license.
Shockwave Player (Director)
The Shockwave format (not to be confused with Flash) is used for multimedia content like games, presentations, and learning applications. The Shockwave plugin enables playback of Shockwave content in your Firefox browser. More information about Shockwave is available from the official Adobe website. Shockwave is not FLOSS.
Images and/or animations missing
Beyond specific kinds of plugin content there are a few things to try if sites don't appear to work properly.
Firefox allows you to prevent images from loading for certain websites to make pages load faster. If you are having trouble viewing images. Its possible that image loading might have been turned off. Here is how to check and correct that setting:
- Select Tools in the Firefox menu, and click Options.
- In the Options window, select the Content panel.
- Make sure there is a check mark next to Load images automatically
- Click on Exceptions... next to Load images automatically to open the Exceptions - Images window.
- In the Exceptions - Images window, look at the list of sites. Make sure the sites with which you're having trouble are not in the list.
- Click OK to close the Options window.
Compatibility with security software
Some Internet security software (including antivirus and anti-spyware programs, firewalls, privacy programs, and others) may identify and block certain images as web bugs or may prevent images from animating. Check the settings for your Internet security program to make sure it allows images to load.
The Mozilla Support Site has up-to-date information on resolving problems in Firefox caused by antivirus and firewalll programs
Bugzilla@Mozilla
Mozilla has createdan extensive bug tracking system called Bugzilla. Bugzilla@Mozilla (BMO) tracks bugs for every Mozilla project, but specially Firefox and its components. Any user can submit a bug, choose a severity, or set it as an enhancement bug (just a simple suggestion). Other users, including Mozilla employees, can comment and do much more.
Bugzilla is capable of filing a bug for any Mozilla product, service, website, etc. When you click the button to file a bug, you will be shown a list of common products. You can then click "Other Projects" for a full list.
Glossary
Add-ons An extension for Firefox that gives it additional features, functionality, uses, etc. Available from https://addons.mozilla.org
algorithm A precisely specified method for performing a particular process, one that can readily be turned into a computer program in almost any programming language. From algorism, method of calculation, from mathematician Muhammad ibn-Musa al-Khowarizmi.
authentication Any process for assuring each of two communicating parties of the other's identity, or for guaranteeing that a set of data has not been changed.
Awesome Bar Alternate name for the Firefox Location Bar, so called because of its remarkable power to suggest pages the user might want to return to from just a few characters of the URL.
backdoor An entry point into a program or computer that the user is not told about. These may be built into legitimate software for support and maintenance purposes, although such designs are not acceptable when users know about them. More commonly, backdoors are installed by malware.
bot A computer that has been taken over by malware (software created with bad intentions) for an external user.
botnet A network of bots or zombie computers.
certificate A digitally signed document from a trusted authority stating the identity of the holder.
client A computer running a Web browser such as Firefox, or some other end-user software, in communication with a server running Apache or some other software to provide data or services.
command line The text terminal user interface in which the user types commands, as opposed to the GUI interface where users click icons or select commands from menus.
computational infeasability The level of difficulty of a problem that cannot be solved on current computers or any that we can currently imagine in their usable lifetime, or sometimes even in a period longer than the present age of the Universe. A property of mathematical problems used as the basis of cryptographic systems.
cookie A short text string stored on the client computer to identify it or its user to the server, or to hold data temporarily during a transaction.
cryptography The field devoted to securing secrets, applying secure signatures to documents, and authenticating strangers to each other using mathematical transformations of their data.
cryptosystem A combination of cryptographic algorithms and protocols designed to accomplish some form of security, authentication, or both for a particular purpose.
digital signature An encrypted data object, or encrypted hash of a data object, created with the sender's private key. Anyone can use the sender's public key to recover the data or the hash, and thus verify that it came from that sender.
distribution A version of Linux distributed by an individual or organization.
distro Short for distribution.
DMCA Digital Millennium Copyright Act, a US-based legislation adopted in 1998 to extend and amend copyright laws. It is controversial because it forbids public discussion of the weaknesses of any cryptographic system used to prevent or restrict copying of copyrighted materials.
DRM Digital Rights Management, the use of encryption to protect copyrighted material from unauthorized copying.
Extension (See Add-on)
firewall Software to protect a computer from unwanted access.
FLOSS Free/Libre Open Source software licensed to guarantee users the essential software freedoms, including access to source code and the right to modify the code and distribute the new version under the same kind of license.
GUI Graphical User Interface with windows, icons, menus, and mouse control.
hack (positive) noun A brilliant bit of programming, particularly one previously thought impossible, or never thought of at all. (negative) verb Break into computers.
hacker (positive) A truly talented programmer who can make hardware do things that nobody expected. (negative) A person who breaks into computers for malicious purposes, or just to show he or she can do it.
hash A short signature calculated from a data object or file. Hashing algorithms are designed to make it computationally infeasible to create a different set of data with the same hash. To the extent that they succeed, checking the hash value for the data indicates that it has not been changed by errors in transmission or malicious interference.
HTML Hypertext Markup Language, the method of specifying format and other properties of a Web page.
HTTP Hypertext Transfer Protocol, the method a browser uses to communicate with a Web server.
HTTPS Hypertext Transfer Protocol Secure, a method for communication but with a Secure Security Layer or Transport Security Layer.
info A text-based Unix documentation-display program.
Java A highly portable computer language, created by Sun Microsystems, which is working toward putting all of it under a FLOSS license.
Javascript Originally ECMAscript, a programming language that can be embedded in Web pages. No relation to Java.
key exchange A secure protocol for setting up a secure session, starting from a situation in which the parties have no shared key. Each side creates a key, then one initiates a dialogue consisting of a sequence of numbers, computed so that the holder of each key can determine the other key, but an eavesdropper with neither key cannot determine either one.
license A legal statement of rights and duties binding on the user or purchaser of software. Free licenses guarantee the rights of Software Freedom to the user, and require that those rights be passed on in any further distribution of the software or other software derived from it.
malware A general term combining the words malicious and software that describes software designed or used with intent to harm or cause disruption.
man page Terse text documentation for Unix command-line programs.
one-time password A password generated by a hardware token, and simultaneously on a server using the same algorithm.
personas Easy to use (and change) themes that allow you to personalize the look of your Firefox.
phishing A criminally fraudulent process of acquiring sensitive information via email or web site claiming to be legitimate seeking identifiable information.
port scan An attempt to take over a computer by testing each of its active communication ports.
public-key cryptography Any cryptographic system using two keys per user, one private and one public. The two keys must be inverses, that is, either one can be used to encrypt a message, and the other to decrypt it. It must be
rootkit A form of malware that takes over the target computer's operating system, and hides itself from the user and from system monitors and normal malware scanners.
RSA Rivest-Shamir-Adleman public-key cryptographic system.
RSS Really Simple Syndication is a method for publishing data feeds and subscribing to them in a Web browser, so that the latest updates automatically appear on a menu.
Security through Obscurity The attempt to protect encrypted data by keeping the encryption method secret.
script kiddy A derogatory term used to describe an inexperienced, often juvenille user of malware who cannot write his own, but just takes scripts or programs from others.
search engine A web-based program that allows users to search for and retrieve specific information from the World Wide Web.
server A computer offering services to clients.
SHA Secure Hash Algorithm, a widely used set of cryptographic hash algorithms. SHA-1 has been shown to have some limited weaknesses, which may also apply to SHA-2. These weaknesses cannot currently be exploited to break security where SHA-1 is used. They will be replaced in due course by SHA-3, using an algorithm that has not yet been selected.
SSL Secure Sockets Layer, the cryptographic system used in HTTPS for key exchange and secure communications.
sypware Malware that reports on the user's computer activity to someone else.
stateless In software, a program or protocol is stateless if it does not rely on storing values internally for retrieval in a later stage. A stateless Web service may use external storage to track interactions, such as a cookie on the user's computer.
Theme An addon-type file that changes the overall appearance of your Firefox browser
URL or uniform resource locator A special, unique name for a page or other content on the Web. A URL contains at least a "type" such as http, followed by ":", and an address. The address can be a Web address (http://www.somewhere.com/), an e-mail address (mailto:somebody@somewhere.com), or any other as specified for the protocol indicated by the type. URLs may contain only ASCII printing characters.
zombie computer A computer that has been taken over by malware and used for attacks on other computers.
License
Unless otherwise stated, all chapters in this manual are licensed with CC-BY-SA. Parts of the manual are written by contributors of the Firefox Support Knowledge Base (http://support.mozilla.com/), the MozillaZine Knowledge Base (http://kb.mozillazine.org/), and contributors to mozilla.com content.
Authors of the Firefox Knowledge Support Base include: David Tenser, Chris Hofmann, Bo Bayles, Jason Barnabe, Chris Ilias, Matthew Middleton, Cheng Wang, Alice Wyman, Tony Evans, Ehsan Akhgari, Nelson Ko, Deb Richardson, Johnathan Nightingale, underpass, skulvis, beandip004, NickR25, justinwhite, mstepien, Lucy, Esan013, ken, VBMonkey, supernova_00 and andrew_t29, Dr.Evil, pcabellor, myles7897, tizy132, edjackiel, kjhass, Tim2, Alice0775, kjhass, ThomasLendo, Wawuschel, michro, JRPars, tto1, neosephiroth, funkcmonk, stevewon, Vectorspace, Peter.Lucius, mozbrowser and RayKiddy, and aksu.
We are awaiting clearance for licensing of this manual with the GPL.
This documentation is free documentation.
Authors
About This Manual
© adam hyde 2009
Modifications:
Chris Hofmann 2009
Christopher Lynch 2009
David Tenser 2009
Debbie Jay 2009
Edward Cherlin 2009
Janet Swisher 2009
Kathy Hassinger 2009
Kyle Mayhugh 2009
TMZ - 2009
Accessibility
© Janet Swisher 2009
Modifications:
adam hyde 2009
David Tenser 2009
Kathy Hassinger 2009
Add-Ons Intro
© Chris Hofman 2009
Modifications:
adam hyde 2009
Anne Gentle 2009
Austin Martin 2009
Chris Hofmann 2009
Christopher Lynch 2009
David Tenser 2009
Edward Cherlin 2009
Greg Urban 2009
jay maechtlen 2009
Add-Ons
© Authors Of Firefox Support Knowledge Base 2007
Modifications:
adam hyde 2008, 2009
Anne Gentle 2009
Chris Ilias 2009
Christopher Lynch 2009
David Tenser 2009
Irene Yi 2007
Janet Swisher 2009
jay maechtlen 2009
Leo McArdle 2009
Matteo Cortese 2008
Mozilla Waterfox 2010
Before Getting Started
© Chris Hofmann 2009
Modifications:
adam hyde 2009
Cheng Wang 2009
Christopher Lynch 2009
Edward Cherlin 2009
Janet Swisher 2009
Kyle Mayhugh 2009
Lucinda Croft 2009
Bookmarks
© Authors Of Firefox Support Knowledge Base 2009
Modifications:
adam hyde 2009
Cheng Wang 2009
Christopher Lynch 2009
David Tenser 2009
Edward Cherlin 2009
Janet Swisher 2009
jay maechtlen 2009
Robert Hershenow 2009
Tobias Markus 2009
BugZilla
© Christopher Lynch 2009
Modifications:
Mozilla Waterfox 2010
Configuration
© Anne Gentle 2009
Modifications:
Aaron Davis 2009
adam hyde 2009
Christopher Lynch 2009
Janet Swisher 2009
Tobias Markus 2009
TMZ - 2009
Copy-Save-Print
© Authors Of Firefox Support Knowledge Base 2009
Modifications:
adam hyde 2009
Anne Gentle 2009
Janet Swisher 2009
Credits
© adam hyde 2006, 2007, 2008, 2009
Modifications:
David Tenser 2009
Toolbar
© Authors Of Firefox Support Knowledge Base 2009
Modifications:
Aaron Davis 2009
adam hyde 2009
Anne Gentle 2009
Christopher Lynch 2009
David Tenser 2009
Edward Cherlin 2009
Downloading Files
© Janet Swisher 2009
Modifications:
adam hyde 2009
Anne Gentle 2009
Christopher Lynch 2009
David Tenser 2009
Greg Urban 2009
jay maechtlen 2009
Tobias Markus 2009
FireFTP
© adam hyde 2007, 2008, 2009
Modifications:
Anne Gentle 2009
Christopher Lynch 2009
damian kroliczak 2009
Irene Yi 2007
Janet Swisher 2009
Kristine Hahn 2009
Matteo Cortese 2008
Firefox Security Features
© Authors Of Firefox Support Knowledge Base 2009
Modifications:
adam hyde 2009
Chris Hofmann 2009
Chris Ilias 2009
David Tenser 2009
Edward Cherlin 2009
Janet Swisher 2009
Themes
© Authors Of Firefox Support Knowledge Base 2007
Modifications:
adam hyde 2008, 2009
Anne Gentle 2009
BriannaJane Laugher 2007
Christopher Lynch 2009
Irene Yi 2007
Janet Swisher 2009
Janet Swisher 2010
Keith Howanitz 2010
General Web Security
© Edward Cherlin 2009
Modifications:
adam hyde 2009
Anne Gentle 2009
Christopher Lynch 2009
Harjot Dhodi 2009
Janet Swisher 2009
Joe Paradise 2009
Lukas Blakk 2009
Get Sites to Work
© Authors Of Firefox Support Knowledge Base 2009
Modifications:
adam hyde 2009
Chris Hofmann 2009
Chris Ilias 2009
David Tenser 2009
Edward Cherlin 2009
jay maechtlen 2009
Matthew Middleton 2010
Glossary
© adam hyde 2006, 2008
Modifications:
Anne Gentle 2009
Austin Martin 2009
Christopher Lynch 2009
Edward Cherlin 2009
Harjot Dhodi 2009
Irene Yi 2007
Janet Swisher 2009
Keith Howanitz 2010
The Internet
© TWikiGuest 1970
Mac OSX
© Adam Willetts 2006
Modifications:
adam hyde 2007, 2008, 2009
Anne Gentle 2009
Christopher Lynch 2009
David Tenser 2009
Edward Cherlin 2009
Greg Urban 2009
Irene Yi 2007
Janet Swisher 2009
Jason Blackwell 2009
Lucinda Croft 2009
Mozilla Waterfox 2010
Robert Hershenow 2009
Ubuntu
© adam hyde 2007, 2008, 2009
Modifications:
Anne Gentle 2009
Christopher Lynch 2009
David Tenser 2009
Irene Yi 2007
Janet Swisher 2009
Jay MP 2009
Kathy Hassinger 2009
Kyle Mayhugh 2009
Lucinda Croft 2009
Matthew Middleton 2010
Peter Haslam 2009
Windows
© Authors Of Firefox Support Knowledge Base 2007
Modifications:
adam hyde 2008, 2009
Anne Gentle 2009
Austin Martin 2009
Christopher Lynch 2009
David Tenser 2009
Edward Cherlin 2009
Greg Urban 2009
Irene Yi 2007
Janet Swisher 2009
Kathy Hassinger 2009
Kip Streithorst 2008
Kyle Mayhugh 2009
Lucinda Croft 2009
Matteo Cortese 2008
Michael Verdi 2010
TMZ - 2009
Interface
© adam hyde 2006, 2008, 2009
Modifications:
Aaron Davis 2009
Anne Gentle 2009
Chris Hofmann 2009
Chris Ilias 2009
Christopher Lynch 2009
David Tenser 2009
Eddie VanArsdall 2009
Edward Cherlin 2009
Irene Yi 2007
Janet Swisher 2009
Kathy Hassinger 2009
Tobias Markus 2009
Open Source
© Chris Hofmann 2009
Modifications:
adam hyde 2009
Anne Gentle 2009
Christopher Lynch 2009
David Tenser 2009
Edward Cherlin 2009
Janet Swisher 2009
Jennifer Maher 2010
Kathy Hassinger 2009
Kyle Mayhugh 2009
Matthew Middleton 2009
Peter Haslam 2009
Introduction
© adam hyde 2006, 2007, 2008, 2009
Modifications:
Anne Gentle 2009
Cheng Wang 2009
Chris Hofmann 2009
Christopher Lynch 2009
David Tenser 2009
Edward Cherlin 2009
Harjot Dhodi 2009
Irene Yi 2007
Janet Swisher 2009
Jeff Sizer 2009
Joe Paradise 2009
Kathy Hassinger 2009
Kyle Mayhugh 2009
Leo McArdle 2009
Lucinda Croft 2009
Matteo Cortese 2008
Peter Haslam 2009
yvonne guzman 2008
Managing Plugins
© Authors Of Firefox Support Knowledge Base 2009
Modifications:
adam hyde 2009
Anne Gentle 2009
Christopher Lynch 2009
David Tenser 2009
Eddie VanArsdall 2009
jay maechtlen 2009
Joe Brockmeier 2010
Matthew Middleton 2009, 2010
Navigating
© Authors Of Firefox Support Knowledge Base 2009
Modifications:
adam hyde 2009
Anne Gentle 2009
Cheng Wang 2009
Christopher Lynch 2009
David Tenser 2009
Edward Cherlin 2009
Greg Urban 2009
Janet Swisher 2009
Lucinda Croft 2009
Marcia Couey 2009
Location Bar
© Authors Of Firefox Support Knowledge Base 2006
Modifications:
adam hyde 2008, 2009
Adam Willetts 2007
Anne Gentle 2009
Austin Martin 2009
Cheng Wang 2009
David Tenser 2009
Edward Cherlin 2009
Janet Swisher 2009
Janet Swisher 2010
Kathy Hassinger 2009
Marcia Couey 2009
Matthew Middleton 2009
Firefox Privacy
© Cheng Wang 2009
Modifications:
adam hyde 2009
Austin Martin 2009
Joe Brockmeier 2010
Mozilla Waterfox 2010
RSS/Live Bookmarks
© Authors Of Firefox Support Knowledge Base 2007
Modifications:
adam hyde 2007, 2008, 2009
Andrew Lowenthal 2008
Anne Gentle 2009
Christopher Lynch 2009
David Tenser 2009
Edward Cherlin 2009
Irene Yi 2007
Janet Swisher 2009
Lucinda Croft 2009
Searching
© Authors Of Firefox Support Knowledge Base 2009
Modifications:
adam hyde 2009
alan Robertson 2009
Anne Gentle 2009
Cheng Wang 2009
Christopher Lynch 2009
David Tenser 2009
Edward Cherlin 2009
Janet Swisher 2009
Home Page
© Eddie VanArsdall 2009
Modifications:
adam hyde 2009
Christopher Lynch 2009
Support
© adam hyde 2006, 2007, 2008, 2009
Modifications:
Austin Martin 2009
Christopher Lynch 2009
Irene Yi 2007
Michael Verdi 2010
Mozilla Waterfox 2010
Uninstalling
© Authors Of Firefox Support Knowledge Base 2009
Modifications:
adam hyde 2009
Anne Gentle 2009
Christopher Lynch 2009
David Tenser 2009
Edward Cherlin 2009
Janet Swisher 2009
Kathy Hassinger 2009
Updating
© Authors Of Firefox Support Knowledge Base 2009
Modifications:
adam hyde 2009
Cheng Wang 2009
Christopher Lynch 2009
David Tenser 2009
Edward Cherlin 2009
Janet Swisher 2009
Joe Paradise 2009
Kathy Hassinger 2009
Lucinda Croft 2009
Using Sidebars
© Eddie VanArsdall 2009
Modifications:
adam hyde 2009
Christopher Lynch 2009
David Tenser 2009
Greg Urban 2009
Matthew Middleton 2009
Tabbed Browsing
© Authors Of Firefox Support Knowledge Base 2009
Modifications:
adam hyde 2009
Cheng Wang 2009
Christopher Lynch 2009
David Tenser 2009
Eddie VanArsdall 2009
jay maechtlen 2009
Joe Brockmeier 2010
Patrick O'Patrick 2009
UsingWebForms
© Authors Of Firefox Support Knowledge Base 2009
Modifications:
adam hyde 2009
David Tenser 2009
Greg Urban 2009
Matthew Middleton 2009

Free manuals for free software


 .
.


