


Installing Firefox on Ubuntu
Firefox is already installed on Ubuntu as part of the normal installation. If you want to install a different (most commonly newer) version of Firefox on your Ubuntu system (or other GNU/Linux systems) that is also possible and is explained below.
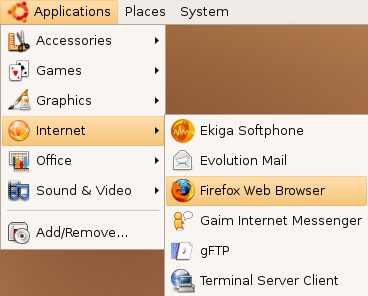
Accessing it is easy. If you are using an installation of Ubuntu with no changes to the default Desktop, select Applications > Internet > Firefox Web Browser:
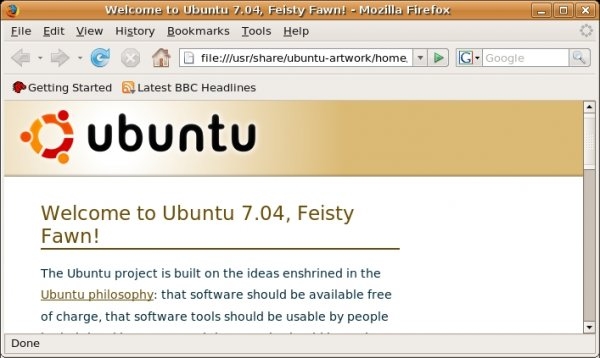
Firefox starts and a welcome window opens:
If you want to install a newer version of Firefox on your system, such as a beta version or a new stable version, which is not offered for your older distribution, there are a few different ways to upgrade.
Upgrading Firefox through Ubuntu
If you want to upgrade the version of Firefox included with Ubuntu to the latest version, replacing your existing version, a detailed guide is available on the Ubuntu wiki at https://help.ubuntu.com/community/FirefoxNewVersion
Manually installing multiple versions of Firefox
Reading the rest of this manual and the Ubuntu wiki page will give you a full overview of how to manage different versions of Firefox in your system, including how to test a beta version. How to test a beta version of Firefox alongside your normal, everyday installation is the focus of the rest of this manual. These steps require advanced file management and extensive use of the command line. If you are new to Ubuntu, using the steps in the previous section is advised.
The very first thing you should do is to backup your existing Firefox settings and add-ons. All of your Firefox related files are stored in a folder with an unusual name in this location:
/home/user/.mozilla/firefox
It can be something like:
/home/user/.mozilla/firefox/d1eukl01.default
Navigate to that folder by clicking:
Places --> Home
Then press CTRL+H to view hidden files - or go to "View" and choose "Show hidden files"
Scroll down until you find the folder ".firefox". Double click on its icon to enter the folder.
Unless you have used the profile manager your default settings and add-ons will be located in a folder with the extension .default
If you have used the profile manager you probably know what you are doing and which folder contains what.
THIS IS BEST DONE WHEN FIREFOX IS NOT RUNNING!! Copy the default folder by highlighting it with a single left mouse click. Then press CTRL+c and paste it into the same folder by pressing CTRL+v - or simply by right-clicking on the folder and choosing "copy", then click in the white area of the screen, finally right-click and choose "paste".
You now have an exact copy of all your Firefox settings in a folder called something like:
/home/user/.mozilla/firefox/d1eukl01.default (copy)
No matter what happens you can always restore all your current Firefox settings.
http://www.mozilla.com/en-US/firefox/all-beta.html
Find the version you want to test and download it to somewhere where you can find it again.
Then go to the Terminal and create a folder to which you have permission in your /opt/ folder. This is a two-step operation. First:
user@box:~$ sudo mkdir /opt/user (press enter)
.. where "user" is your user name (or whatever you might want to call it).
Then you need to gain ownership of that folder, which you get by typing (followed by Enter):
user@box:~$ sudo chown user -v /opt/user
You now have a folder in the /opt(ional) directory into which you can unpack the file you downloaded from the Mozilla website. Navigate to it and right-click and choose to open it with "Archive Manager" (or unpack it in your usual way):
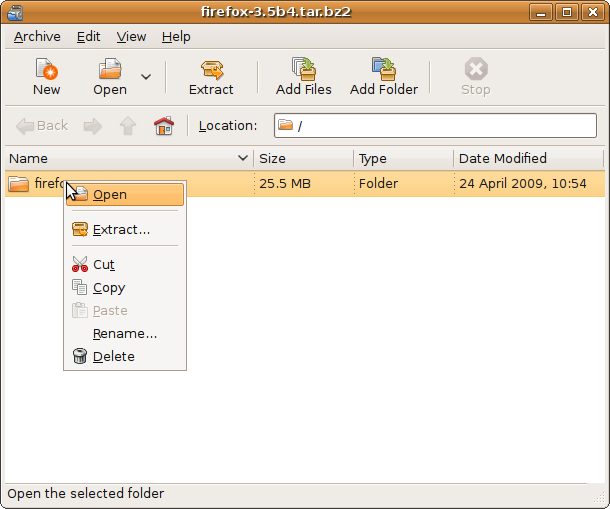
You guessed it: "Extract.." the contents of the file to:
/opt/user/
That means you have a folder called:
/opt/user/firefox
There are now two different way that you can proceed. Either you can run the beta version with a copy of your existing settings and add-ons or you can run a fresh, clean version.
If you want to run the Firefox beta version with its "own" fresh settings, the next step is to create a new profile. This is done by running Firefox with the ProfileManager option. It is best done from the Terminal / Command Line Interface / Virtual Console, which can be found by going to:
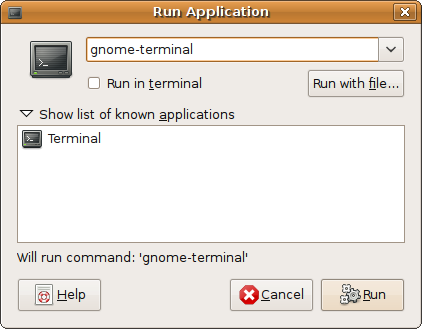
Applications --> Accessories --> Terminal - or by pressing ALT+F2 and typing:
gnome-terminal (once you have typed "gnome-term" it will auto-complete and you can simply press enter)
Inside the Terminal type:
user@box:~$ /opt/user/firefox/firefox -profilemanager
.. and press enter. This will bring up the Firefox Profile Manager, which is a little dialog box that manages different profiles for the use of Firefox.
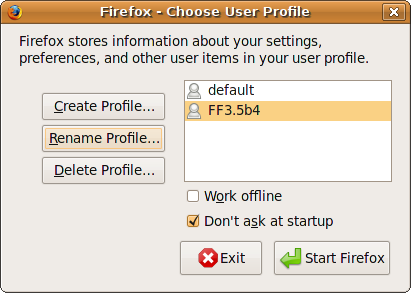
You need to create a different profile, so that you can test the beta version without affecting or screwing up your existing Firefox settings and add-ons. Create an identity with a name that makes sense for what you are doing. It could be: FF3.5b4, for instance, to indicate that the profile is for the testing of Firefox 3.5Beta4. Follow the simple instructions of the Profile Manager and finally run Firefox. That's it - You are now running a beta version of Firefox!
You can also choose to test Firefox with all your current settings and add-ons. However, if you are testing Firefox 3 with your Firefox 2 settings there are certain incompatibilities that might cause minor issues. It is not recommendable, but you can test if you want to see for yourself, perhaps it works just fine.
That is done by navigating to the new folder, which would be called something like:
/home/user/.mozilla/firefox/dhytrklgs.FF3.5b4
.. and deleting all the contents (by clicking CTRL+a and pressing Del) and then pasting the contents of your original folder into it. Your original folder was called something like:
/home/user/.mozilla/firefox/d1eukl01.default
.. which you paste into the folder of the test profile (see above) and then you run Firefox, again with the Profile Manager as described above and create a profile for it, such as the FF3.5b4 profile you created earlier.
That's it! You are now running a beta version of Firefox, which has all your current settings and add-ons without affecting the settings and add-ons of your current and stable version of Firefox that is installed by default in your Ubuntu system. The first time you run it, Firefox will search for updates to your add-ons, some of which might be incompatible with the newer beta version. If that is the case they will simply be disabled.
If something screws up at any point with the new version, either if running it with your current settings or for some other reason, all you have to do is to shut it down, run it again with the Profile Manager option and delete the FF3.5B4 (or whatever you called it) profile and create a new profile:
user@box:~$ /opt/user/firefox/firefox -profilemanager
Alternatively, you can also delete all the contents of the test profile folder:
/home/user/.mozilla/firefox/dhytrklgs.FF3.5b4
.. and run Firefox with the Profile Manager option again. Firefox will (re-)generate the basic settings, so that you can start afresh. Once you get the hang of this and understand the principles, you can move your settings and add-ons easily from one version of Firefox to another. The most important thing is to remember to always make a backup of your settings, so that you never lose your bookmarks, passwords and so on.
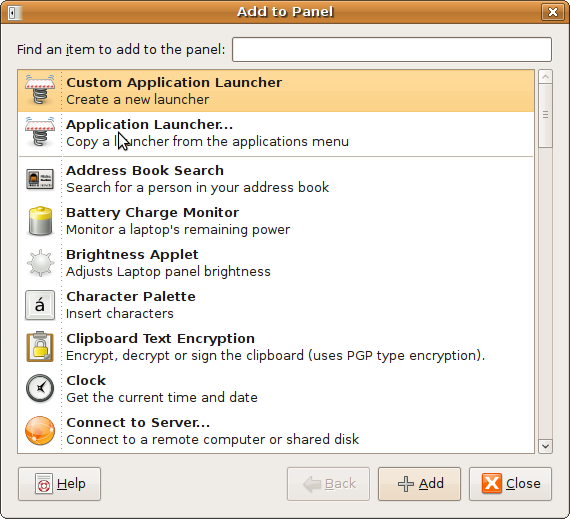
You can easily add a short cut to your Gnome panel, so that you don't have to go to the Terminal to run the optional Firefox version. Right-click anywhere on any of the panels where there are no icons and where you want the short-cut to be located. Choose "Add to panel.." and double-click on "Custom Application Launcher":
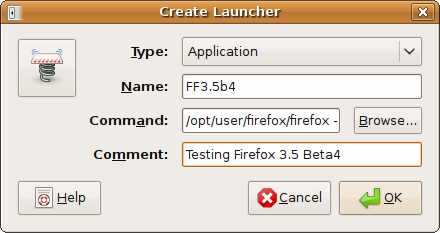
In the next dialog box you enter a sensible name and comment for your short-cut in the "Name" and "Comment" fields. The command you used to run Firefox from the Terminal you enter in the "Command" field:
/opt/user/firefox/firefox -profilemanager
You can add an icon of your choice by clicking on the funny spring in the top left-hand corner of the dialog box.