Text flow and typography
By default, frames in Scribus have a rectangular shape. This is what you want in most cases, and is well-adapted to creating a structured composition. Thus, one can easily place text and images side-by-side.
If you wish to increase the dynamism of the layout, frames can be made to overlap:
- You may add a text frame to highlight some point.
- You may select some text, then place it in a separate frame for emphasis.
- You wish to put the image inside the space where text already exists.
What you find in these cases, is that the new frame is on top of text content, and what you really want is for the text to flow around the frame, which may have an irregular shape.

Text Flow
Except for special cases, text flow is applied to the object, image, text, or geometric shape, which is overlying the text – on some level above the text.
Enabling text flow
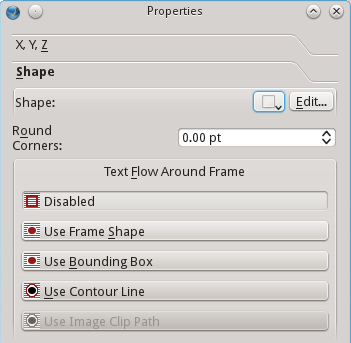
Remember, this is applied to the object above the text which must flow around, so select that upper level object. Now, in the Properties palette, select the Shape tab.

Your four options:
- Use Frame Shape uses the boundaries of the frame you created in the object.
- Use Bounding Box will be the same as the Frame Shape for an unrotated rectangle, but in the case of an irregular shape or rotated rectangle, the Bounding Box delimits the horizontal and vertical boundaries of all the elements of the object, including control points.
- Use Contour Line uses an editable shape which initially is the same as the frame shape.
- Use Image Clip Path uses the clipping path of an image, when one exists. Not only must the path exist, but it must have been activated in the Extended Properties of the image.
Since it's important to apply text flow to a frame on a higher level, it's important to remember that as you add frames, they are placed on a level above the last frame created.

Here we see in this small part of the XYZ tab of Properties how to adjust the level of an object. The left up and down arrows shift by one level, the right arrows either all the way to the top or to the bottom. The number beside the arrows indicates the level of the selected object, 1 being the lowest level.
Adding space around an image
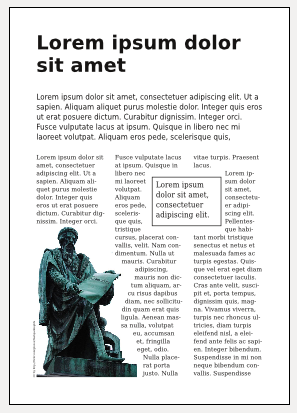
By default, text flow would be immediately against the edge of the image or text frame, but in most cases you will want some "breathing room", such as you see in the example page above.
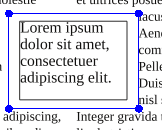
- Click Edit in the Shape tab. You should then see blue dots appear at the corners to mark the Nodes.
- Select Edit Contour Line at the bottom of the dialog.

- Adjust the spinbox with the percentage (10% here), to your desired amount of change in size.
- Now click the button to increase the size of the contour line – the tooltip for the button says, Enlarge the Size of the Path by shown %. The button shows a rectangle with arrows pointing outward. If you wish you can repeat clicking to get the effect you need, then click End Editing.

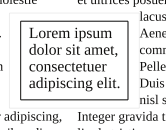
If you are going to use a border for your frame as you see here, you will want to add some space above and to the left of the text inside the frame. Go to Properties > Text > Columns and Text Distances, and adjust the distances as needed.

Add a caption
Scribus doesn't yet support text flow around a group of objects. If you want text to flow around an image, then add a caption to the image, here are a couple of work around methods:
- Place a transparent text frame behind the image, then set text flow around the new frame, positioning the image over it to get your desired effect.
- Place a frame inside the image frame, enlarging the image frame so that the caption is inside any border. You may have to disable Adjust Image to Frame to do this.
Changing the shape of frames
You may notice that when you attempt to change the size of the contour line that the desired effect doesn't take place. In this case, Undo your edits and make sure you have checked Edit Contour Line in the Edit dialog. Also check to make sure you have selected Use Contour Line for the text flow setting.
Should you wish to change the shape of frames, this is accomplished with the buttons in the upper part of the Edit Shape dialog. The functions here are complex and require some practice to master, but here is some information to get you started.
- The first button in the top row allows you to move the nodes (blue dots), and you can do this directly with the mouse, or in the X-Pos and Y-Pos spinboxes lower down in the dialog.
- The second button allows you to add nodes to the shape.
- The third allows deletion of nodes.
- The first button in the second row allows for editing of control points for the nodes. Control points with be colored pink and adjust the line between nodes so that it curves between them.
More information about editing shapes can be found in the online manual that comes with Scribus.
Typographic considerations
Whenever you narrow a column of text you run the risk of the various problems pointed out in the chapter on Typography. Refer to that chapter where the possible ways of adjusting your text are covered in detail.


