


Installing and Configuring Plumi
Installation
The most up to date Plumi installation guide can be found at https://github.com/plumi/plumi.app/blob/master/docs/INSTALL.rst
This page takes you through how to install Plumi on Debian/Ubuntu. Plumi is a package that includes an application server, web server, FTP server, cache server and media transcoding system. The guide runs you through required packages, how to run the buildout, and how to check all services are running.
Configuration
Plumi and Plone itself (upon which Plumi is built) are highly configurable. This chapter covers some of the aspects of Plumi which you can configure easily, with links to further documentation about customisation.
Site Setup
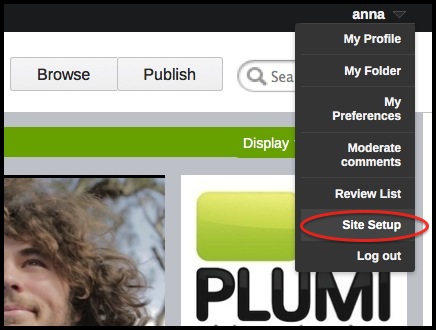
You can configure Plumi's built in settings by accessing Site Setup by clicking the site setup link in the top right. Please note that you must be logged in as a user with the Manager role to do this.
Basic Plone Configuration is available, as well as configuration of Add-On Products (including Plumi packages).
 ⁞
⁞
-
Add-ons. Which add-on modules you have available to implement on your Plumi site.
-
Calendar. Settings such as the first day of the calendar week.
-
Configuration Registry. Settings for some add-on modules.
-
Content Rules. Rules that automatically perform actions on content when certain triggers take place.
-
Diazo theme. The visual theme for Plumi uses Diazo, read more here.
-
Discussion. Configure commenting.
-
Editing. Configure the WYSIWYG editor.
-
Errors. A log of the most recent errors that have occurred on the site.
-
HTML Filter. Plone filters HTML tags that are considered security risks. Here you can change the settings for which tags are stripped and which are allowed.
-
Image Handling. Configure sizes for images generated by Plumi.
-
Language Settings. Here you can define which languages are available on your site. Plumi currently offers both English and Indonesian with more languages to follow.
-
Mail. Mail settings, including SMTP server and the 'From': address for emails sent by your website.
-
Maintenance. Restart the Zope application server (which runs Plone and your Plumi site) and change other maintenance options.
-
Markup. Change from default HTML to other kinds of markup such as plain or structured text.
-
Navigation. Navigation settings, including what kinds of content appear in the tree.
-
Search. Which content types can be searched.
-
Security. Settings including passwords.
-
Site. Change site title and description plus various site-wide settings.
-
Theme. The older pre-Diazo theme configuration.
-
Types. Workflow, visibility and versioning settings for your content types.
-
Users and Groups. Add or remove users, define groups, assign roles (permissions) to users and to groups.
-
Zope Management Interface. Further configuration settings in the older ZMI interface.
Add-On Configuration - Plumi Specific Settings
- Content Licensing Settings. Open content licencing options including Creative Commons.
- Piwik settings. Configure server name etc. for your Piwik instance.
- Plumi settings. Configure notifications on publishing content.
- Ratings. Set which content has ratings applied.
- Plone Captchas Setup. Change colours etc. of captchas.
- Transcode Settings. Enter transcode server address, set mime types etc. Also here you can configure subtitles. By default, subtitle support through Universal Subtitles is enabled. You can disable it through Site Setup->Transcode Settings. You can also disable downloads through embedded videos there.
- Upload Settings. Allowable image sizes and types for upload.
- Vocabulary Library. Here you can upload vocabularies to create taxonomies within Plumi e.g video Genres, Topics, Languages and Countries (by default).
Further Customisation
For more information on customising your Plumi site please consult the documentation on Plone.org.