Open Video Workbook

Hands on - Using Popcorn.js

Getting started with HTML

Objective
Learn the basic structure of a web page and how to include an image
 
Background
HTML stands for HyperText Markup Language and is the basis of almost every page on the internet. For example, if I were writing the homepage to my website, I might start with something like:
 
<!DOCTYPE html>
<html lang="en">
  <head>
    <meta charset=utf-8 />
    <title>My Web Page 1</title>
  </head>
  <body>
    <h1>Welcome</h1>
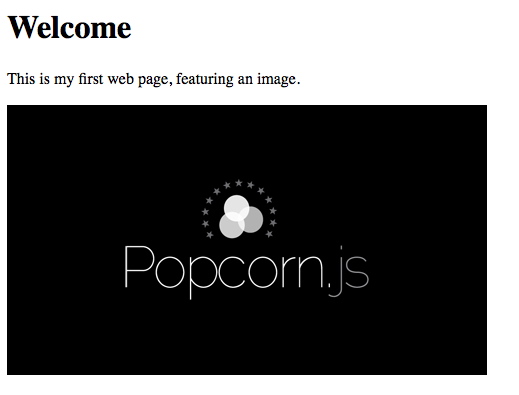
    <p>This is my web page, featuring an image using the img tag.</p>
  </body>
</html>
 
To learn more about the structure and different kind of tags used in this example, have a look at: https://p2pu.org/en/groups/html-introduction/content/basic-markup/.
 
A web browser (Firefox, Chrome, Internet Explorer, Opera, Safari, and others) converts this HTML into a page with a header, a paragraph and an image.
 
Task
You can see how the above example looks at: http://jsbin.com/odemem/latest. Click 'Edit in JS Bin' on the top right to see and edit the HTML source code in an online text editor.

Let's make that a little more personal.

Find an image that exists somewhere online and copy its URL. For most images online, you can right click the image and select 'Copy Image Location/URL/Address' (in Firefox/Chrome/Safari). Now back at the jsbin page, change the src URL of the img tag (the text between quotes after "src=") for your image's URL. See the change in the preview on the right? Nice one! You've now got a web page displaying your own custom image!

Including video in HTML5

Objective
Learn how to include video in a web page the open standard way with HTML5
 
Background: <video> in HTML5
 
The possibility to include images via the <img> tag in HTML pages was added in 1993. Many years later, discussions started about adding video support, which have now resulted in the <video> tag as part of HTML5. HTML5 is a set of new tags and functions for HTML that has been in active development since 2008 [http://en.wikipedia.org/wiki/Html5]. Open-source web browsers were the first to explore running audio and video on their own, inside new <audio> and <video> tags. This makes it possible to access and edit the media directly, make your page interact with the video, create different-shaped frames, and many other cool tricks.
 
Once you have video files that are ready to go online (find out more about encoding for web here [http://diveintohtml5.info/video.html#video-codecs]), you can include them via the <video> tag in your HTML5 page like so:
 
<!DOCTYPE html>
<html lang="en">
  <head>
    <meta charset=utf-8 />
    <title>My Web Page</title>
  </head>
  <body>
    <h1>Welcome</h1>
    <p>This is my first web page, featuring an image.</p>

    <video height="180" width="300" id="ourvideo" controls>
    </video>

  </body>
</html>


Task
Have a look at the this page at: http://jsbin.com/agecem/latest and hit 'Edit in JS Bin' again to access the source. See how the <video> tag has the attributes "height" and "width", set to 180 and 300 pixels respectively? Change the values between quotes to modify the dimensions of the video element. Try making the video twice the size. Got it showing up correctly in the preview on the right? Cool! You are getting in control of your video the HTML5 way!

Using popcorn.js to add a time-based footnote to your HTML5 video

Objective
Learn how to include the popcorn.js library in your web page and use its functionality via plugins
 
Background: The Popcorn Project
 
Popcorn is a project developed by Mozilla that includes a JavaScript library that lets you use the <video> tag to create time-based interactive media on the web. The project aims to bring together filmmakers and web developers by letting them merge their technologies. Popcorn has good documentation and lots of tutorials online to get started at a not too technical level.
 
With the popcorn.js JavaScript library, you can make things happen like: 10 seconds in, show a map of Paris; 20 seconds in, show my Flickr photos; add subtitles that can be translated to the viewers' language and a lot more! These kinds of things are called "events" and are represented in JavaScript code.
 
Here is a simple example of how we can extend the previous example to a expanded video experience. Notice how, besides the <video> tags, we also include a <div> with the id of "footnotediv", which is where we'll display a footnote on a particular moment in our video.
 
The first step to use the popcorn functionality is to include the popcorn.js library. This is what we do on line 8 in the code below.
 
What follows is a block of JavaScript code between <script> tags. Line 12 starts a statement that wraps around the popcorn code to make sure it is run when the web page has loaded. The first piece of popcorn code is line 15, where we create a popcorn instance that takes the id of the HTML video element.
 
The next part from line 18 results a specific time trigger. Using the variable "pop", we add a footnote using the footnote plugin. Between the curly brackets ( '{' and '}' ) we specify the essential parameters that are necessary to display the footnote correctly (to find our about which parameters are required, have a look at the Popcorn plugin documentation [http://popcornjs.org/popcorn-docs/plugins/#Footnote]). Here we choose to display the text "Pop!" inside the target with the id "footnotediv" from second 2 until second 6.
 
The final piece of code uses the 'play()' method to start playing our popcorn video as soon as the web page has loaded.
 
<!DOCTYPE html>
<html lang="en">
  <head>
    <meta charset=utf-8 />
    <title>My Web Page 3</title>
    
    <!-- load in the popcorn.js library -->
    
    <script>
      // ensure the web page (DOM) has loaded
      document.addEventListener("DOMContentLoaded", function () {
 
         // Create a popcorn instance by calling Popcorn("#id-of-my-video")
         var pop = Popcorn("#ourvideo");
 
         // add a footnote at 2 seconds, and remove it at 6 seconds
         pop.footnote({
           start: 2,
           end: 6,
           text: "Pop!",
           target: "footnotediv"
         });
 
         // play the video right away
         pop.play();
 
      }, false);
    </script>
  </head>
  <body>
    <h1>Welcome</h1>
    <p>This is my web page, featuring a popped video using the footnote plugin.</p>
    <video height="180" width="300" id="ourvideo" controls>
    </video>
    <div id="footnotediv"></div>
  </body>
</html>
 
Task
See the live demo of this page at http://jsbin.com/ifekul/latest and hit 'Edit in JS Bin' to access the source. Let's remix that example to include something more visual. We can trigger all sorts of content from our video timeline using the different plugins that popcorn.js offers. One of these plugins is the Image plugin that, ... lets you display images! 
 
Have a look at the documentation to find which parameters the plugin uses [http://popcornjs.org/popcorn-docs/plugins/#Image]. Replace the part that adds the footnote with the following:
 
 .image({
        // start seconds
        start: 2,
        // end seconds
        end: 6,
        // optional link to when the image is clicked
        href: "http://www.drumbeat.org/",
        // the url of the image that you want to display
        // the id of the document element that the iframe needs to be attached to, this target element must exist on the DOM
        target: "imagediv"
      });
 
Also replace the footnote div with the following image div:
 
<div id="imagediv"></div>
 
Now hit 'Run with JS' on the top right. See that image of the mozilla drum popping up? Yay! Now go ahead and drop in a URL of any image you like and change when it is displayed. Got that going? Great! Have a look at the References chapter of this section to see how you can further explore the possibilities to extend web video in your browser.