
Publish Video
To publish a video you must have registered, and must be signed-in.
Note: it may take a while to upload your video, depending on your internet connection, so please be patient. Also your video will not be published immediately - the default set up of a Plumi site is for new contributions to be moderated by site reviewers. After the content is reviewed you will be notified via email. You will not be able to edit the video unless you retract it.
Publish Video Steps
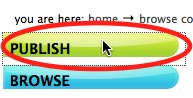
Click the Publish button in the sidebar.
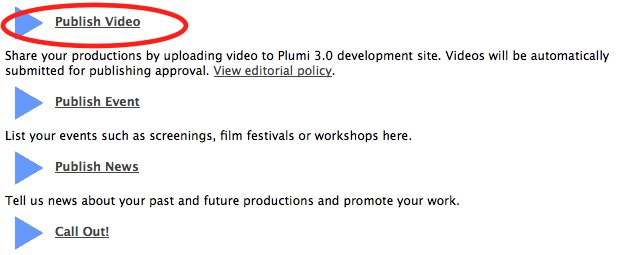
Choose Publish Video button.
Step One
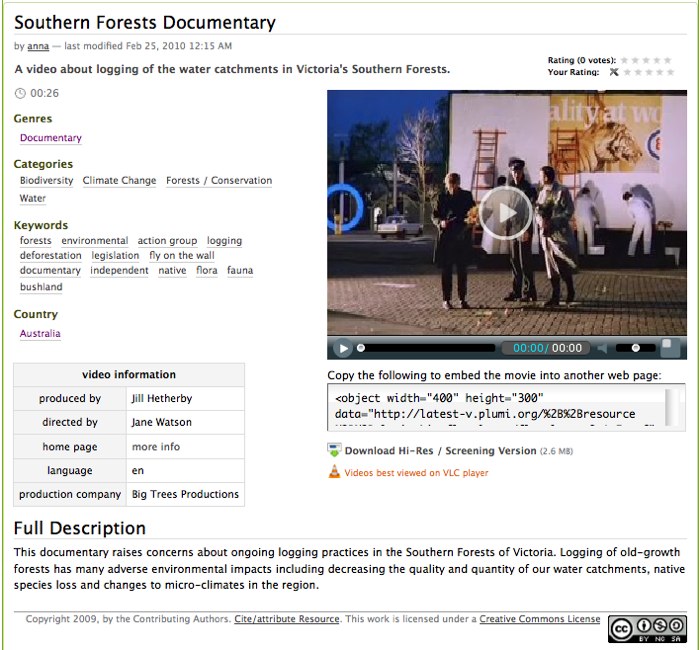
Fill out the form, adding a Title (required), Description (required - a short summary) as much other production information as you choose (Producer, Director etc.).
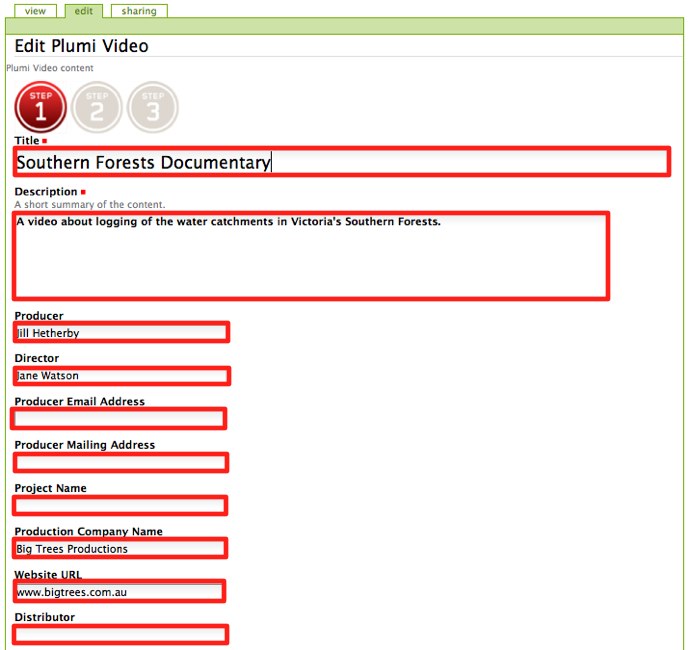
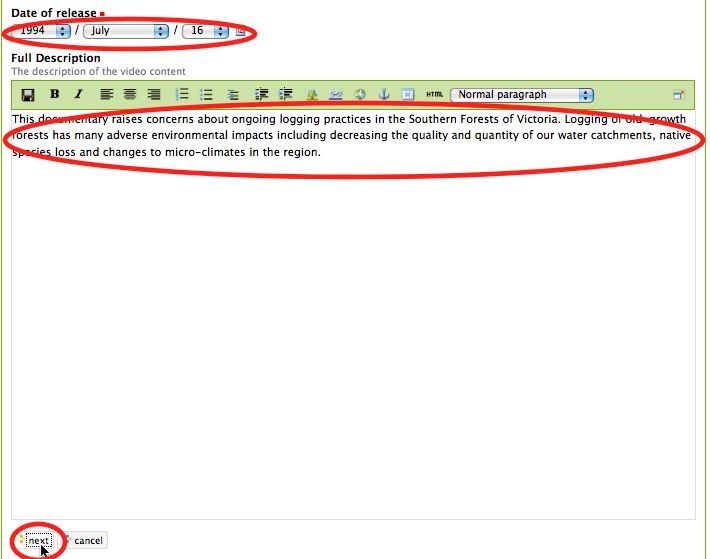
Choose a Release Date , add a Full Description (HTML, can include images and links) and click the next button to take you to the next step.
Step Two
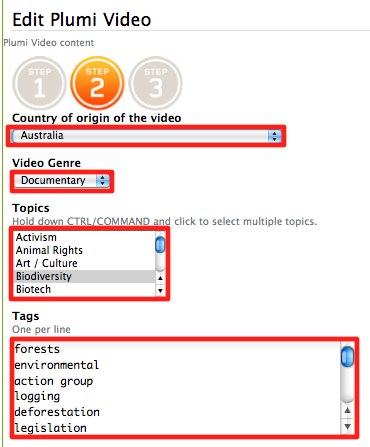
Now it's time to categorise your video. Choose the Country of origin, Video Genre, Topics (hold down CTRL/COMMAND and click to select multiple topics) and enter Tags (your own words to categorise the video, these MUST BE ENTERED ONE PER LINE, NOT WITH COMMAS) into the box.
Enter the Location which your video is primarily about.

Enter the copyright information for your video. If the Copyright Holder (creator) is not you, enter their name instead of "(site default)".
Now choose your Copyright License. Plumi allows for multiple licensing forms including open-content licenses to give you more choice about who can distribute, copy or re-edit your work.
If you wish to use the site default license, you don't need to change anything. If you want to choose your own license, just tick the box next to All Rights Reserved (standard copyright), GNU Free Documentation License (the license Wikipedia uses, more info here) or Creative Commons License (more info here).
You can choose what kind of Creative Commons license you want to attach to your video by clicking (Choose) next to Creative Commons License. This will open another window where you can choose which license you want based on some simple questions. The license you have chosen will display here.
You can also tick the box next to Other and click the (Choose) button to attach any other kind of license you wish to your video.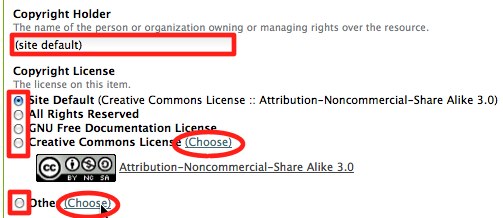
Add Related items - search for related content already on the website by clicking the add button. This will open a new a new window where you can browse or search for other content that is related to your video. Click the next button to take you to the next step (or the previous button if you wish to change what you've entered into Step 1).

Step Three
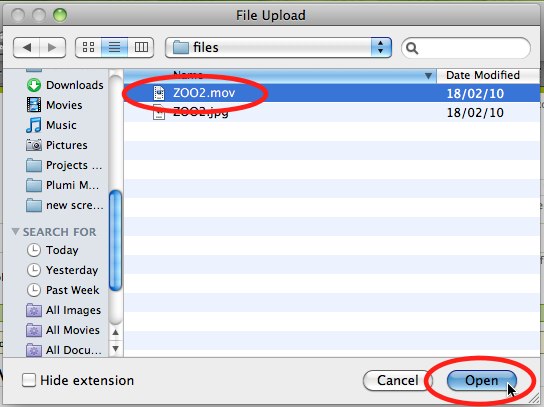
Browse for a video file on your computer by clicking the Browse button.
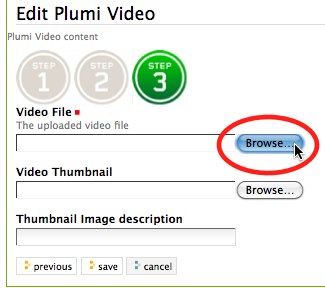
Choose the video you wish to upload, and click the Save button.
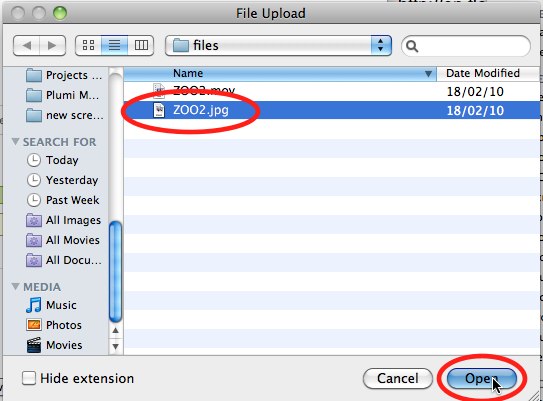
Attach a thumbnail image to your video by clicking the Browse button, and choosing an image from your computer (note this is optional - Plumi will automatically grab an image from the video you uploaded if you don't upload your own thumbnail image).
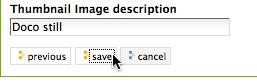
Give the image a description by entering text (also optional) into Thumbnail image description.
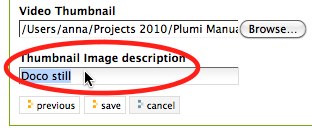
Click the save button.
Your video will now go into the pending content state, awaiting publishing by a Reviewer or Manager (it will not be available within the site, for example on the front page, until it has been moderated).