


Installing Web Proxies
If you have access to a Web server in a country which is not censoring access to the Internet, you can install a Web proxy, which is a small software written in the programming languages PHP, Perl, Python or ASP. Installation of Web-based circumvention software requires some technical expertise and resources (a compatible Web hosting and sufficient bandwidth).
If you want to install your own Web proxy, you need one of the following:
- a Web hosting space with PHP support (which can be purchased for a few US dollars a year from hosting companies such as https://www.dreamhost.com or http://www.hostgator.com, or provided by your school or university)
- a virtual (VPS) or dedicated server (which are more expensive and more complicated to use)
- a PC connected to a broadband connection (with a publicly routable IP address).
Public and private Web proxies
Public Web proxies are available to anyone able to search them, on search engines such as Google for example. Public Web proxies and anonymity services may be found by users and those authorities implementing filtering, so they are more vulnerable to blacklisting.
The locations of Private Web proxies are only known to the intended users. Therefore, private Web proxies are best suited for users who require stable circumvention services for Web traffic and have trusted contacts in non-filtered locations with sufficient technical skills and available bandwidth to set up and maintain the Web proxy. The chances of private Web proxies being detected and blocked are lower than those of public circumvention services. This is also the most flexible circumvention option available for simple Web traffic and is less likely to be discovered and blocked than a public Web proxy, particularly if it is used with SSL encryption.
Features of Web proxies
Web proxies can be set up with some level of customization tailored to the specific needs of the end user. Common customizations would include changing the port number that the Web server runs on and implementing encryption such as SSL. Since some blacklists may block keywords associated with popular proxy software, changing items like the default URL, the name of the script, or elements of the user interface can also reduce the risk of automated detection and blocking of the proxy. It is possible to protect the use of the Web proxy by enabling .htaccess with a username and a password.
When using SSL, it's also useful to create an innocuous Web page at the root of the Web server and conceal the Web proxy with a random path and file name. Although intermediaries may be able to determine the server you are connecting to, they will not be able to determine the requested path because that part of the request is encrypted. For example, if a user connects to https://example.com/secretproxy/, an intermediary will be able to determine that the user connected to example.com but they will not know that the user requested the Web proxy. If the Web proxy operator places an innocuous page at example.com, then the Web proxy is less likely to be discovered by monitoring network transmissions. A valid SSL certificate which is trusted in all popular Web browsers is available for free at https://www.startcom.org/.
There are several free open source Web proxies available on the Internet. The main differences are the programming languages they are written in, since not every Web server supports every programming language. The other big difference is the compatibility of the script with modern Web sites with technologies like AJAX (used by GMail or Facebook) or streaming Flash video (used by YouTube).
Popular free Web proxy programs include:
- CGIProxy ( http://www.jmarshall.com/tools/cgiproxy): a CGI script written in the Perl programming language that acts as both an HTTP and an FTP proxy.
- Peacefire's Circumventor (http://www.peacefire.org/circumventor/simple-circumventor-instructions.html): an automated installer program that makes it much easier for non-technical users to install and configure CGIProxy on a Windows machine.
- SabzProxy (http://sabzproxy.com): both an HTTP and an FTP proxy. It is based on the legacy code of PHProxy written in PHP with new features, such as random encoding of the URL, to make it harder to block.
- Glype Proxy (http://www.glype.com): another free-to-use, web-based proxy script, also written in PHP.
The sites of these Web proxies provide instructions on how to set them up. Basically, this involves downloading the script, extracting it on the local hard disk, uploading the script via FTP or SCP to your Web server, setting permissions and testing the script. The following example is for the installation of SabzProxy, but the steps are similar for other Web proxies.
Installing SabzProxy
SabzProxy is only available in Persian, but the GUI is simple and is still easy to understand.
These instructions describe the most common case: using FTP to transfer SabzProxy to a Web space account that already supports PHP. For this technique, you will also need an FTP client program such as FileZilla (http://filezilla-project.org).
Although this method is the most common, it isn't applicable to every situation (for example if you're setting up your own server through the comand line), but the steps should be similar.
- The first step is to download the SabzProxy archive file from http://www.sabzproxy.com.
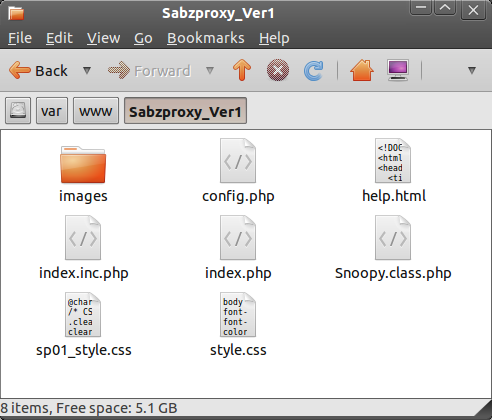
- Next, extract the contents of the .zip file by clicking with the right mouse button on the file and choosing Extract All.
- Open the config.php file with a basic text editor (e.g. Notepad for Windows, Gedit or Nano for Linux systems, Texteditor for MacOS)
- Edit line 8, starting with $config_key. Type a random string between "". This string will be used to randomize the URL encoding, so make it as random as possible.
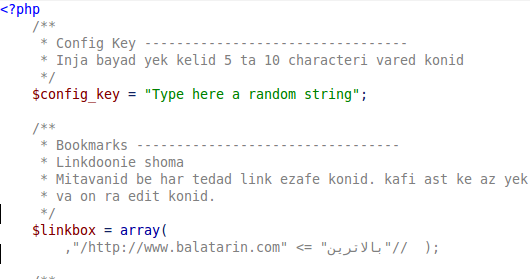
- You can also configure a couple of options, such as the welcoming text and links.
- Open FileZilla, enter the server (host), username and password of your Web space and click on Quickconnect (or similar if you are using a different FTP client).
- The left part of the FTP client window represents your local PC, so you can locate the SabzProxy files that you have just extracted here.
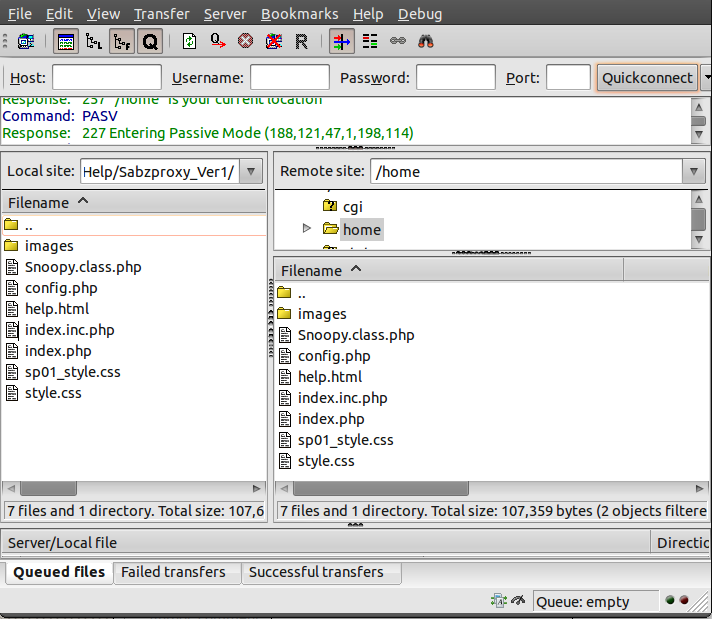
- Drag-and-drop the files from the left part of the FTP client window to the right part, which represents the remote FTP server (your Web space).
- You can now access SabzProxy by browsing to the domain of your Web space and the directory to which you uploaded PHProxy. (In this example http://kahkeshan-e-sabz.info/home.)
If this doesn't work, your server account may not support PHP, or support for PHP may be disabled or may require additional steps. Please refer to the documentation for your account or the Web server software in use. You can also look for an appropriate support forum or ask your web server operator for additional help.