


How to make transactions for a loan account
- How to apply payments
- How to apply adjustments
- How to repay a loan
- How to apply charges and fees
- How to remove recurring account fees
- How to record and clear overpayments
- How to Apply Principal Pre-payment
- How to repay overdue interests first
Regardless of whether the loan is held by a client or a group, the process of making transactions is the same.
In any Search box, type the name of the client or the group (or the number of the loan account, if you know it). If you type the client or group name, a list appears with all clients and groups having that name. Click the link for the correct one and, from the details page that appears, click the link for the correct loan account.
Then follow these instructions for the transaction that you want to make.
How to apply payments
-
In the Transactions box at the upper right of the screen, click Apply Payments.
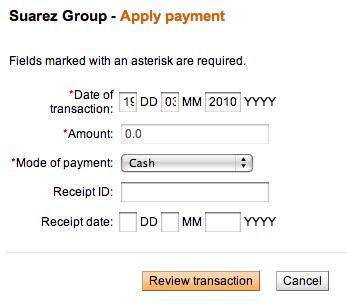
A screen like the following appears:
-
Enter information using the descriptions in the following table:
Field
Description
Date of Transaction
This shows today's date. If you need to change this date because the payment took place at another time, type the day (XX), month (XX), and year (XXXX) of the payment.
Amount
The amount of the payment. If the borrower is making only a partial payment, type the amount of this payment.
Mode of Payment
The way the payment was made.
Receipt ID
The number of the receipt, if you use one.
Receipt Date
Date the receipt was issued, if you used one.
-
When you are done, click Review Transaction to review your work.
For information on uploading administrative documents that you can use for payment transactions, see "How to manage administrative documents." You can get information on entering information on several accounts at the same time; see "How to enter collection sheet data."
How to apply payments via a savings transfer
Mifos provides functionality which allows to repay loan fees and payments by funds transfer from Savings account, if customer has both Loan and Savings accounts. It is easy and can be done by using standard ‘Apply payment’ functionality.
Follows the steps below to see how to apply payments via savings transfer:
1. Make sure that you have enough balance on Savings account to apply Loan payment.
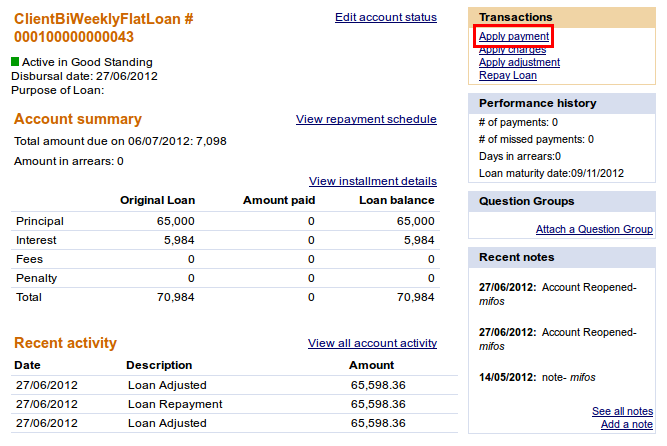
2. Go to Loan Account and click on Apply payment link.
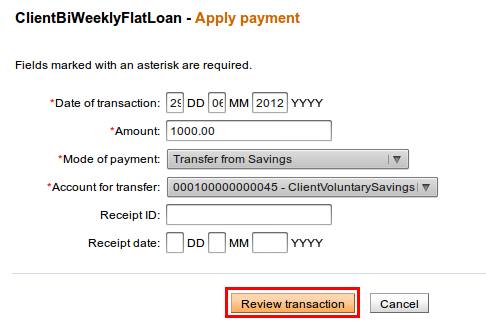
3. Enter payment amount and select mode of payment - 'Transfer from Savings Account', as it shown below:
![]()
After selecting 'Transfer from Savings Account' as a mode of payment, the list of all active customer’s Savings accounts is displayed and you select any of them.
NOTE: If you select Savings account with insufficient balance to repay loan, then validation message will appear once you try to submit transaction - "Insufficient Balance in savings account to make the payments".
If the amount entered is greater than the maximum amount per withdrawal limit on the savings account, an error message "The amount entered exceeds the maximum amount per withdrawal limit on the savings account" is displayed.
4. Click Review transaction button.
5. Verify that all payment details are appropriate and click on Submit button.
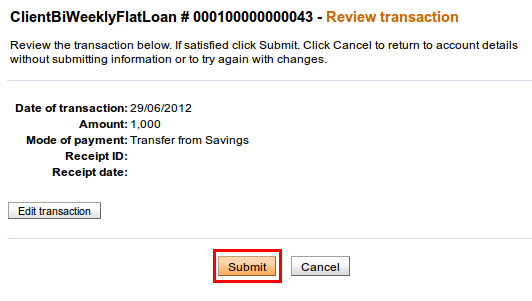
After that, funds will be transferred from Savings account and applied as payment reflecting this hierarchy: Penalty -> Fees -> Interest -> Principal.
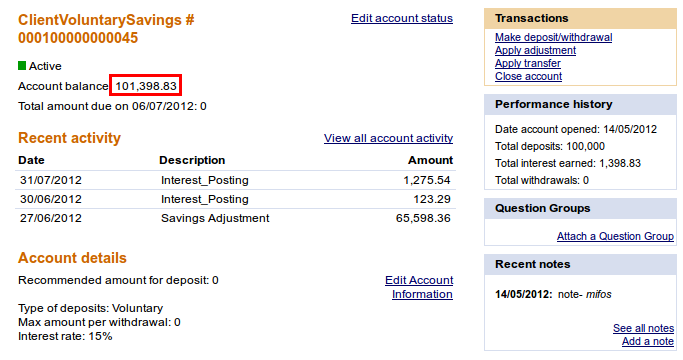
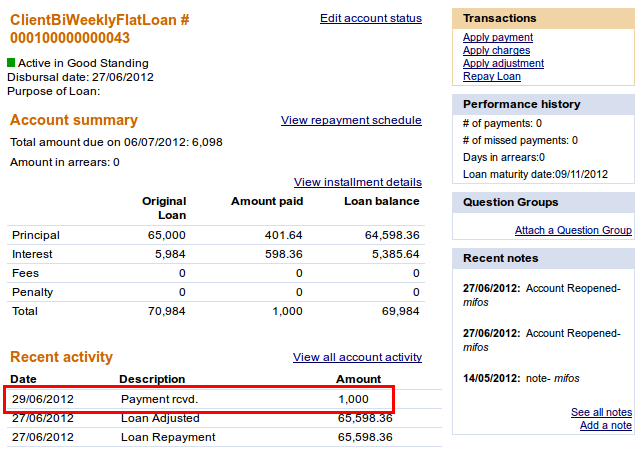
6. You can check that payment has been applied:
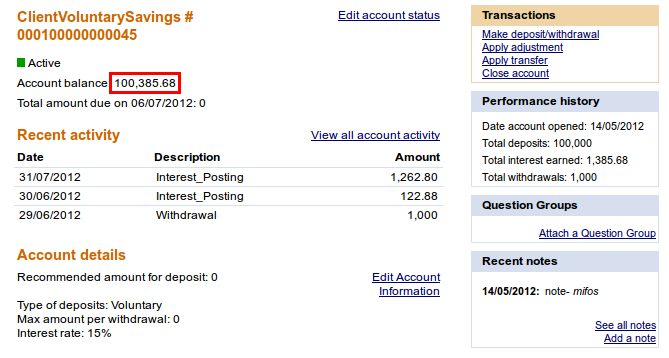
7. Go to Savings account to see that balance has been reduced, as it is shown below:
NOTE: You can apply payments via savings transfer only if 'Transfer from Savings Account' payment type is added to right group (e.g. Repayments, Fees) on 'Define accepted payment types' page in 'Admin' tab.
How to apply adjustments
Sometimes errors occur when payments for a loan are recorded. If you need to cancel the full amount of the last repayment, you can do this by making an "adjustment." If you need to cancel several repayments, you must do each one separately. You have also a possibility to adjust historical transactions. If you have made incorrect transaction in the past, you can make adjustment of any transaction you want.
When you have made an adjustment, Mifos divides the canceled payment into principal, interest, and fees, and makes adjustments in each of these categories to the total amount still due for the loan.
To apply adjustment, follow these instructions:
-
In the Transactions box at the upper right of the screen, click Apply Adjustment.
Note: If no payments have been made up to the present for this loan, this button does not appear.
A screen like the following appears, showing all payments:
You can choose any payment (including those in the past) and click Apply Adjustment to see a scren like following: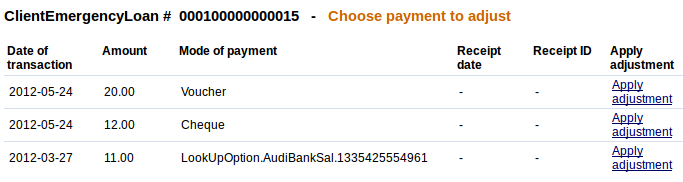
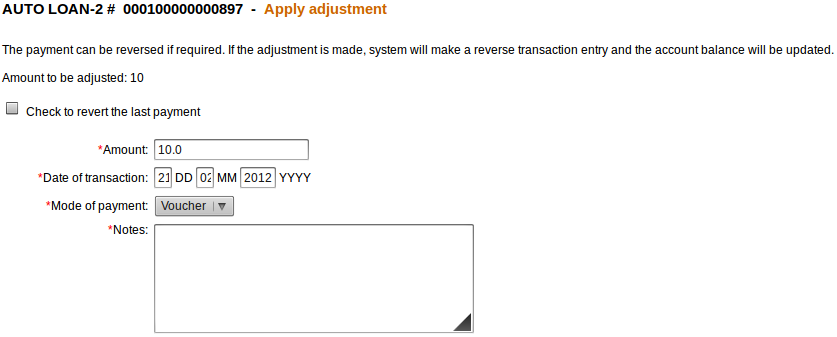
-
Check the Check to Revert the Last Payment box, if you want to adjust full amount.
Note: You may also adjust only part of amount. If you want to do so, do not check the Check to Revert the Last Payment box and specify Amount value which you want to adjust.
- Date of transaction is set on the current day, but you may change it to any date, and make adjustment not only of the last transaction, but also of transactions, made in the past.
- Choose Mode of payment from the drop-down list.
- In the Notes box, type information describing why you made this adjustment.
-
When you have made the adjustment, click Review Adjustment to review your work and click Submit.
Note: Partial adjustments are not available for declining balance with interest recalculation method and savings accounts (you may only specify amount and make adjustment for the last transaction).
How to repay a loan
You can repay the entire remaining loan balance at once using the Repay Loan link. After following these instructions, the status of the loan will change to "Closed - Obligation Met".
Date of transaction is automatically set as current date, but you change it. If you forget to record the loan repayment on the day of the center meeting you may may specify a backdate of the repayment of a loan up in Date of transaction field, but it can not be earlier then date of the last payment or last meeting date.
Note:
You will be able to write off loan with backdate only if 'Back dated transactions allowed: Yes' option is enabled in the system. You can check if this option is enabled in your system in Admin tab on 'View organization settings' page.
If LSIM option is enabled, only the last payment matters and you can enter date which cannot be before the last payment date. If LSIM is disabled, then transaction date must not be before the previous meeting date or last payment date.
To repay loan follow this instructions:
-
In the Transactions box at the upper right of the screen, click Repay Loan.
A screen like the following appears:
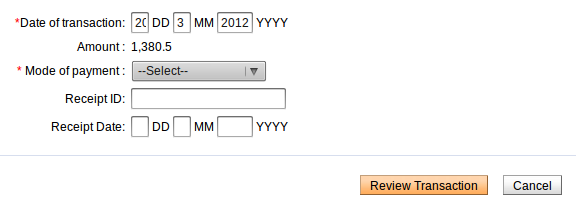
-
Enter information using the descriptions in the following table:
|
Field |
Description |
|
Mode of Payment |
The way the payment was made |
|
Receipt ID |
A number for the receipt, if you use one. |
|
Receipt Date |
The date the receipt was issued, if you use one. |
|
Date of transaction |
The date when transaction was made or backdate if transaction is made in different date than repayment. |
-
When you are done, click Review Transaction to review your work.
-
If you want to make changes, click Edit Transaction, make any changes, and click Review Transaction again.
-
When you are satisfied with all changes, click Submit.
How to apply charges and fees
If you want to apply fees or penalties directly to the loan, following these instructions.
-
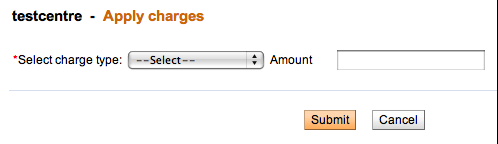
In the Transactions box at the upper right of the screen, click Apply Charges.
A screen like the following appears:
-
Enter information using the descriptions in the following table:
|
Field |
Description |
|
Select Charge type |
Click the appropriate charge or fee. These are loan fees that have been created or you can select Misc Fee or Misc Penalty |
|
Amount |
The amount to apply. If there is a set amount for this charge, it appears in the Amount box; type over this to change it. |
-
Click Submit.
The charge now appears in the Upcoming Charges and the Recent Account Activity list. It will appear in Transaction History when posted.
Note the following:
-
In addition to the penalty calculated for delayed repayment, the user can apply a "Misc penalty" amount to the account. If a Misc Penalty amount is applied to the account, the same will be included in the next payment due for the account.
-
If the penalty rate is changed in between two payments, the old penalty rate should be taken for calculation until the date the change was made.
-
A penalty is not calculated until the day after the due date.
How to remove recurring account fees
In the Recurring Account Fees section, near the bottom of the account details screen, a list of recurring account fees associated with the account are listed. Click Remove for the fee you wish to remove. The fee is now gone from the Account Details section and is no longer associated with the loan account.
How to do an early repayment of Loan
After a loan is disbursed, a client can make repayments at any time. The date of repayment need not necessarily be on the date the amount is due. The repayment can be either partial or a full repayment of the total amount outstanding. Depending on the type of loan repayment (whether full or partial), one of the following repay options is used in Mifos:
-
Repay Loan
-
Apply Payment
Difference between Repay Loans and Apply Payments:
Apply Payments:
This is used in case of partial repayment of loan amount, where the repay amount is not equal to the amount due on a specific date. In this case, details of this transaction can be recorded into the Mifos system by modifying the default amount and entering an amount less than the expected amount. Before processing and saving the transaction details, Mifos performs the following validations:
- Date of transaction should be between the last payment date and current date
- Amount entered is not greater than the total amount outstanding on that account.
Repay Loans:
After loan disbursal, the client can at any time repay the entire loan in a single payment. To record a total repayment, the Repay Loans option is used. The system calculates the total amount due as of the current date as follows:
- Principal: The principal is calculated as the sum total of principal due in unpaid, due and future installments.
- Interest: Interest is calculated depending on whether the waive interest feature is enabled - this is explained in greater detail in the next section.
- Fees: The fees due for all future installments is not included, but the fees due for all past unpaid installments and the current installment is included in the total due.
- Penalty: This includes miscellaneous penalties and penalties due to late repayments, if any. The total includes miscellaneous penalties, both for the current instalment and for those due through the last installment.
Early repayment of Loans - Repay Loans and Waive Interest
Scenario: If the client repays the loan earlier than the due date and the loan product has been marked as ‘Can Waive Off Interest’.
1. Click Repay Loan link on the Loan Details page (top right of the screen). A screen like the following appears:

2. As shown in the screenshot above, the Can Waive Off Interest option is enabled. (This is because the loan product has been marked as Can Waive Off Interest). Depending on your MFI’s current requirement, you have the option to disable it or retain it.
- Waive Interest Option Disabled: The Amount is calculated by waiving off all the future fee, future interests. The payment due interest is included in the calculate amount and the penalty is not waived off.
- Waive Interest Option Enabled: The Amount is calculated by waiving off all the future fee, future interests and the payment due interest. The penalty is not waived off.
3. Select the appropriate mode of payment from the list provided. The receipt ID and receipt date are optional fields. After entering the required details, click Review Transactions. A screen like the following appears:
![]()
4. If any changes need to be made, click Cancel. This will direct back to the Loan Details page. Click Repay Loan again to make the necessary changes to the transaction.
If all details are in order, click Submit.
5. The status of the loan should read ‘Closed-obligation met’ as shown below.
![]()
To further verify that the transaction has indeed been recorded as 'closed' by the Mifos system, check that the Loans Balance field in the Accounts Summary section reads 0 (refer screenshot above).
Click View Repayment Schedule (in the Accounts summary section). The Repayment schedule should display all installments under the Installments Paid section.

How to record and clear overpayment
Mifos provides possibility to make payment greater then remaining balance of the loan (an overpayment) by using import transaction functionality. Sometimes it is only a few dollars over, sometimes an entire extra installment is mistakenly paid. It may occur only during repayment of the last installment. Mifos validates loan balance and shows overpayment amount, which may be returned to clients. If overpayment is made, client's account automatically changes the status to ' Closed- Obligation met' and the new section called 'Overpayments' on client's details page is displayed.
How to import transaction with overpayment
Import transactions functionality is possible only if Audi Bank plugin is available (it should be added into catalog Home > .mifos > plugins). Then you should import previously prepared Excel file (.xls) which contains loan payment transactions.
To import Excel file follow instructions below:
1. At the beginning you must prepare Excel file, which contains transactions for actual client. Transaction may contain amount greater than last installment amount (an overpayment).2. Click on Admin tab. Under 'Manage Imports and Exports' section click on Import transactions link.
Note: You only can make an overpayment for client's last installment.
You will see following screen:
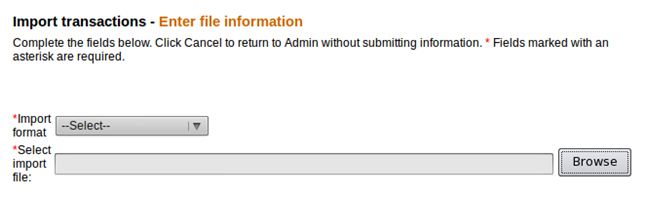 |
3. Select import format (Audi Bank Excel 2007) from the drop-down list and choose earlier prepared file to import (each file may be imported only once). After filling required fields click Review.
4. If no errors occur during import, you will see a screen like this.
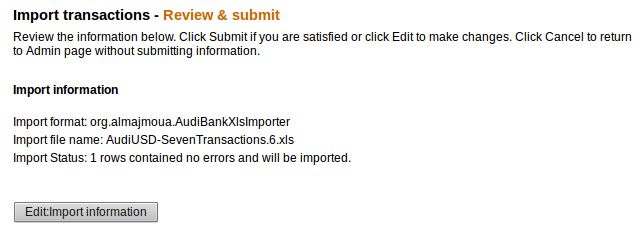
5. Click Submit to import a file or edit information if you want to make changes.
How to display and clear overpayment
1. Click on Clients & Accounts tab and type an appropriate Client Name.2. Choose a client from the list and click on Client Name to display his details
Client details page looks like following:
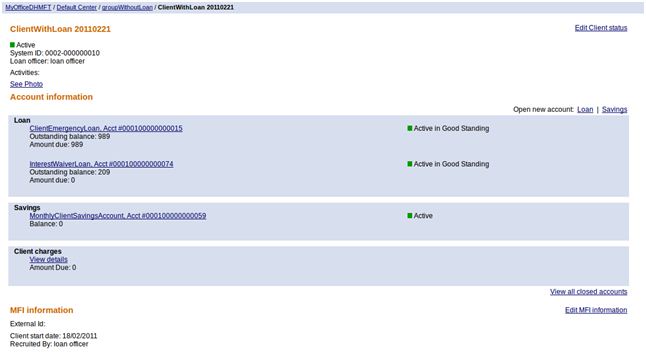
3. To display closed accounts, click on 'View closed accounts' under the list of loans and savings accounts. Choose appropriate Loan Account and click on its name to display details page.
4. On the right panel you will see an 'Overpayments' section which displays overpayment amount made during import transaction.

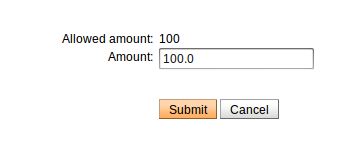
You may see a screen like following. Allowed overpayment amount is loaded automatically and you can not change it.
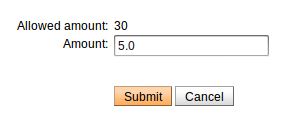 |
Type Amount value, which you want to clear, it may be less than overpayment amount but it can not be greater, otherwise you will see validation message. Then click Submit.
Note that overpayment value has been changed in 'Overpayments' section:
 |
You may also clear a full amount at one time. To do that enter the full allowed amount and click Submit button.
After clearing the whole amount, overpayment section is no longer displayed on Loan Account details page.
How to Apply Principal Pre-payment
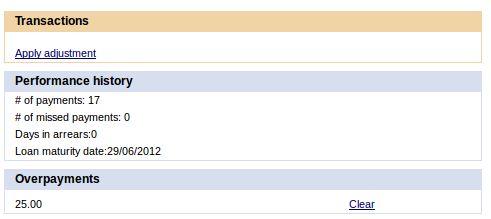
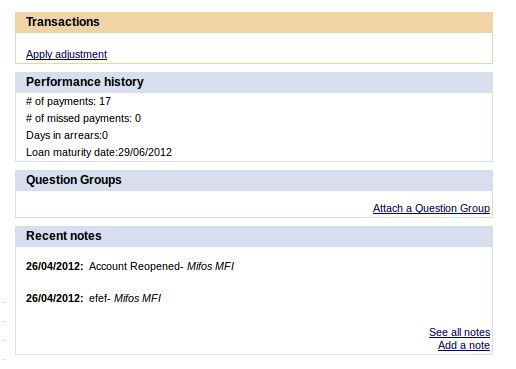
Principal Pre-payment option is enabled only for Loan accounts with ‘Declining Balance’ or ‘Declining Balance-Equal Principal Installment’ interest rate type. If you add such Loan account to Client or Group, then you will see on Loan account details page, in Transaction box, an additional option named ‘Apply Principal Pre-payment’ (as it is shown below).
![]()
‘Apply Principal Pre-payment’ option allows you to make more than one transaction on the same day, even if you applied a payment for interest on the same date.
There is also a possibility to make principal pre-payment on non-meeting date (i.e. on a date on which there is no entry in the loan schedule table) or if the duration of the loan went beyond what was entered into loan schedule table by Mifos.
If you want to apply principal pre-payment transaction, follow the instruction below.
1. Choose appropriate Client or Group and enter Loan account (with ‘Declining Balance’ or ‘Declining Balance-Equal Principal Installment’ interest rate type) details page. In Transaction box click on Apply Principal Pre-payment.
You will see a screen like following.
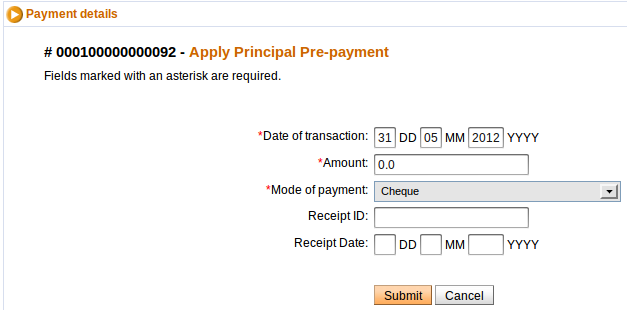
2. Type all mandatory information such as: Date of transaction, Amount and Mode of payment. You can also specify also Receipt ID and Receipt Date.
3. Click on Submit button.
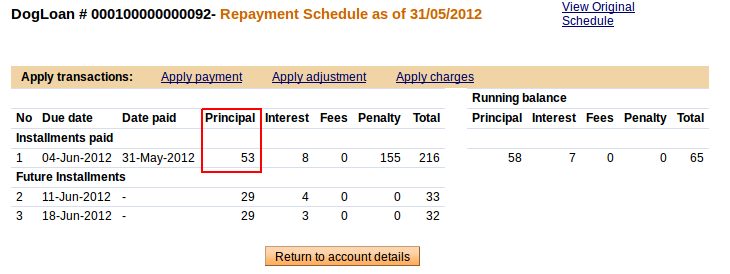
4. You can check this transaction in repayment schedule. To do it, click on View repayment schedule on Loan account details page.
You will see a screen like following:
1. Before transaction:
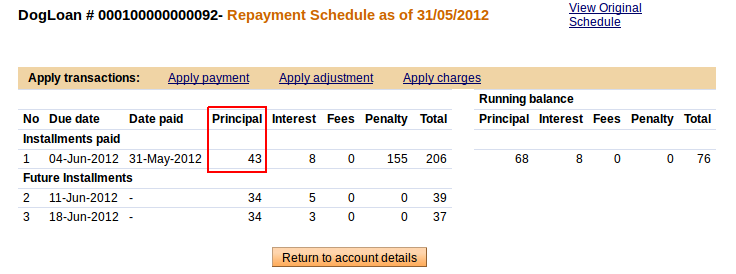
2. After transaction ( was paid):
How to repay overdue interests first
1. Open loan account with couple of due Installments.
2. Click on link 'View repayment schedule'. Number in bracket shows amount of interest which has already been paid.

3. Click on apply payment and pay for example amount=10.

Note that Interest for second installment is partly payed and Principal is still 0.

After next payment, the rest of principal can be paid.