


Installing WordPress
If you have no experience with installing software on servers and do not want to learn, then this process may not be for you. You may wish instead to visit a site which gives out free WordPress installs and create a blog there. Some examples are http://wordpress.com, http://network23.org, http://blogsport.eu.
However, if you have time, and access to a webspace, then it can be well worth installing your own version - to increase privacy and control over your set-up.
Pre-requisites
You need some basic system administrations skills and the following to install WordPress on your server (it is beyond the scope of this guide to walk you through each technology, so a high level of prior understanding is assumed):
- MySQL 5.2.4 or better (other SQL variants will require additional configuration not covered by this chapter)
- PHP 5.0 or better
- The mod_rewrite module for Apache webserver.
You will also need the following skills:
- familiarity with FTP/FTPS including setting directory permissions
- OR confidence with decompressing archives and changing file ownership in shell.
Quick Guide to Installing WordPress
Here's the quick version of the instructions, for those that are already comfortable with performing such installations. This guide is from the WordPress codex pages. More detailed instructions1 are also on the WordPress codex pages.
If you are not comfortable with renaming files, Steps 3 and 4 are optional and you can skip them as the install program will create wp-config.php file.
- Download and unzip the WordPress package if you haven't already.
- Create a database for WordPress on your web server, as well as a MySQL2 user who has all privileges for accessing and modifying it.
- Rename the wp-config-sample.php file to wp-config.php.
- Open wp-config.php in a text editor3 and fill in your database details4 as explained in Editing wp-config.php5 to generate and use your secret key password.
- Upload the WordPress files in the desired location on your web server:
- If you want to integrate WordPress into the root of your domain (e.g. http://example.com/), move or upload all contents of the unzipped WordPress directory (but excluding the directory itself) into the root directory of your web server.
- If you want to have your WordPress installation in its own subdirectory on your web site (e.g. http://example.com/blog/), create the blog directory on your server and upload WordPress to the directory via FTP.
- Run the WordPress installation script by accessing wp-admin/install.php in a web browser.
- If you installed WordPress in the root directory, you should visit: http://example.com/wp-admin/install.php
- If you installed WordPress in its own subdirectory called blog, for example, you should visit: http://example.com/blog/wp-admin/install.php
That's it! WordPress should now be installed.
Configuring WordPress
Adding Users
The initial administrator user name is "admin" (without the quotes). Type that in the user field and paste the password in the password field. If you are working on a shared computer, do not check the "Remember me" box.
The first thing that should be done upon logging in is to create a new user for yourself with a memorable password.
- Click the Users tab towards the right side of the top menu bar.
- Scroll down the page until you see the Add New User heading.
- Enter your username, your email address and your new password. Set the Role drop down menu to Administrator and click Add User.
File Permissions
After finishing the WordPress install you should change the permissions of the web root directory to something more secure. There is more information on this in the section Securing Your Installation.
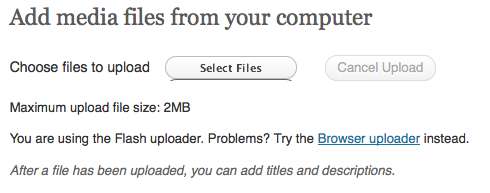
Media Upload Settings
Before getting started with adding media to your website you may need to have a look at the limits imposed by your server. The default settings of your server may mean that you have a fairly small limit set to upload files. This may be come clear when you try to upload a file that is over the Maximum upload file size.
You to change this limit you need to overwrite those configurations by adding the following into your .htaccess file. The #Change upload limits is just a comment. You can put these lines before or after any other script in you .htaccess file. Save it and upload. That's it! Hope this helps!
#Change upload limits
php_value memory_limit 34M
php_value post_max_size 33M
php_value upload_max_filesize 32M
php_value max_execution_time 600
#Change upload limits end
There other ways to change this setting that are listed in a support thread on the WordPress support site.6
Keeping Wordpress Updated
Now you have successfully installed Wordpress, you need to make sure that you keep it (and all the themes and plugins) updated. Failure to keep Wordpress updated will expose you to an increased risk that your blog or website could become compromised by a malicious attacker.
More information on this topic can be found in the section Securing Your Installation of the Advanced Admin chapter of this book.
- http://codex.wordpress.org/Installing_WordPress#Detailed_Instructions^
- http://codex.wordpress.org/Glossary#MySQL^
- http://codex.wordpress.org/Glossary#Text_editor^
- http://codex.wordpress.org/Installing_WordPress#Step_3:_Set_up_wp-config.php^
- http://codex.wordpress.org/Editing_wp-config.php^
- http://wordpress.org/support/topic/increasing-upload-max-file-size-in-phpini^