Using the Dashboard and Settings
When you have logged into your site, you should see what is called your Dashboard. This is the control panel where you can add new content to your blog, manage users and change settings.
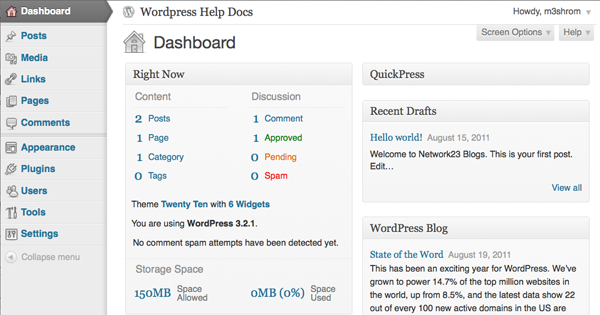
You can think of the Dashboard as the back-end of your blog, compared to the front-end which is what your readers see. The key to using WordPress is to understand your Dashboard.
Tip: Why not try opening a new tab in your Internet browser so you can see both the front-end (your publicly visible blog) and your Dashboard at the same time. This will make it easier when you are working on your blog to see the changes. When you have done this, click on the new tab to see the front-end of your blog. It will be available at the URL in the address bar of your browser.
The Side Menu of the Dashboard
Just about everything you need to do can be accessed through the side menu of the Dashboard.
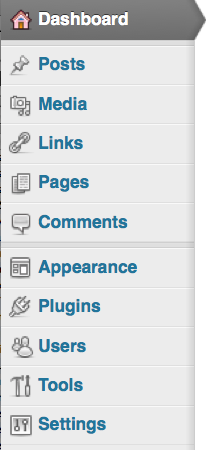
It is divided in two two sections. The first includes Posts, Media, Links, Pages and Comments. This section is for adding and managing the content of your site.
The second section lists Appearance, Plugins, Users, Tools and Settings. This is where you can alter the appearance and functionality of your site.
Clicking on any of these sections give you a page of key options and additional subsections. For example, clicking on Appearance takes you to a page where you can choose a new theme and also shows links to the options Widgets, Menus, Background and Header.
Introduction to WordPress Settings
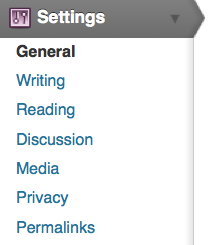
There are some settings that are important to check before you start using your site. Navigate to Settings > General and check that the settings there are correct.
Here you can change the name of your site which appears on all of your pages.
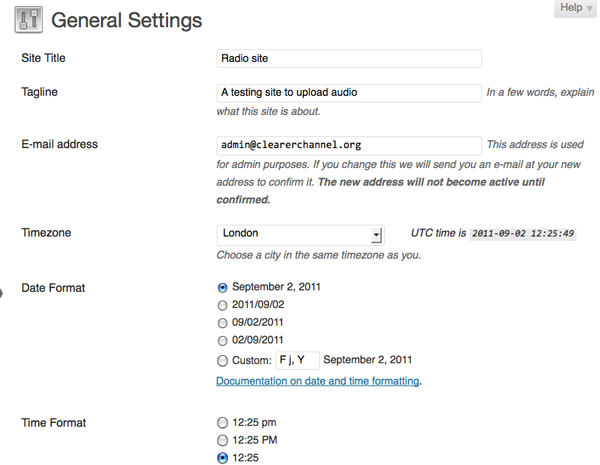
The default Tagline is often something like "Just another WordPress site", which makes your site look at bit unloved, so it is a good idea to put something more descriptive.
Do check that the time settings are what you want them to be, as the time is shown on posts. When you are happy with the settings click on Save Changes.

Writing Settings
From the Dashboard, go to Settings > Writing Settings. Here you can change the settings for how many posts appear on each page, and what the default category for each post is.
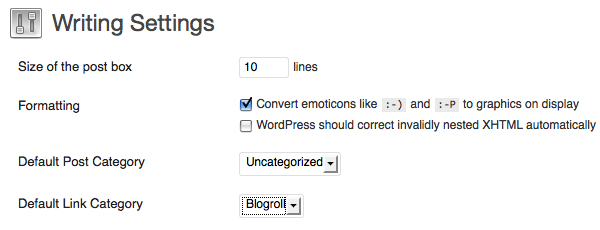
There is a section on the Writing Settings page about Remote Publishing. This may be useful if you want to publish to WordPress from your phone, iPad or other similar platforms or tools. Make sure to tick these options if you want to publish in this way.

When you are happy with the Writing Settings click on Save Changes.
Reading Settings
Next, it is good to check your Reading Settings. Here you have options to change what is displayed on your site's front page, including how many posts to show on each page and to include in your RSS feeds. 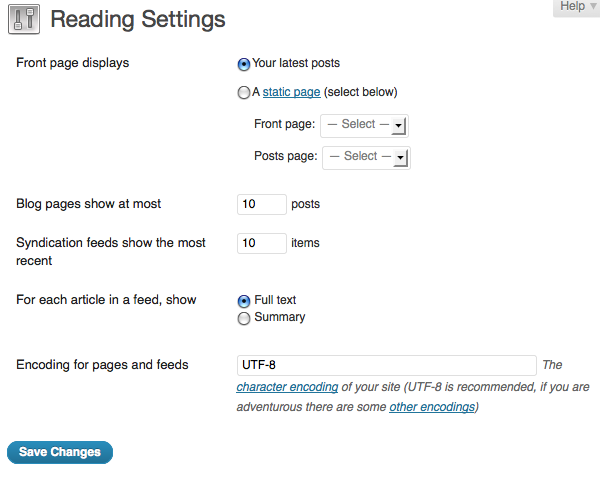
If you are using your WordPress install mostly as a static website containing information that doesn't change much, you may want to point visitors to an About page when they first visit your WordPress site.

You'll get to learn more about other areas of the Dashboard and Settings in the other chapters of this manual.


