How to attach and collect surveys
Surveys are ways for loan officers and others working in the branch to collect information about groups and clients. These surveys can include demographic information (income, family size, types of business) that might change over time, and they enable you to know your clients and serve their needs better. The process of attaching surveys is the same for centers, groups, and clients. The example used here is for a center.
Center workers can ask the survey questions directly from the computer screen, or they can print a copy of the survey and take it directly to the client. If they use a paper copy of the survey, they must enter the answers in the computer later.
To create a new survey, follow the instructions in How to create a new survey.
When you are ready to use the survey online (or to enter survey data from the printed copy), follow these instructions.
- In any Search box, type the name of a center, group, or client and click Search.
- In the list that appears, click the link for the correct center, group, or client.
- In the Center Details screen, click Attach a Survey.
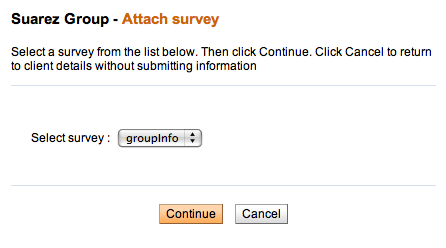
A screen like the following appears:

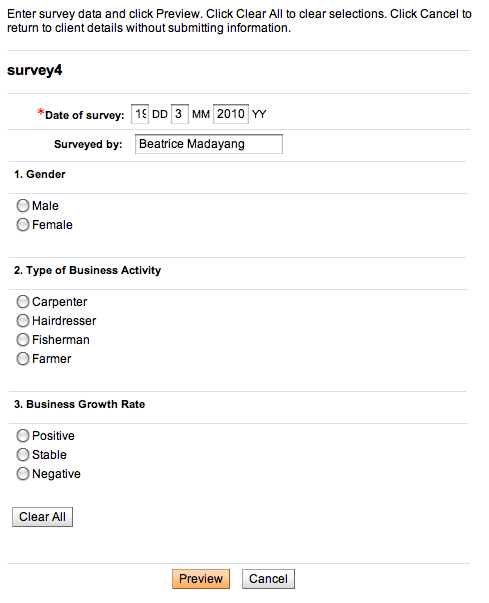
- In the Select Survey list, click the survey you want to enter data for and click Continue. (You can see only the surveys that are available for this center.) The online form of the survey might appear like this screen:

- The default survey date is today's date. If you need to change this, type the day (XX), month (XX), and year (XXXX) of the actual survey.
- In the Surveyed By box, your name appears automatically. Type over this name if someone else has asked these questions.
- Click or type a response to each question. If the question is mandatory, you may not finish the survey until the question is answered.
- If you need to change answers, click Clear All to erase all of them.
- When you have answered all questions, click Preview to review the answers.
- If you want to make changes to the answers, click the Edit button, click Clear All to erase the answers, click or type the correct answers, and click Submit.
- In the Surveys box, the name and date of the survey now appear. To see details of that survey, click the name of the survey.


