


How to import transactions
If you have appropriate permissions, and if your MFI is set up for this action, you can import transactions from another system.
Follow these instructions:
- Click Admin > Import Transactions.
A screen like the following appears:
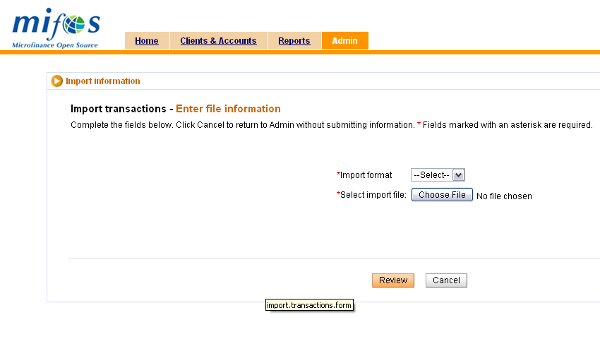
- In the Import Format list, click the format of the transaction information.
- In the Select Import File section, click Choose File to browse your files, and double-click the one you want to import.
- The filename appears on the screen.
- Click Review to review your choice. Check with your MFI for further instructions.
How to import M-PESA transactions
M-PESA is a mobile-phone based money transfer service designed to enable users to complete basic banking transactions without the need to visit a bank branch. This form of a branchless banking service would allow borrowers to conveniently receive and repay loans through mobile phones. This would enable microfinance institutions (MFIs) to offer more competitive loan rates to their users, as there is a reduced cost of dealing in cash. The users of the service would gain through being able to track their finances more easily.
Overview of the M-PESA import plug-in
The M-PESA import plug-in is the basis for mobile money integration with Mifos. This plugin integrates with Kenya's leading mobile money platform by supporting the import of an Excel (.xls) spreadsheet into Mifos. MFIs accepting transactions via M-PESA currently download a spreadsheet with a record of each transaction from Safaricom. Safaricom is a mobile network operator in Kenya.
What the plug-in does
This plugin allows for the import and validation of these transactions via the mobile phone number of the customer. Currently the plugin supports the import of loan repayments and savings deposits into Mifos. Incoming payments are first applied towards the current amount due on any applicable loans and the remaining amount is then deposited to a savings account.
Install and Configure Plug-in
To install and configure the plug-in, refer to the documentation available here.
The M-PESA mode of loan repayment should also be added to the mifos system - as lookup option and payment type.
Add MPESA as Lookup Option
1. Click Admin> Define Lookup Options.
2. Under category Payment Modes, add MPESA. To add this option, click the edit option next to Payment Modes. A textbox to add a new payment mode is displayed. Add MPESA and click Submit. *IMPORTANT: This must be MPESA, not M-PESA or any other variant.
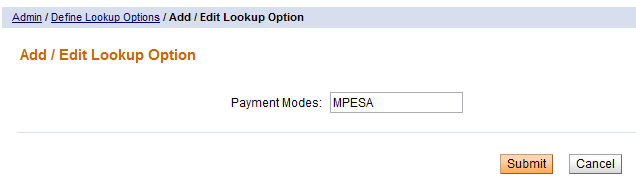
3. After clicking Submit, check and ensure that MPESA has been added to the list displayed under payment modes.

Add M-PESA as Payment Type
Before adding M-PESA as an accepted payment type, make sure that it has already been added as a Lookup Option.
1. Click Admin>Define Accepted Payment Types. The following categories and fields will be displayed.
- Clients/ Groups/ Centers
-
- Fees
- Loans
-
- Disbursements
- Repayments
- Savings
-
- Withdrawals
- Deposits
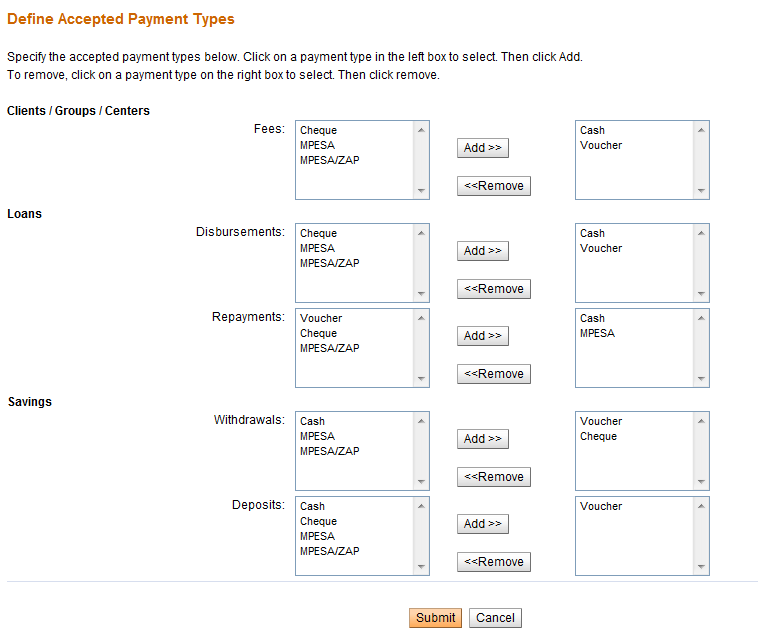
2. Since M-PESA has already been added as a lookup option, it will be displayed on the left box under each category. Add M-PESA as an accepted payment type. To do this, click on M-PESA on the left box to select. Then click Add.
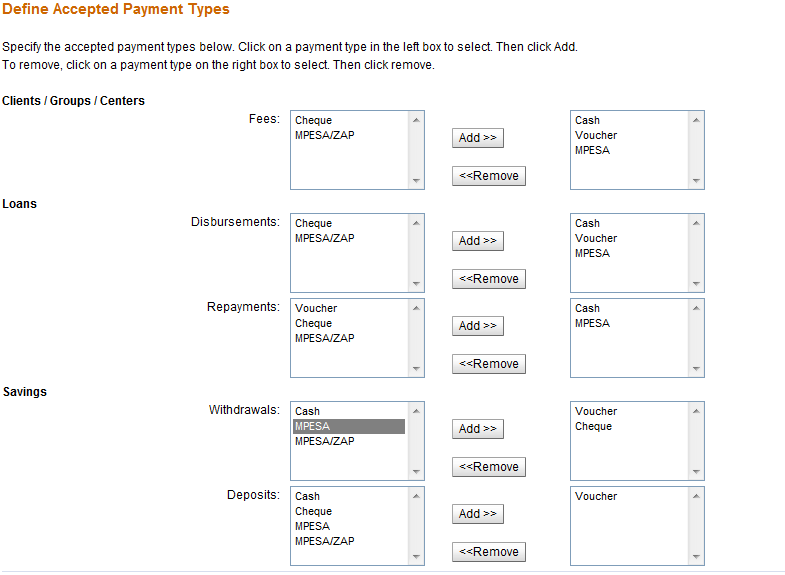
3. Click Submit.
Take note of the following points while configuring the plug-in:
- Make sure the M-PESA plugin has been installed in the proper directory. The plugin (a jar file) has to be copied into $MIFOS_CONF/plugins folder (detailed in the install instructions available here).
- The file generated by Safaricom cannot be used as in by Mifos. Only Excel formats will be accepted by the system. To convert the Safaricom file to Excel, open the file in Excel and save it with .xls extension.
How to define order to apply transactions
In the properties file called ke.co.safaricom.MPesaXlsImporter.ImportTransactionOrder specify the default order of transactions. This can be done by specifying all required product names separated by comma (,). Accounts to which repayments and deposits are made will be applied to in the order specified here when importing a row.
While specifying the order of transactions, make sure that there is only one savings account at the end.
If the default order of transactions is not specified in the properties file, you will have to manually specify which the short name of the loan product in which to apply payments to in the Transaction Party Details column in the spreadsheet being imported.
Otherwise, during import you will receive an error noting "Missing required data".
You can confirm whether or not the order to apply transactions has been defined by going to Admin - View organization settings. Underneath the miscellaneous heading, you should see MPESA transaction order and a status of DEFINED or NOT DEFINED.
How to import M-PESA transaction file
To import the M-PESA transaction file into Mifos, click Admin>Manage Imports> Import Transactions. From the Import format dropdown box, select M-PESA and then choose the Excel file from Safaricom which needs to be imported into the Mifos system.
![]()
Following are the columns in the imported m-PESA file.
Receipt (required) - Receipt ID is proof of payment and a unique MPESA identifier that can be cross-referenced with clients phone receipt. This must be imported into Mifos since needed as reference in the Collection Sheet.
Date (required) - Payment Date. The payment date cannot be before the present date. However, if backdated transactions have been enabled in Mifos, then the date can be before the present date up until the previous meeting date.
Details - Contains information payment received from phone number, telephone number, MFI account number. The value of this column is ignored.
Status (required) - One of four statuses displayed - Completed, Attempted, Cancelled, Declined. This value must be Completed or else it is ignored.
Withdrawn - Amount paid from MFI. This is the amount of the payment out from the MFI in the form of a disbursal.
Paid In - Transaction amount paid to MFI. This is the amount of the repayment/deposit from the customer to the MFI.
Balance - Balance of MFI. This value is ignored during import.
Balance confirmed - This value is ignored during import.
Transaction Type (required) - This field determines if this is a repayment or disbursal. For the M-PESA plug-in support repayments and disbursals, if this value is "Pay Utility" it will be treated as a repayment and there must be a corresponding value in the Paid In column. If the value is "Business Payment", it will be treated as a disbursal and there must be a corresponding value in the Withdrawn column. For prior versions of the plug-in that only supported repayments, all values other than "Pay Utility" will be ignored.
Other Party Info (required) - This field is required and is Safaricom generated phone number and is the phone number that is used to cross-reference the Safaricom M-PESA account with the account in Mifos. The 10 digit number in this column is compared against the Phone Number field under the Client record in Mifos.
Transaction Party Details - This field will include Mifos Product Code if there is one, and other information such as Client's Group ID, etc. A value is required here if no default order to apply transactions has been defined in the .properties configuration file. If the Mifos Product Code is different than the default order set in ke.co.safaricom.MPesaXlsImporter.ImportTransactionOrder, then this field will include the short names of product(s) applied to the client's accounts.
Logic behind payment application
If there is a product name specified after a client ID, then payment is applied to that particular product. If no product name is specified, then all transaction amounts will be applied according to the default order which was specified initially.
For example: Lets assume ke.co.safaricom.MPesaXlsImporter.ImportTransactionOrder = AL1, NL1,SP1 where AL1, NL1 and SP1 are product names. In this case, all rows that do not specify a product name after the client ID will have their transaction amount applied to in this order. Only the next payment due will be applied. In this example, if the client owes on AL1 next instalment and on NL1, and the client pays 0 then those respective amounts would be applied, and then deposited in SP1.
Repayments versus Disbursals
Repayments and Deposits will have the Transaction type of Pay Utility and a corresponding value in the Paid In column. Disbursals will have the Transaction Type of Business Payment and a corresponding value in the Withdrawn column.
How to cancel or correct errors during import
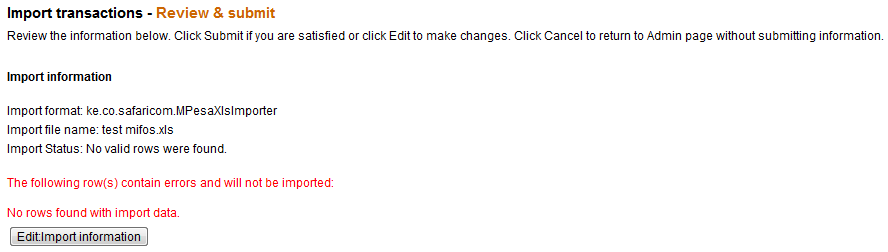
If there are errors during import, Mifos displays an appropriate error message. The screenshot below shows the error message displayed when the file is uploaded with no valid rows.
The screenshot below shows the error messages displayed when rows with import data are found and they are not properly validated. You'll notice that the total amount of transactions to be imported is listed as 0.0 because all transactions have errors. When the total amount to be imported is 0.0, you will not be allowed to submit. See below for a list of common errors and steps to resolve them.
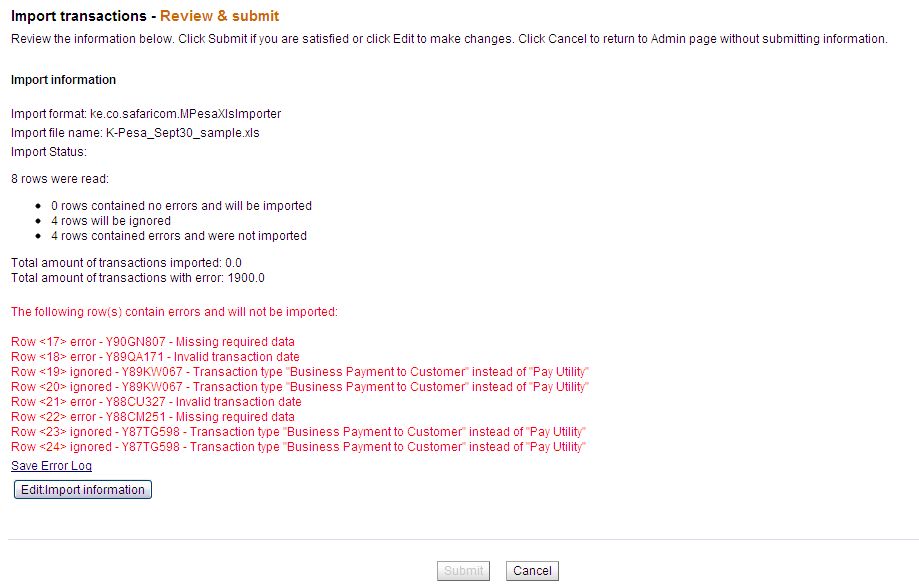
To correct the error, click the button Edit Import Information.This will direct the user back to the main page displayed below and the corrected file can be uploaded again.
![]()
How to verify that data has been imported
If there are rows that contain no errors and will successfully be imported, you will see a screen like below with the number of rows that will be imported and a summation of the total transactions to be imported.

After uploading the Excel file and clicking Submit, Mifos imports the file and displays a confirmation screen that the import was successful.
<<screenshot with confirmation message>>
Once the file has been imported, there is no option to revert the file upload.
Common error messages while importing
Row <22> error - Y88CM251 - Missing required data
This error message typically occurs when the order to apply transactions has not been defined. To resolve, either define the default order for payment transactions in your .properties configuration file or manually specify the short code of the product the transaction should apply to in the Transaction Party Details column of your import spreadsheet.
Row <18> error - Y89QA171 - Invalid transaction date
This error message typically occurs if you have the transaction date does not fall in the correct range. Transaction date cannot be prior to previous meeting or later than today (i.e. if last meeting date was Feb 18 and today is Feb 24, transaction date must be between Feb 18 and Feb 24.
Row <#> error - <Receipt ID> - Transactions with same Receipt ID have already been imported.
This error message is displayed if a transaction with that Receipt ID has already been imported and exists in Mifos. This is to prevent duplicate transactions from being imported.
Row <#> error - <Receipt ID> - Date does not begin with expected format (YYYY-MM-DD).
This error message is displayed if the date is not in the proper format of YYYY-MM-DD HH:MM:ss
Row <#> error - <Receipt ID> - Client with mobile number <mobile number> was not found.
This error message if the mobile number specified in the Other Party Info column of the import spreadsheet does not belong to a client in Mifos. This is the primary way in which Mifos references an M-PESA transaction. The first 10 digits in the Other Party Info column are recognized as a phone number and compared with the Client's Phone Number field in Mifos. If there is not a match, the message is displayed.
Row <#> error - <Receipt ID> - More than 1 client with mobile number <mobile number> was found.
Likewise, M-PESA accounts must be unique and transactions can only be applied to one customer account; if the phone number matches more than one Phone Number in Mifos, this error message will be displayed.