


How to manage and run BIRT reports
- How to upload new report templates
- How to view report templates
- How to change report templates
- How to define a new report category
- How to create a report
- How to run reports
Mifos ships with a large set of standard reports. The majority of these are written in Pentaho and part of the Mifos Business Intelligence Suite. A limited number (which are being phased out) are written in BIRT and directly embedded in the Mifos User Interface. This section applies to those.
Accessing and using these reports does not require that you install BIRT (Business Intelligence and Reporting Tools, a free, open-source application from Eclipse). However, if you want to customize the reports, you must install BIRT. You can also create your own reports using BIRT.
The three reports are as follows:
- Collection Sheet Report: Helps Loan Officers organize and prepare for their repayment collection meetings with clients and groups. See “How to enter Collection Sheet data” for information on how to collect the data that will appear in this report.
- Branch Cash Confirmation Report: Assists management and accounting in tracking daily cash inflows and outflows.
- Branch Progress Report: Helps management monitor office progress.
You generate reports from the Reports tab. To change how the reports appear on the Reports tab or to edit the appearance of the reports themselves (by editing or creating your own reports templates), click Admin > View report templates and Admin > Upload report templates.
For complete information on the current state and usage of Mifos reports, see the reports guide.
You can also create and manage BIRT-created administrative documents such a receipt forms, and you can decide when these forms are available during procedures (such as loan account applications). See How to manage administrative documents for more details.
How to upload new report templates
You can upload new report templates from the View Reports page, or you can click Admin > Upload Reports Templates. Note: All templates must be BIRT files with the .rptdesign format.
Follow these instructions:
- Click Admin > Upload Reports Template. The following screen appears:
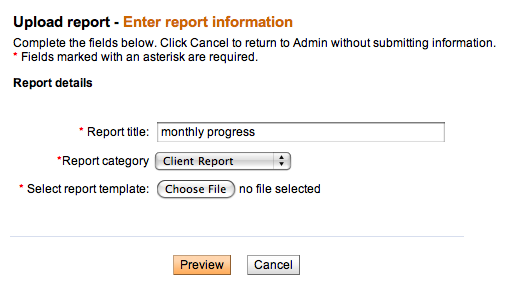
- Enter information using the descriptions in the following table:
Field
Description
Report Title
Title for the report.
Report Category
The kind of report this is (use the categories that you or your administrator set up during configuration).
Select Report Template
Click Choose File, browse your computer to find the report template file, and double-click it.
- The filename now appears in this section. If you have chosen a non-BIRT file, you will see the following error message: "Please choose a Birt report to upload>>"
- Click Preview to review your work and (if you like) render the actual report template.
- If you want to make changes, click the Edit button, make changes, and click Preview again. To change report information, see the "How to change report templates" procedure below.
- When you are satisfied with the template, click Submit.
How to view report templates
Mifos includes three standard reports that are already uploaded into BIRT, the standard reporting tool for Mifos. To see other report templates, click Admin > View Reports Templates. The list of templates might look like the following:

How to change report templates
You can change certain things about existing uploaded report templates within Mifos:
- Title
- Category
- Report Status (active or inactive: inactive reports do not appear on the Report page)
- Template
Follow these instructions:
- From the list of report templates, click the Edit button next to the report template.
A screen like the following appears:
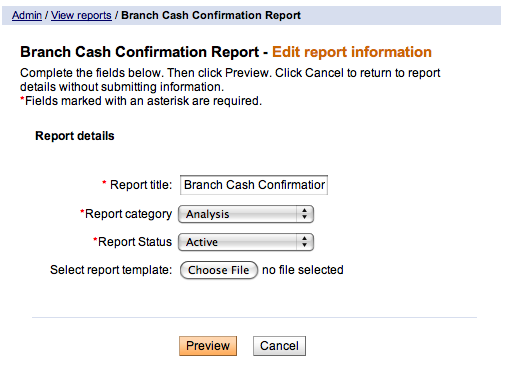
- Enter information using the descriptions in the following table:
Field Description Report Title Change the title here. Report Category Change the category here. Report Status Active or Inactive. Select Report Template Click Choose File, browse your computer for a BIRT file, and double-click it. The new filename appears. - Click Preview to review your work.
- If you want to make changes, click the Edit button, make changes, and click Preview again.
- When you are satisfied with your changes, click Submit.
How to define a new report category
You can divide the reports available in Mifos into categories. Default categories are as follows:
| Report Category |
Examples |
| Client detail | Collection Sheet report, General ledger, Membership IDs |
| Performance | Financial indicators, Program performance indicators |
| Center | Daily Activity Summary |
| Loan Product Detail | Loan Disbursement |
| Status | Loan portfolio aging |
| Analysis | Branch cash confirmation report, Branch progress report |
| Miscellaneous |
These categories can be edited.
Follow these instructions:
- Click Admin > Define New Report Category. The following screen appears:
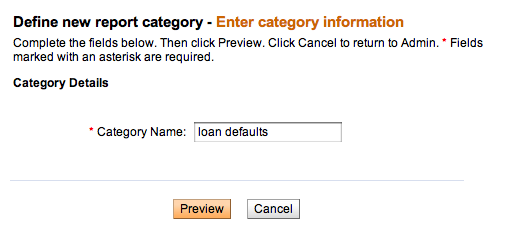
- In the Category Name box, type the name you want for this category and click Preview to review your work.
- If you want to make changes, click Edit Category Information, make changes, and click Preview again.
- When you are satisfied with the category, click Submit.
The category now appears when you click Admin > View Reports Category. It also appears when you click the Reports tab to see all available reports.
How to create a report
You can design and build your own report templates using either Java or SQL. First, however, you need to download the BIRT software. For step-by-step instructions on how to build a report template in BIRT, see http://mifos.org/documentation/reporting/building-your-own-reports-0.
How to run reports
Follow these instructions:- Click Reports and then click any of the report links.
If you clicked Branch Progress Report, for example, you might see a screen like this:

- All reports ask for different information. For this report, follow the next steps:
- In the Select Branch list, click the branch whose progress you want to see a summary of.
- In the Enter Date box, type the day (XX), month (XX), and year (XXXX) that you want the report to give information for.
- Click OK.
The report appears in PDF form. You can then download it and print it.
